I haven’t discussed this publicly before, but I just started in a new role as a Senior Frontend Developer at Justice League International. While many of you have probably heard of it, you may not be aware of what a large organization JLI is. For example, here’s a photo of just the senior management!

Source: https://www.bleedingcool.com/2017/09/06/kevin-maguire-justice-league-cover/
Like any large enterprise, our development team is pretty spread out, with teams around the globe as well as a few small teams that operate from various distant galaxies and across dimensions. As you might imagine, this can complicate the development process.
Oftentimes I am stuck waiting on backend development to be complete before being able to move forward with my frontend development. First I need the database tables to be created. Next I have to wait on the services/APIs to get built by the backend team. Finally, I’m ready to go.
Sure, I can mock up data for the frontend so that I can at least get going, but this has generally led to some significant adjustments when the actual services/APIs are done or lots of data massaging to get field names and other details in line.
So when I was assigned to build the frontend of the organization’s new employee directory, I decided to build a proof-of-concept using the RapidData connectors in Progress Kinvey to see if they could help improve this process by letting me easily switch from my dummy data to real data without changing my code. Let me walk you through it.
Setting Up My Collection
Kinvey offers a scalable cloud-based NoSQL data store (called Collections). There are a ton of uses for collections, but, in my case, they can be especially useful for mocking up apps.
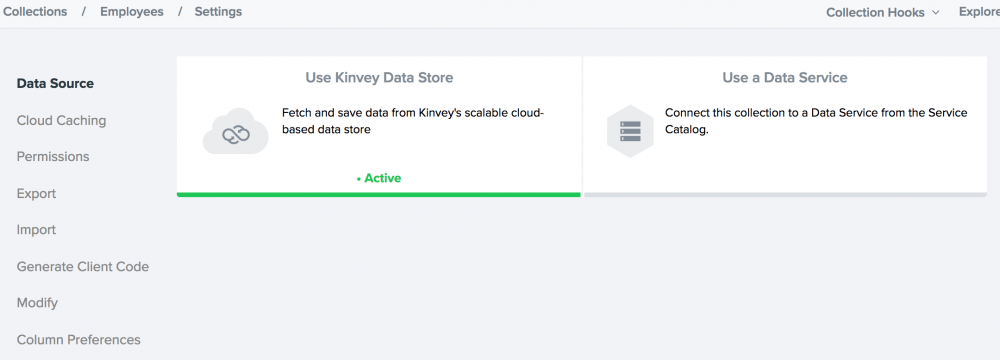
My first step was to get some JLI employees into a new Kinvey Collection.
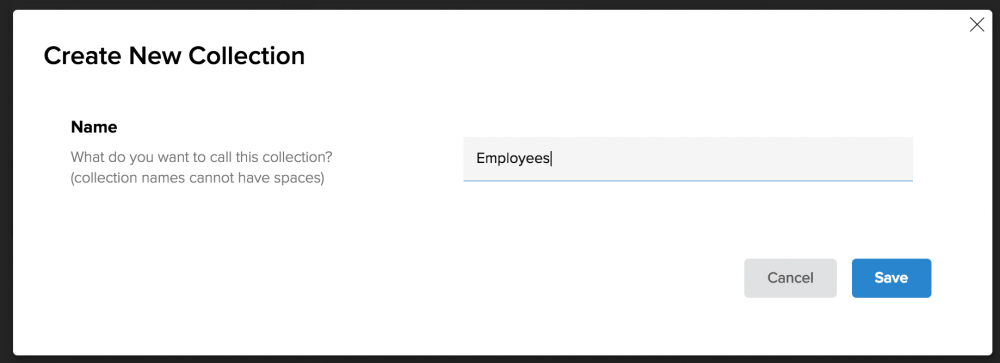
To start with, I just used the Kinvey data store as my collection’s data source.
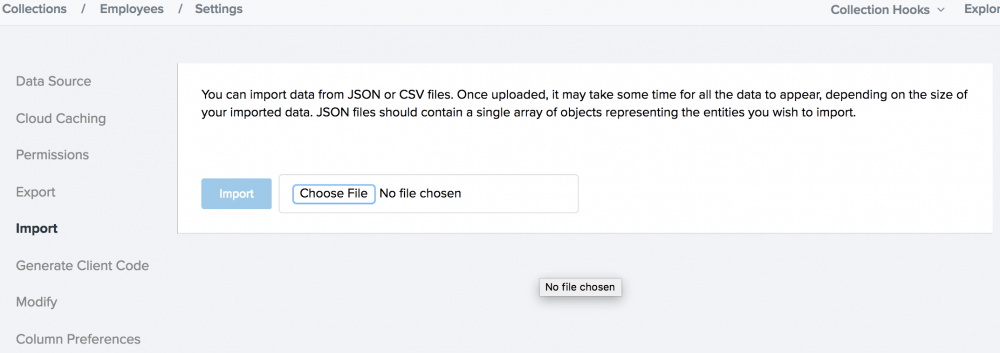
I needed to quickly populate this collection. Luckily, I had some dummy data that I could just import via JSON.
[ { "Photo": "/alias/ClarkKent.png", "Founder": 1, "Status": "Active", "Name": "Clark Kent" }, { "Photo": "/alias/BruceWayne.png", "Founder": 1, "Status": "Active", "Name": "Bruce Wayne" }, { "Photo": "/alias/DianaPrince.png", "Founder": 1, "Status": "Active", "Name": "Diana Prince" }, { "Photo": "/alias/BarryAllen.png", "Founder": 1, "Status": "Active", "Name": "Barry Allen" }, { "Photo": "/alias/HalJordan.png", "Founder": 1, "Status": "Active", "Name": "Hal Jordan" }, { "Photo": "/alias/JohnJones.png", "Founder": 1, "Status": "Active", "Name": "John Jones" }, { "Photo": "/alias/ArthurCurry.png", "Founder": 1, "Status": "Active", "Name": "Arthur Curry" }, { "Photo": "/alias/OliverQueen.png", "Founder": 0, "Status": "Active", "Name": "Oliver Queen" }, { "Photo": "/alias/RayPalmer.png", "Founder": 0, "Status": "Active", "Name": "Ray Palmer" }, { "Photo": "/alias/CarterHall.png", "Founder": 0, "Status": "Active", "Name": "Carter Hall" }, { "Photo": "/alias/DinahLaurelLance.png", "Founder": 0, "Status": "Active", "Name": "Dinah Laurel Lance" }, { "Photo": "/alias/RalphDibny.png", "Founder": 0, "Status": "Deceased", "Name": "Ralph Dibny" }, { "Photo": "/alias/JohnSmith.png", "Founder": 0, "Status": "Unknown", "Name": "John Smith" }, { "Photo": "/alias/ShieraHall.png", "Founder": 0, "Status": "Active", "Name": "Shiera Hall" }, { "Photo": "/alias/ZatannaZatara.png", "Founder": 0, "Status": "Active", "Name": "Zatanna Zatara" }, { "Photo": "/alias/RonnieRaymond.png", "Founder": 0, "Status": "Active", "Name": "Ronnie Raymond" }]
It was pretty simple to import this into my new Kinvey collection.
Alright, with the data set…it was time to get coding.

Working with Kinvey Collection
To start, I built the employee directory as a web application, though, since I used the Kinvey SDK, the code and concepts for working with Kinvey will remain similar as I build for other platforms.
The HTML for my sample app is pretty basic – consisting essentially of just a wrapper into which I will load employee data.
<div id="wrapper" style="padding: 10px;"> <p>Loading...</p></div>
Of course, I need to import the Kinvey HTML5 SDK and then initialize Kinvey with my app key and app secret.
var client = Kinvey.init({ appKey: 'kid_rJf4EsJ8f', appSecret: 'cf8e49769b83466db5b34f6ce1a83b77'});
To output the employees, I used template literals.
const employeeTemplate = templater`<div class="teamMate"> <img src="images/${'Photo'}" alt="${'Name'}"> <div class="details"> <h2>${'Name'}</h2> <p>Founder: ${'Founder'}<br>Status: ${'Status'}</p> </div></div>`;
The code to convert this template into the final HTML (i.e. fill in the placeholders with actual data) is a slightly modified version of an example from CSS Tricks (P.S. Zatanna is a huge CSS Tricks fan).
function templater(strings, ...keys) { return function(data) { let temp = strings.slice(), thisItem = ''; keys.forEach((key, i) => { // tweaked this to display the boolean as yes/no rather than 1/0 thisItem = data[key]; if (thisItem === 1) { thisItem = 'Yes'; } else if (thisItem === 0) { thisItem = 'No'; } temp[i] = temp[i] + thisItem; }); return temp.join(''); }};
Finally, here’s the code to get the data from Kinvey, populate the template and display it. I’ll walk through it in a moment.
var promise = Kinvey.User.logout().then(function () { console.log('logged out'); var user = new Kinvey.User(); var promise = user.login({ username: 'webapp', password: 'password' }) .then(function(user) { console.log('logged in'); getData(); }) .catch(function(error) { console.log(error); });}).catch(function(error) { console.log(error);});function getData() { var employees_ds = Kinvey.DataStore.collection('Employees'), query = new Kinvey.Query(), stream; query.descending('Founder'); query.ascending('Name'); stream = employees_ds.find(query); stream.subscribe( function onNext(employees) { console.log("data retrieved"); var wrapper = document.getElementById('wrapper'); wrapper.innerHTML = ''; employees.forEach(function(employee) { wrapper.innerHTML += employeeTemplate(employee); }); }, function onError(error) { console.log(error); }, function onComplete() { // do nothing } );}
There’s a few layers of nested promises going on here, so let me dissect them.
For the sake of simplicity, I start out by logging out the existing user (remember this is a POC) and then re-logging in. Rather than an implicit user, I created a service account for the web app that will be used to handle anonymous data calls. Once this gets beyond POC stage, I’ll probably utilize Kinvey’s Mobile Identity Connect to connect to JLI’s enterprise authentication system and require a login before displaying data.
Once the login is set, I query the Employees collection in Kinvey (that currently holds my dummy data), sorted by whether they are one of our founders and, secondarily, by their name. I use this data populate the template and then output the HTML to the page.
Let’s see the result.
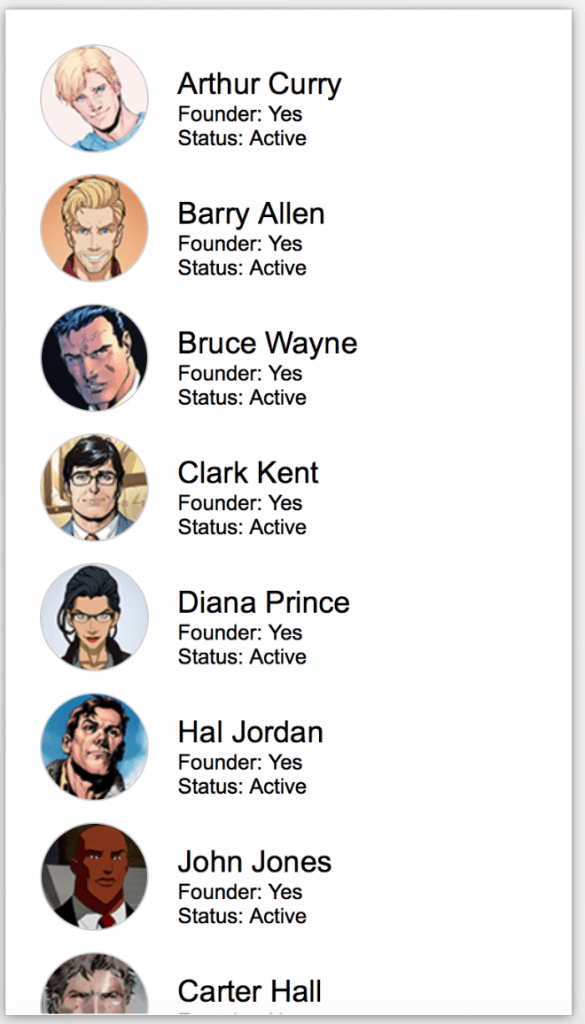
While certainly not a “complete app” yet, I wanted to move forward to see how easy it would be to swap out live data for this dummy data. Plus, our department head, Barry Allen, is a firm believer in rapid application development and moving fast.
Setting Up My RapidData Connector
The Kinvey RapidData connectors allow me to connect Kinvey to an external/third-party data source (SQL Server, Oracle, SAP, Salesforce, etc.). This feature makes it really simple to set up this connection, and even inspect the objects it contains. Lastly, I can use that connection to pass data through a collection.
The first step in connecting to a remote data connection is to be sure that Kinvey can access it through any configured firewalls. In my case, I wanted to connect to SQL Server running on Azure, which offers the ability to configure the server firewall. I just added a rule for the IP where my Kinvey app is running (you’ll have to work with Kinvey support to ensure you have the right IP configured).
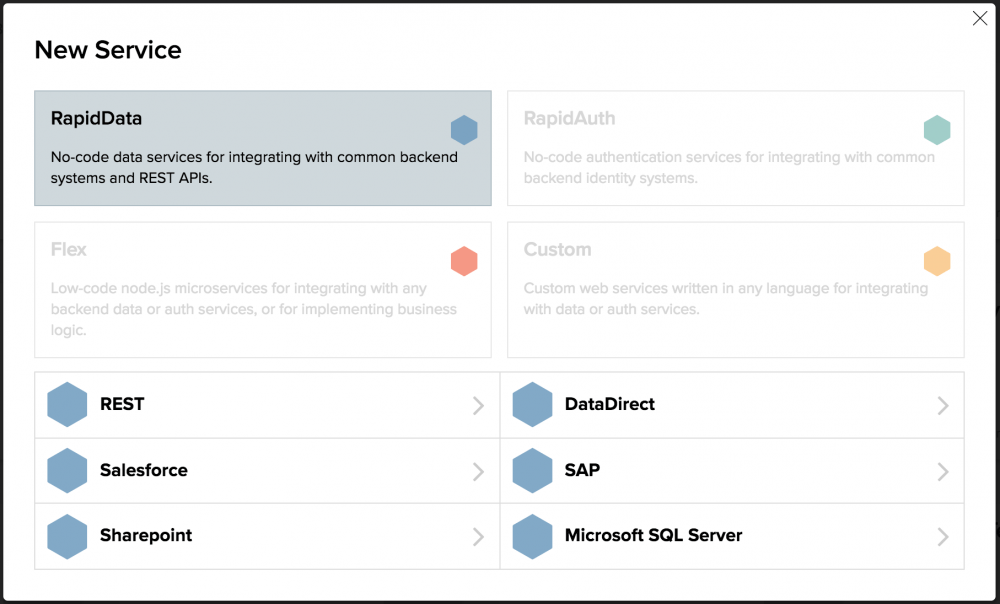
Once I had changed my firewall settings to allow Kinvey access, it was time to set up my RapidData service. This is done via the Kinvey console by choosing “Service Catalog” from the very top left of the screen and then “Add a Service.” I then chose RapidData and then Microsoft SQL Server.
Here are the settings for my SQL Server database.
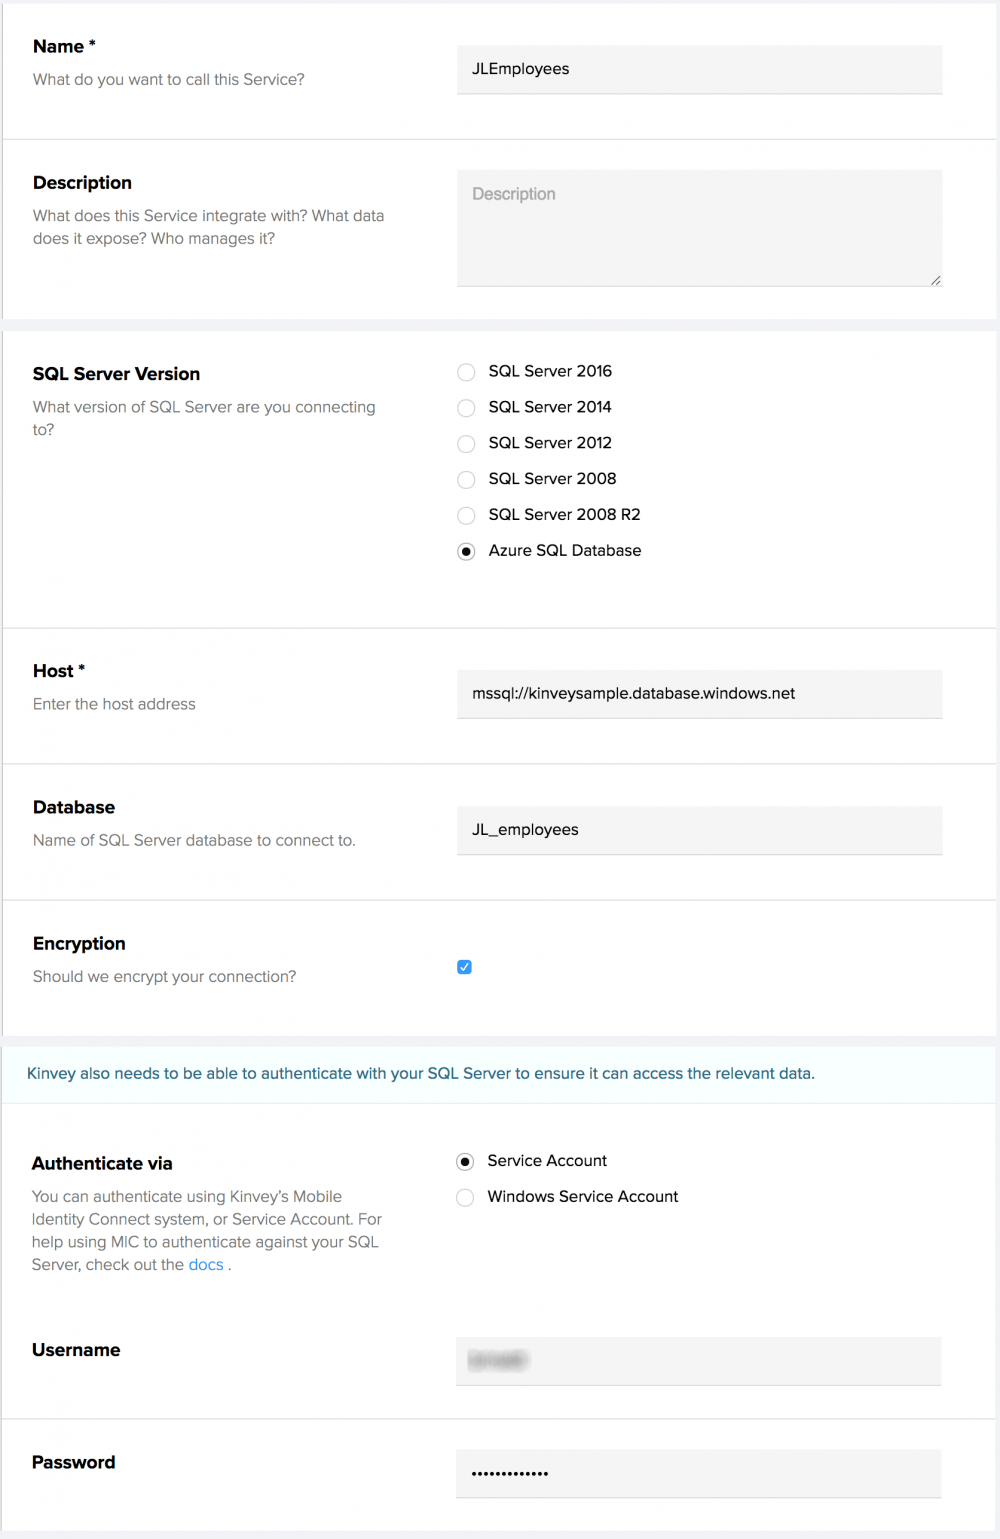
Some key things to note here are that, as mentioned earlier, I used an Azure SQL database. The host URL should start with the mssql:// protocol. The encryption option must be turned on in this case for an Azure SQL Database. Finally, the service account is the Azure SQL database username and password (not my Azure credentials).
Once my settings were saved, I was prompted to create a service object. I chose the “discover” option, which automatically finds any objects in my SQL Server database. For this app’s purposes, I chose the employees table.

At this point, Kinvey automatically found all of the fields in my table.
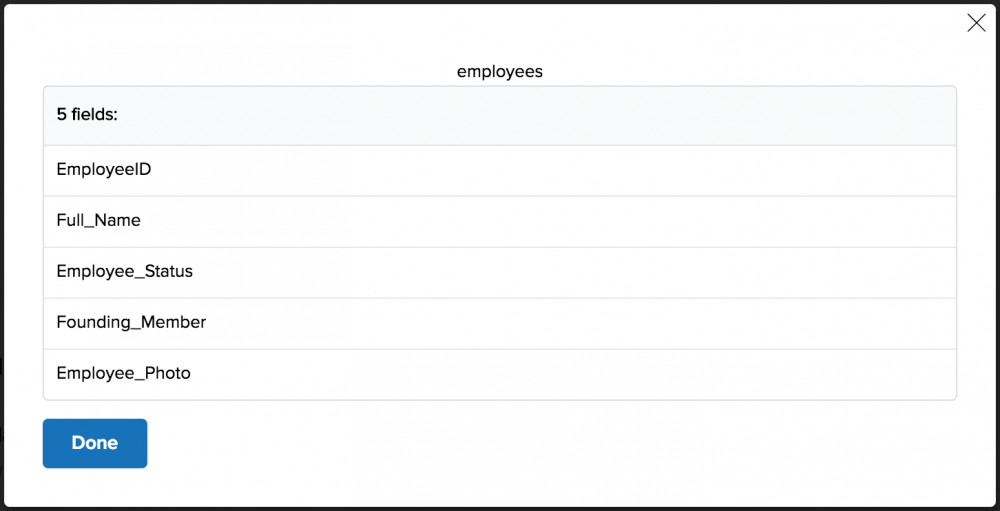
However, first I need to set up the basic settings for my service object, as shown below.
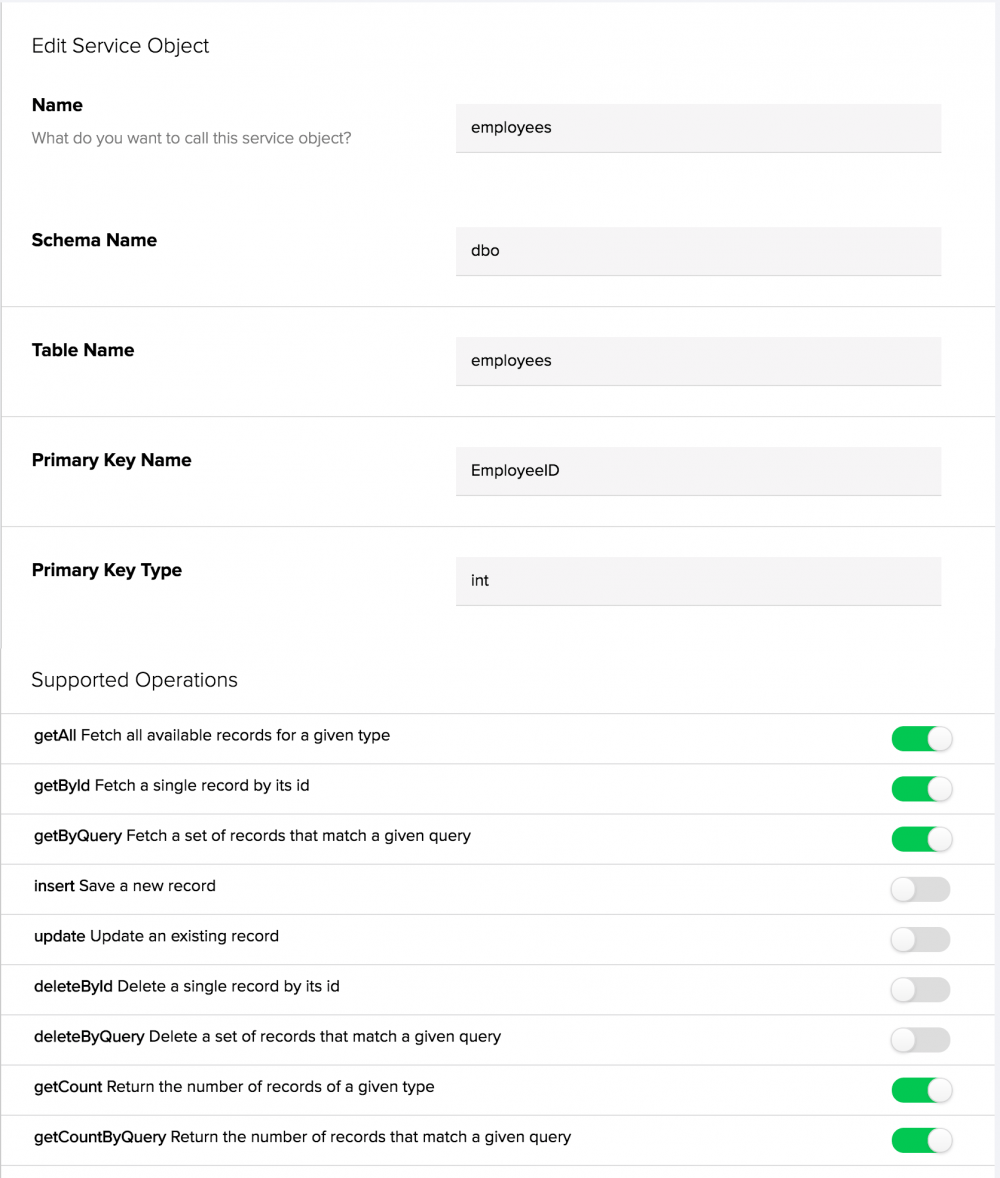
You may have noticed that the actual database field names are a bit more verbose than the names used in my collection. For example, Full_Name versus Name or Founding_Member versus Founder. Luckily, I was able to map the database field names to the names I’d already used—meaning that I don’t even need to make a single change in my code.
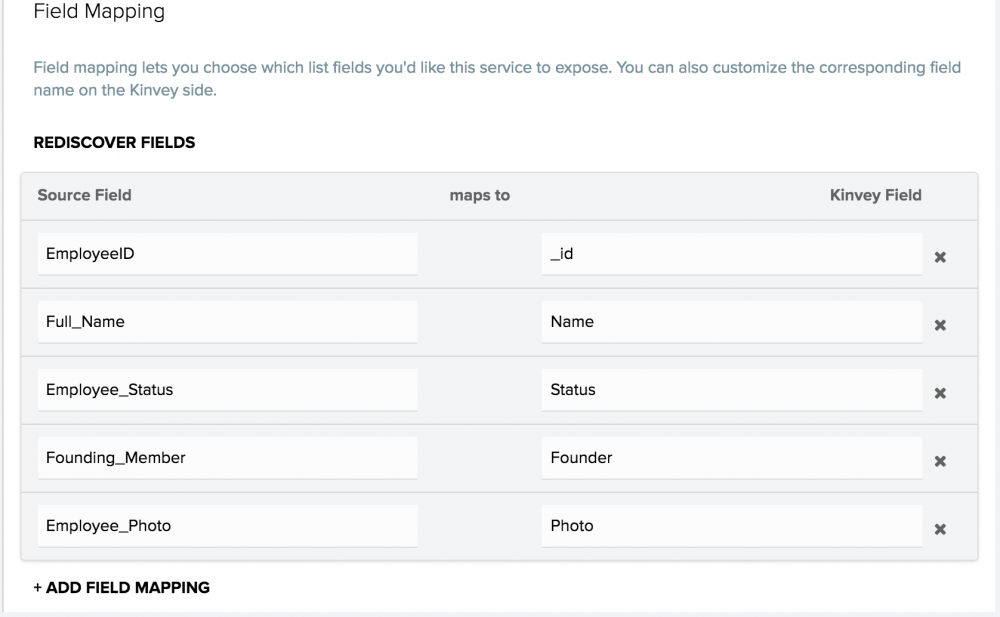
It’s worth noting that the only required mapping is the _id mapping to the table’s primary key.
Switching to Live Data
Now comes the hard part—switching from our dummy data source to our live data source. To make things easier, I have recorded the process.
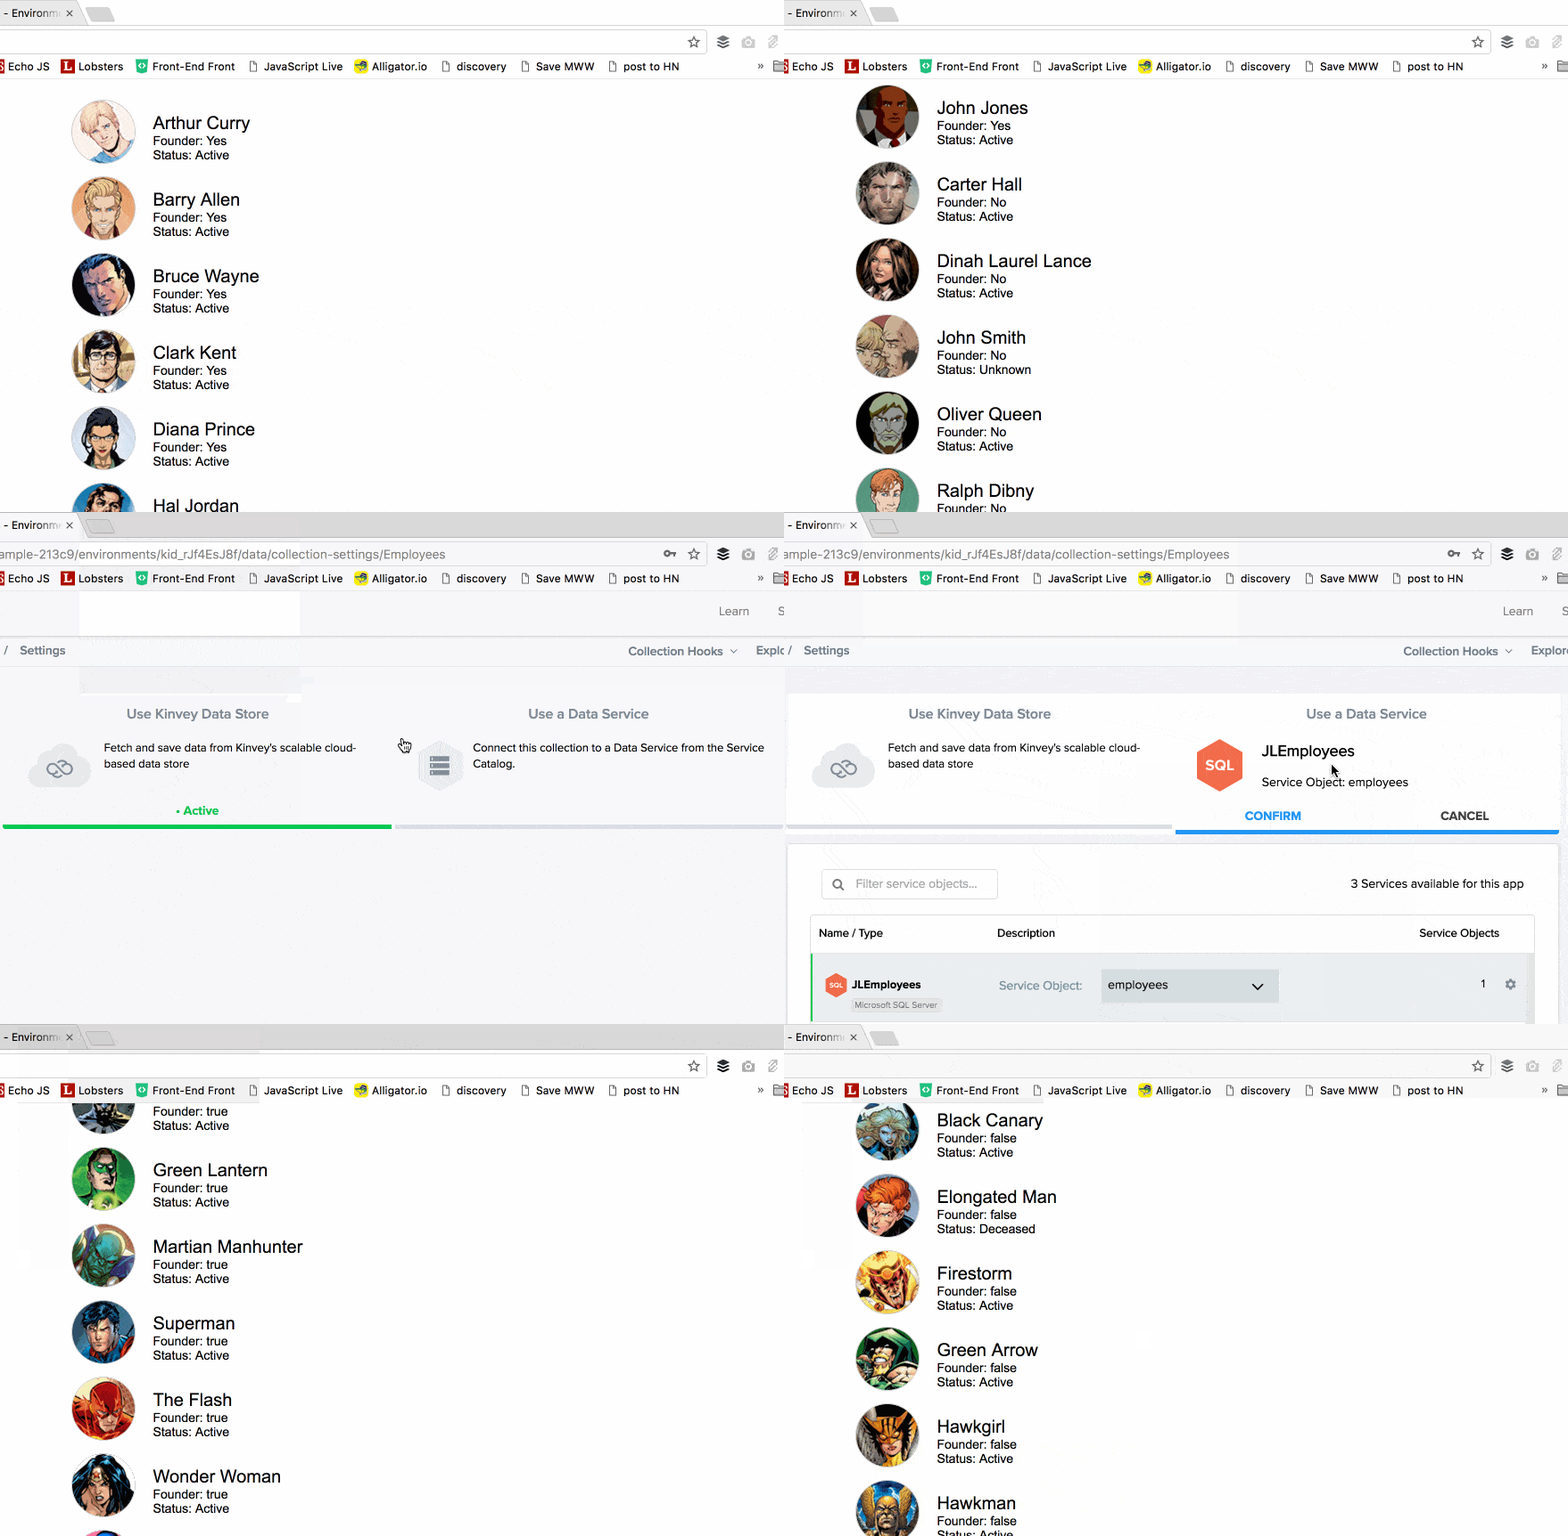
Ha! Just kidding. As Barry Allen might say, that’s as easy as a battle with Captain Boomerang!

Source: http://www.writeups.org/captain-boomerang-flash-suicide-dc-comics-harkness/
And here’s the final app using live data with no changes to the code.

Oh, and since Supes is a big fan of openness, I’ve put this simple app up on GitHub along with the sample data and SQL script to populate the real data, in case you’d like to try it yourself—just don’t tell him I called him Supes, please.


