How to Connect Salesforce to Excel
Import Salesforce Data to Excel
Salesforce is a Customer Relationship Management (CRM) solution that allows businesses to record, track, and analyze interactions with customers. Microsoft Excel, on the other hand, is a popular spreadsheet application that allows users to perform tasks such as performing calculations, creating pivot tables, organizing and visualizing data, and running macros.
You can use the Progress DataDirect for ODBC for Salesforce driver to import Salesforce data into Microsoft Excel. Importing Salesforce data into Microsoft Excel is a 3-step process:
- Determine your Excel version
- Install and configure the Progress DataDirect for
- Connect to Salesforce from Excel and import its data
Determine your Excel version
Determine whether your version of Excel is a 32-bit installation or a 64-bit installation:
- Open your workbook in Excel.
- On the File menu, click Account, and then click About Excel. The About Microsoft Excel window appears.
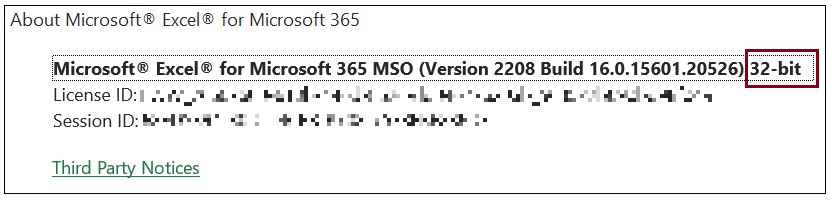
The version information is available at the top of the About Microsoft Excel window.
Install and Configure Progress DataDirect Salesforce ODBC driver
- Navigate to the page and select the driver you want to download.
- If you are using 32-bit Excel, select the Windows 32-bit driver.
- If you are using 64-bit Excel, select the Windows 64-bit driver.
- When prompted, provide your details, such as name and email address; then, click DOWNLOAD.
- Extract the driver zip file contents into a temporary directory; then, double-click the installer program:
For 32-bit drivers: PROGRESS_DATADIRECT_ODBC_8.0_WIN_32_INSTALL.exe
For 64-bit drivers: PROGRESS_DATADIRECT_ODBC_8.0_WIN_64_INSTALL.exe - Follow the prompts to complete the installation.
- Start the ODBC Administrator by selecting its icon from the Progress DataDirect for ODBC program group.
- On the ODBC Administrator, select the User DSN tab, and then configure a data source. If you want to configure:
- An existing data source, select the data source name and click Configure. The driver Setup dialog box appears.
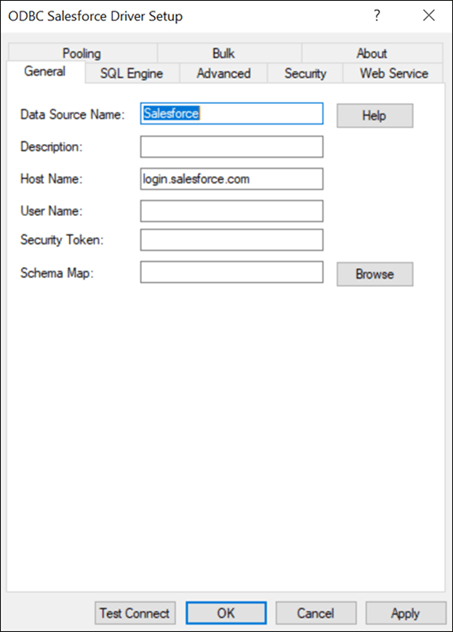
- A new data source, click Add to display a list of installed drivers. Select the Salesforce driver and click Finish. The driver Setup dialog box appears.
- Specify values for the following connection options to authenticate using the UserID/Password authentication; then, click Test Connect.
- Data Source Name
- Host Name
- User Name
- Security Token
Note: To know more about the connection options and authentication methods supported by the driver, refer to the user’s guide.
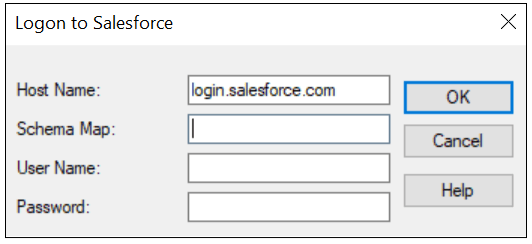
- The Logon dialog box appears. Specify the password; then, click OK.
Connect to Salesforce from Excel and import its data
- Open your workbook in Excel.
- From the Data menu, select Get Data>From Other Sources>From ODBC.
- The From ODBC dialog appears. Select your data source from the Data Source Name (DSN) drop-down list; then, click OK.
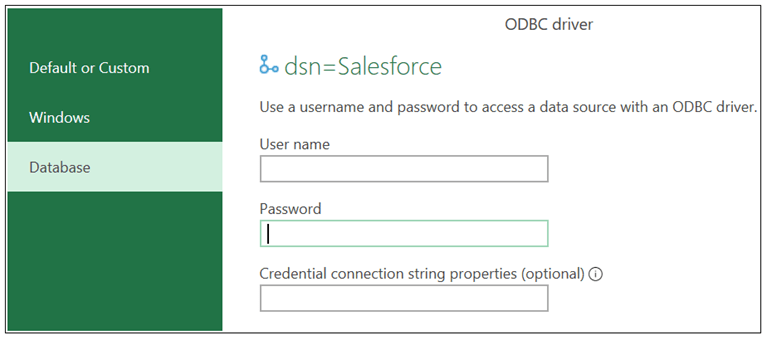
- You are prompted for logon credentials for your data source. Select the Database tab; then, provide your username and password. Optionally, specify a connection string in the provided field. Click Connect to proceed.
- The Navigator window appears.
- Load your data:
- Click Load to import your data into your worksheet. Skip to the end.
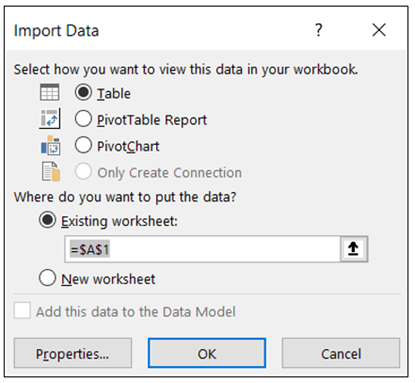
- Click Load>Load To to specify a location to import your data. Proceed to the next step.
- The Import Data window appears. Select the desired view and insertion point for the data. Click OK.
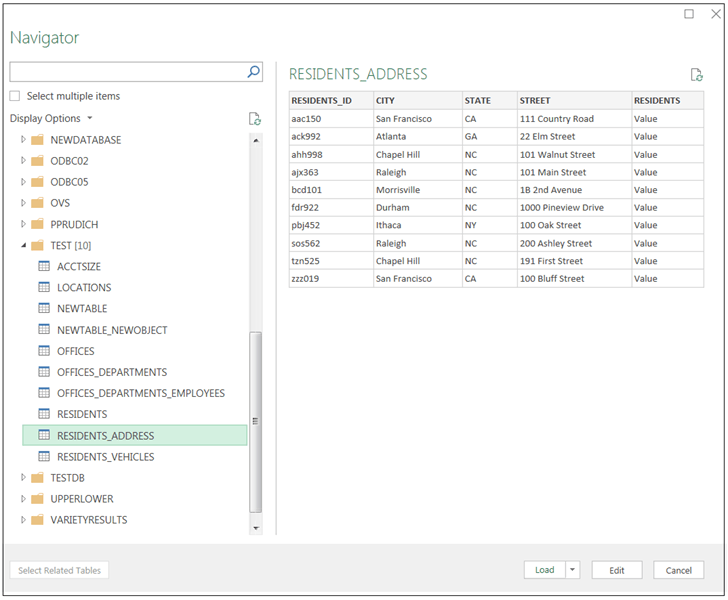
From the list, select the tables you want to access. A preview of your data appears in the pane on the right. Optionally, click Edit to modify the results using the Query Editor. Refer to the Microsoft Excel product documentation for detailed information on using the Query Editor.
Result: The data for the selected tables is imported into Excel at the insertion point
Next Steps
To start a trial of DataDirect to connect to Salesforce data please visit: https://www.progress.com/data-connectivity/salesforce and hit the Try Now button to get started.