DirectQuery Any On-premises REST API from Power BI Service
Introduction
REST APIs are commonly used to expose and consume data in enterprise environments. Although REST APIs can simplify data access, access control, and platform dependency, using Power BI to access data from REST APIs can get tricky. In many scenarios, you have to write custom code to handle authentication, pagination, and normalization, not to mention updating your code whenever the REST API changes.
Fortunately, with the Progress DataDirect Autonomous REST Connector, you can connect to any REST API from Power BI without having to write any code. This tutorial guides you through using the Autonomous REST Connector to access REST data with DirectQuery from Power BI and publishing your report to Power BI Online, which can refresh your dataset via DirectQuery.
To demonstrate this functionality, we will be connecting to an API called AlphaVantage in this tutorial. AlphaVantage provides real-time stock data through their REST service. Refer to their documentation for more information.
Before you start, you will need to request an API Key for AlphaVantage by registering your information. You can request an API Key here
.Install the Progress DataDirect Autonomous REST Connector
- Click the Try Now button.
The Autonomous REST Connector for ODBC provides ODBC connectivity to public and private REST APIs.
- Select the following:
- Connectors: Autonomous REST Connector
- Interface: ODBC
- OS: Windows 64-bit
- When prompted, provide your details, such as name and email address; then, click DOWNLOAD.
- Extract the contents of the installer zip file into a temporary directory; then, double-click the installer program:
PROGRESS_DATADIRECT_ODBC_8.0_WIN_64_INSTALL.exe - Follow the prompts to complete the installation.
Install the Power BI Connector
You can use the Autonomous REST Connector for ODBC directly with Power BI; however, to use the DirectQuery functionality, you must install the Power BI connector that is included with the Autonomous REST Connector. To install the Power BI connector:
- Navigate to the
\tools\Power BIsubdirectory of the Progress DataDirect installation directory; then, locate the installation batch fileinstall.bat. - Run the
install.batfile. The following operations are executed by running theinstall.batfile:- The Power BI connector file,
DataDirectAutoREST.pqx, is copied to the following directory.%USERPROFILE%\Documents\Power BI Desktop\Custom Connectors - The following Windows registry entry is updated.
HKEY_LOCAL_MACHINE\SOFTWARE\Policies\Microsoft\Power BI Desktop\TrustedCertificateThumbprints
- The Power BI connector file,
- Open or restart Power BI to use the connector.
Create a Model file
For the Autonomous REST Connector, you specify the endpoints to which you want to connect using a Model file. To generate a Model file:
- Open the Autonomous REST Composer by using one of the following methods:
- Select the Autonomous REST Composer (ODBC) icon from your desktop or the Windows Start menu.
- From a command line, navigate to the directory containing the autorest.jar file and execute the following command:
java -jar autorest.jar --odbcdesignBy default, the
autorest.jarfile is stored in the following directory:C:\Program Files\Progress\DataDirect\ODBC\java\lib\.
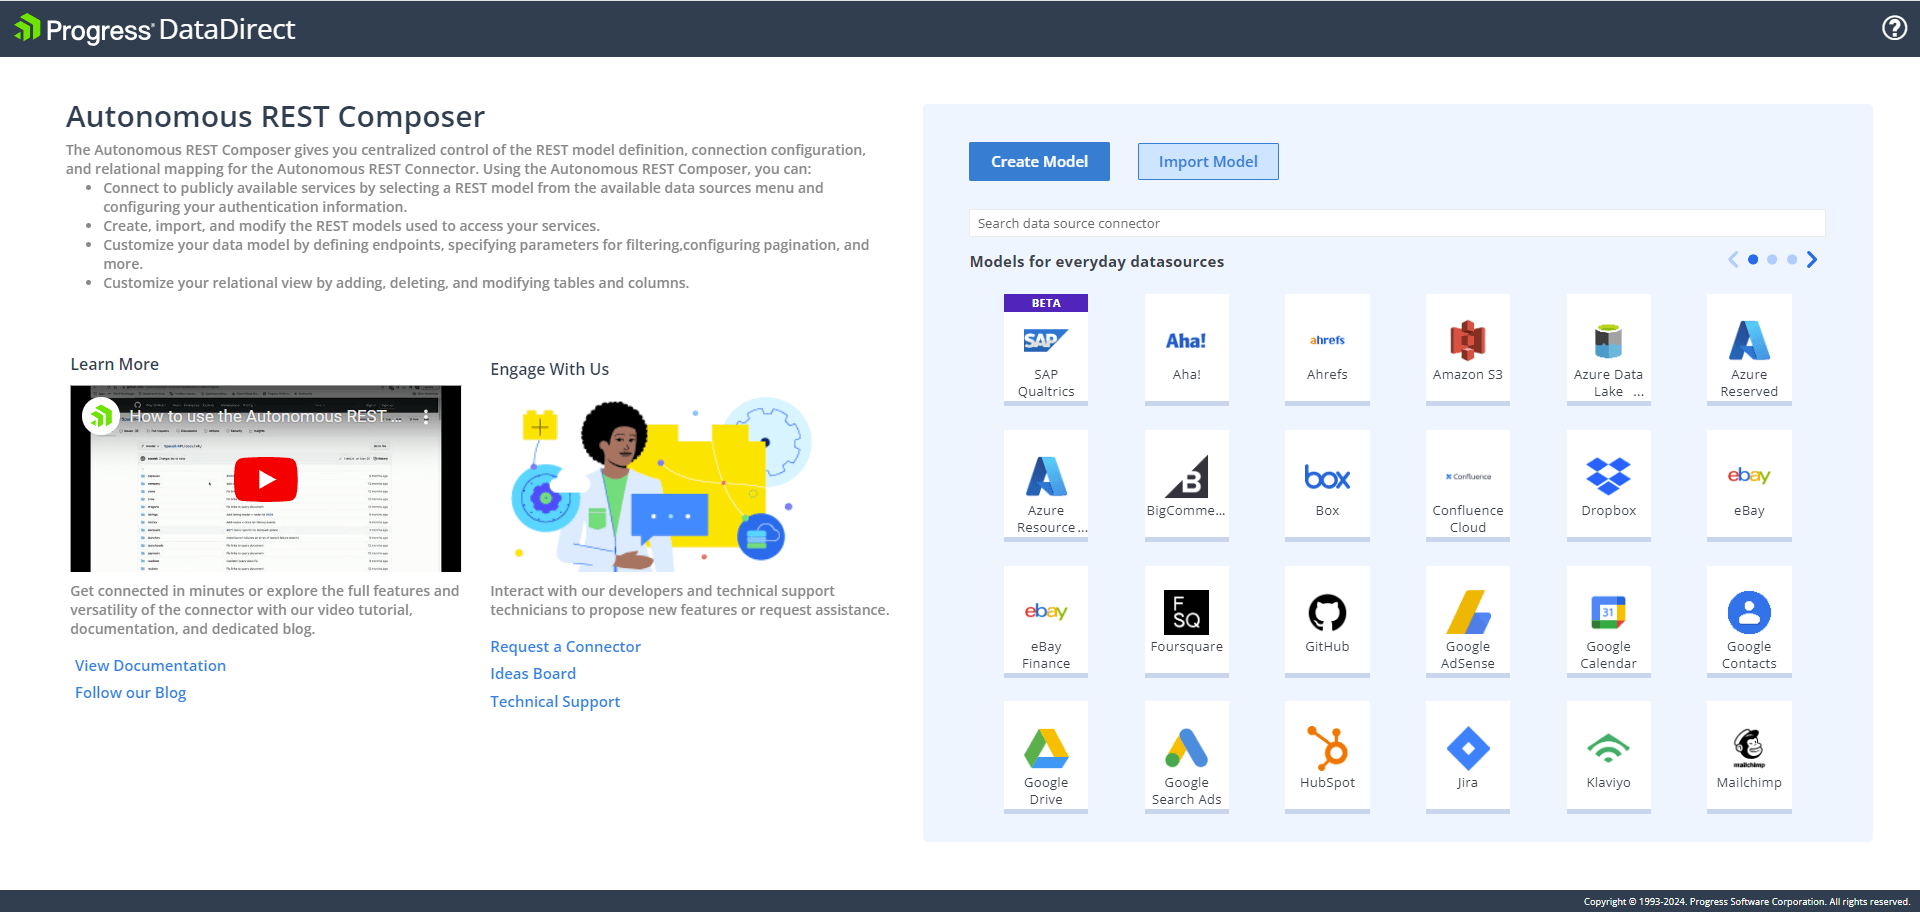
- Select Create a Model.
- The Create Model window opens.
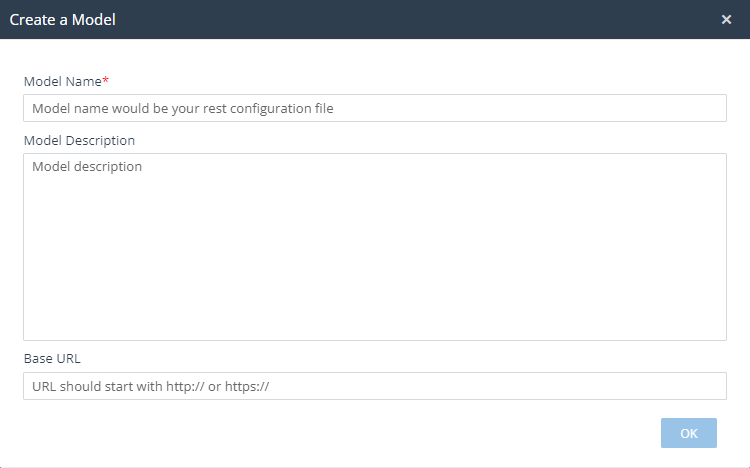
Complete the following fields to create a new project; then, click OK:
- Model Name: The name of your project and Model file to be created. For example,
Alpha Vantage. - Model Description: An optional description of your Model. Note that this description will be stored in clear text in the Model file.
- Base URL: The host name portion of your REST endpoints.
Note: The Base URL field is optional. You can also specify the base URL in the Host Name field on the Connection tab. Specifying a value in either location pre-populates the base URL in the Endpoints field(s) of the Configure Endpoints tab. For this tutorial, we will leave this field blank.
- Model Name: The name of your project and Model file to be created. For example,
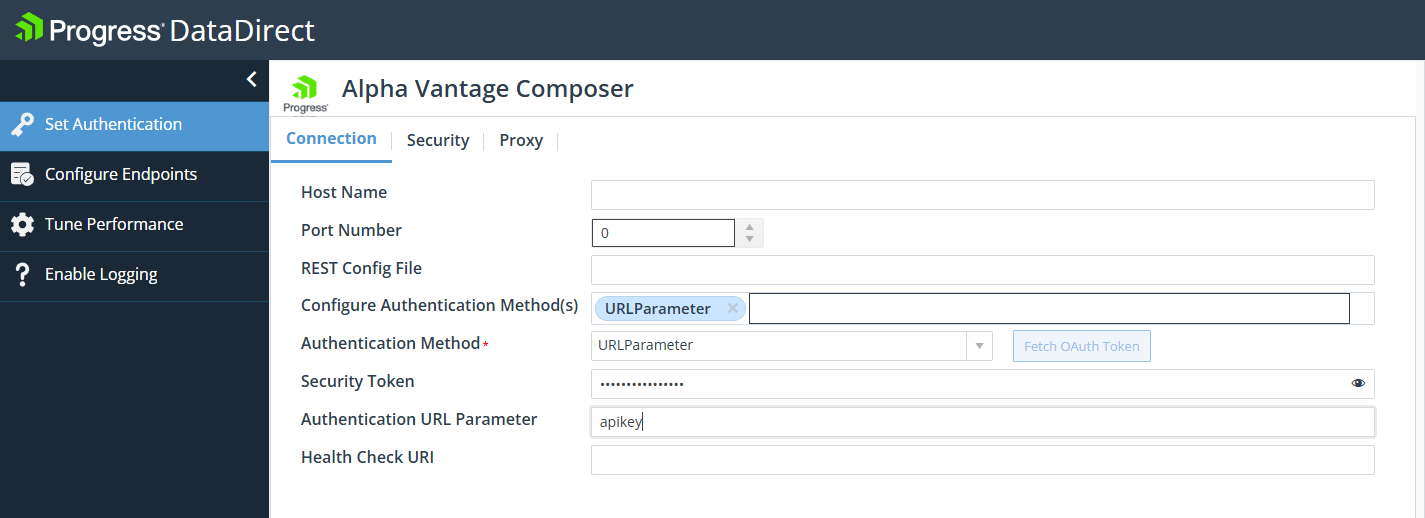
- Configure your authentication. For Alpha Vantage, provide the following:
- Configure Authentication Method(s): Select URLParameter.
- Authentication Method: Select URLParameter from the drop-down.
- Security Token: Enter your Alpha Vantage API Key. You can request an API Key here.
- Authentication URL Parameter: Specify
apikey.
- Select the Configure Endpoints tab on the side menu.

Provide the minimum required information for an endpoint to which you want to issue requests:
- From the Endpoint drop-down menu, select the type of request to issue against your endpoint. For our example, select GET.
- In the Endpoint field, type the path portion of your endpoint after the base URL. Note that the value must be valid URL-encoded syntax. For our example, enter the following endpoint:
https://www.alphavantage.co/query?function=TIME_SERIES_INTRADAY&symbol=MSFT&interval=5min&outputsize=full - In the Table Name field, type the name of the relational table to which you want the endpoint to map. For our example, provide the following table name:
STOCKINTRADAY
- Click Send. The driver sends the REST request and generates a relational view of the data based on the response. To add additional endpoints, click in the + button from the list of REST requests on the left. For testing purposes, also add the following endpoint:
Request Type Endpoint TableName GEThttps://www.alphavantage.co/query?function=TIME_SERIES_DAILY&symbol=MSFT&outputsize=fullSTOCKDAILY - Optionally, click Test Connect to test your model by executing SQL queries.
- Click Download to generate and download your Model file.
- Move your Model file to a location to be used by the driver. When configuring your connection string or data source, you will also need to specify this location using the REST Config Path connection option.
After creating your Model file, you are ready to configure and connect. You can edit your Model file later by selecting Import a Model on the welcome screen of the Autonomous REST Composer.
Configure Autonomous REST Connector for ODBC
To configure the driver using the ODBC Administrator (GUI):
- Start the ODBC Administrator from the Progress DataDirect program group. The GUI dialog allows you to configure the data source definitions in the Windows Registry or generate connection strings.
- On the ODBC Administrator, select the User DSN tab, and then click Add to display a list of installed drivers. Select DataDirect 8.0 Autonomous REST Connector and click Finish.
- The Configuration Manager appears in your default browser. On the Connection tab, specify values for the following fields:
- Data Source Name: Specify a name for the data source you are creating. For example,
StocksAlphaVantage. - REST Config File: Specify the name and location of the Model file you created in "Create a Model file." For example,
C:\path-to-file\Alpha Vantage.rest. - Authentication Method: Select 14 - URLParameter.
- Security Token: Specify your Alpha Vantage API Key. You can request an API Key here.
- Authentication URL Parameter: Specify
apikey.

- Data Source Name: Specify a name for the data source you are creating. For example,
- Optionally, Click Test Connect to connect to the AlphaVantage. The Test Connect window opens. Execute queries in the Test Query field. For example:
SELECT * StockIntraday - Click Save.
Now that you have created an ODBC datasource, you are ready to connect using Power BI.
Using Power BI DirectQuery to build reports for data returned from a REST API
- Open Power BI.
- Select Get Data > Other; then, select Progress DataDirect AutoREST and click Connect.
Note: If you don’t see the connector, select to File > Options and Settings > Security. Under Data Extensions, select Choose Allow any extension to load without validation or warning. Restart Power BI for the changes to take effect.

- In the Progress DataDirect AutoREST window, provide values for the following; then, click OK.
- DSN Name: Specify the value of your ODBC data source name. For example,
StocksAlphaVantage. - Data Connectivity mode: Select the DirectQuery radial.

- DSN Name: Specify the value of your ODBC data source name. For example,
- An authentication window will open prompting you for your User name and password. Select Anonymous; then, click Connect. Authentication information is stored in the data source we created in ODBC Administrator, and we do not need to supply this information again.
- In the Navigator window, you can view your REST API data represented as tables. Click on TimeSeries5MIN or TIMESERIESDAILY tables to preview stock data.

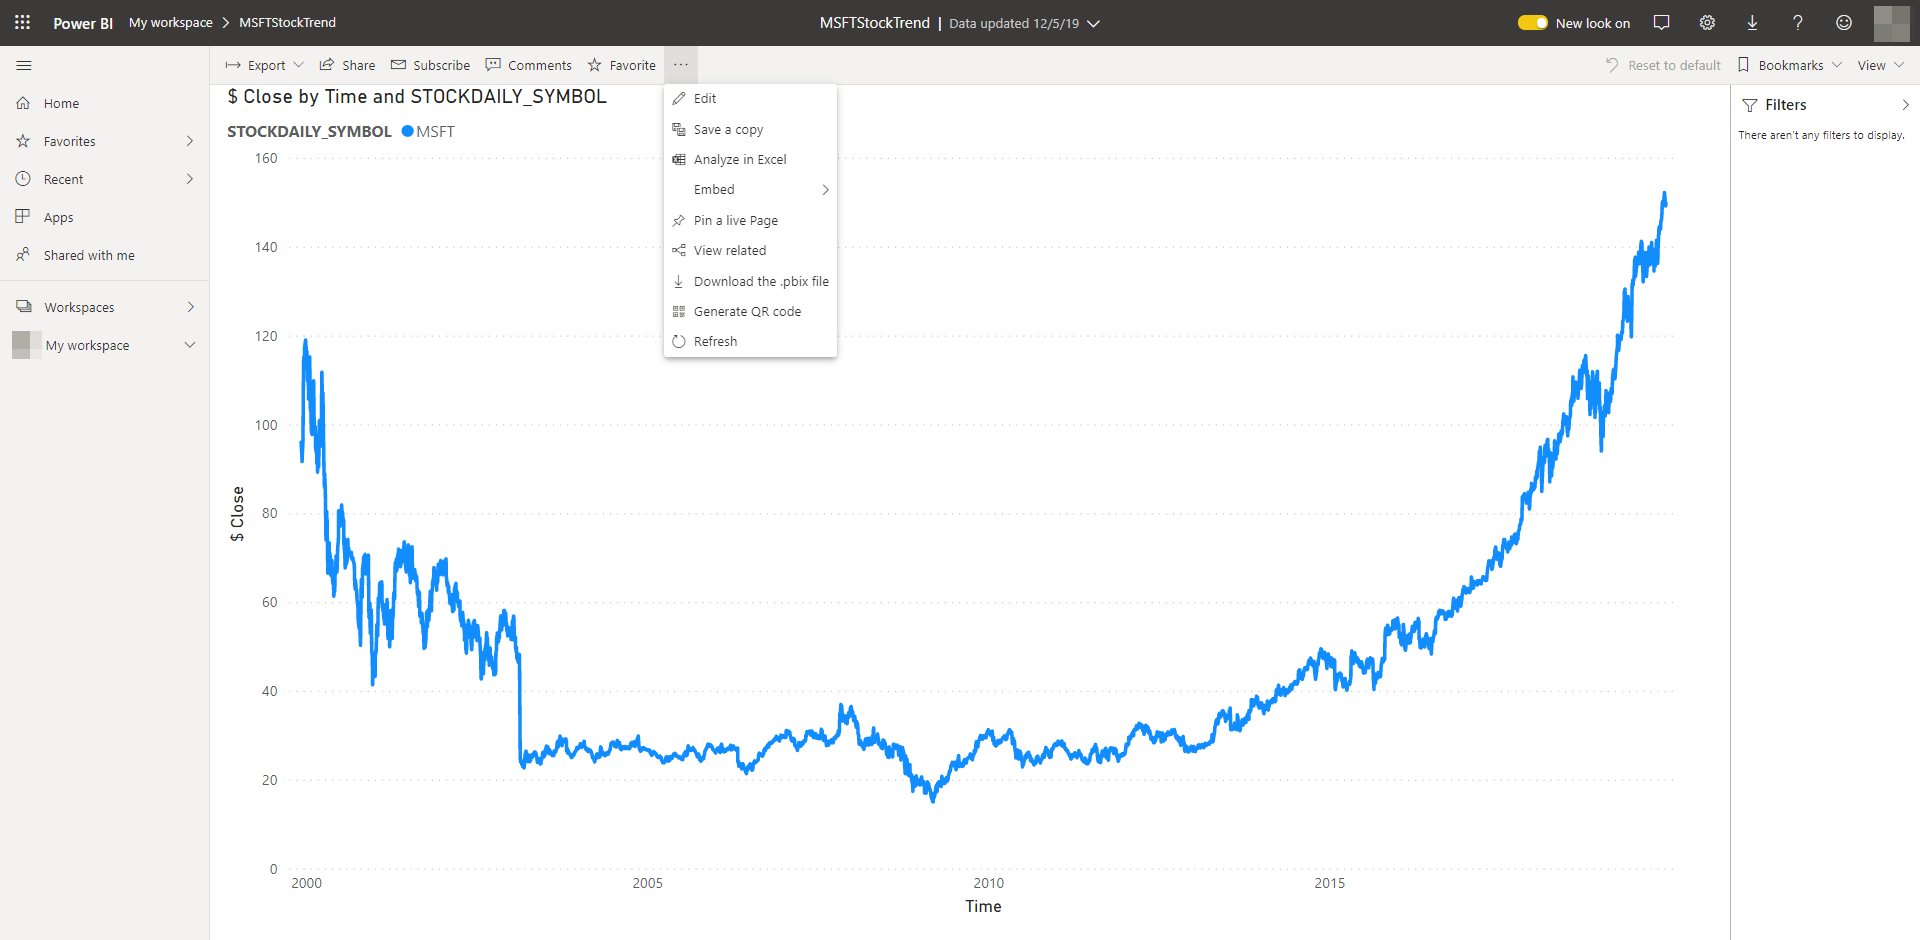
- Select table that you want to use in your reports and click Load. In your Power BI dashboard, create your Report using the DirectQuery connection to your REST API.

- To allow others to access your reports, click save and publish your report to Power BI Online Service. Click the Publish icon.
- Select the destination to which you want to publish from the list; then, click Select. In our example, we chose My workspace.

Refresh your online reports using DirectQuery via Data Gateway
Once you have published your reports online for sharing, you will also want to refresh the reports with latest dataset to keep the information up to date. But the source of your data (REST API) is accessible from your on-premises environments only. To enable refreshing data from on-premises databases and REST APIs, you need to install the on-premises data gateway from Microsoft on the machine where you configured the ODBC Connector.
- Download Data GateWay from Power BI Service. You should find the download option as shown below.

- Install Data Gateway and log in to your Microsoft account during the setup process. Make sure you use the same account you have used to publish the report online from Power BI Desktop.
- Navigate to
C:\Users\{username}\Documents\Power BI Desktop\Custom Connectors and open the properties of Custom Connectors.Note that this is the same directory where you copied the connector in "". - Select Security Tab > Advanced > Add > Select a New Principal to add the Service Account NT SERVICE\PBIEgwService to access the Custom Connectors folder. The Data Gateway uses this service account to run the services; therefore, you need to verify that this service account has access to Custom Connectors folder.
- Change the location of the machine name and add
NT SERVICE\PBIEgwService. Click on Check Names to validate the service account. Then click on OK.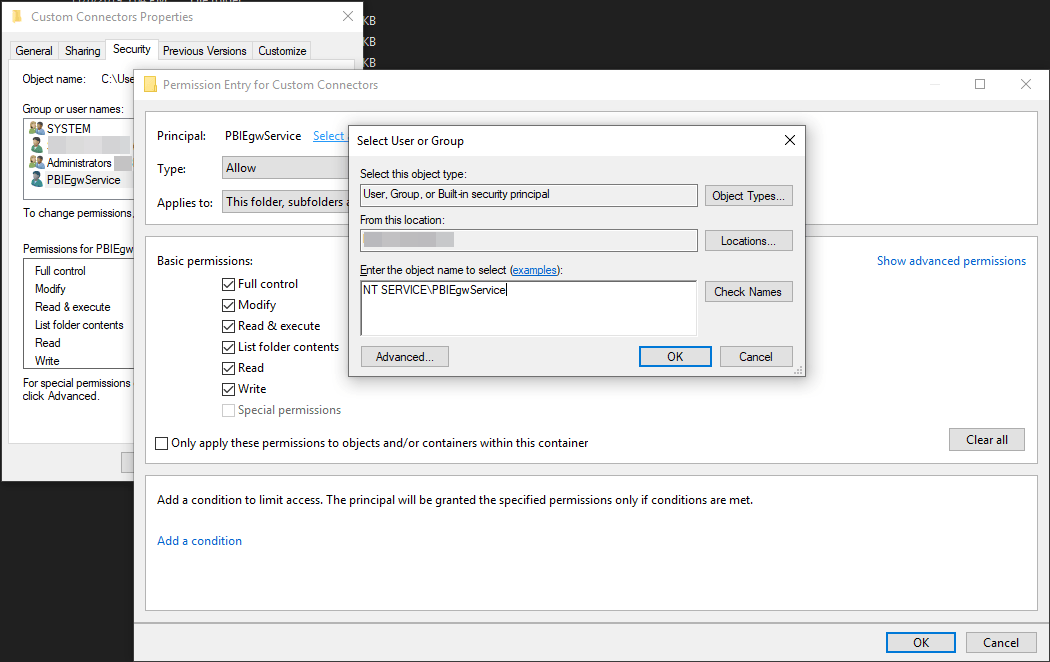
- Save the security permissions and make sure
NT SERVICE\PBIEgwServicehas access to the Custom Connectors folder before you leave.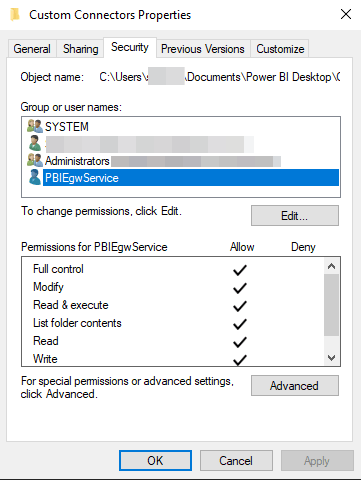
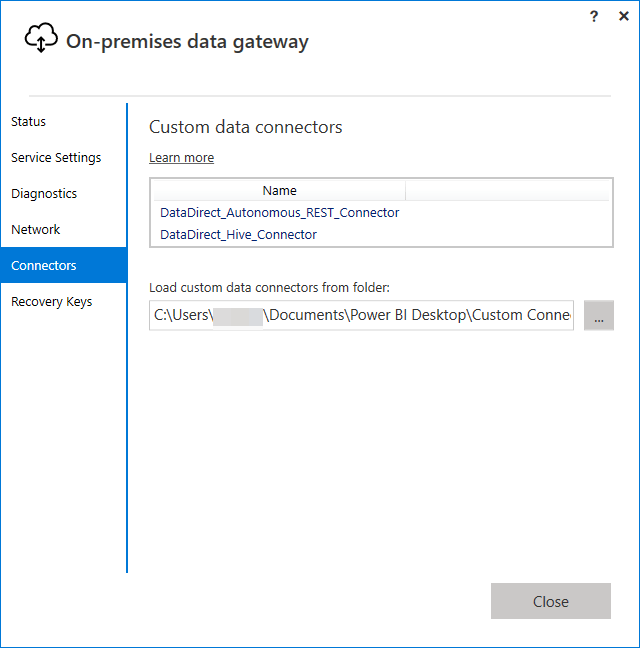
- Open On-premises Data gateway. Navigate to the Connectors tab and replace the path with the following:
C:\Users\{username}\Documents\Power BI Desktop\Custom ConnectorsNote that this is the same Custom Connectors folder we have added our connector to and made sure there is access to the service account NT SERVICE\PBIEgwService.

- Click on Apply and you should now see all the connectors in the folder displayed in the Data Gateway.
- Select Power BI Service > Settings > Manage Gateways and you should see the gateway you just installed. Under Gateway Cluster Settings, check Allow User’s custom data connectors to refresh through this gateway cluster. Click Apply to save the settings.

- Go to the Settings > Data Sets tab and you should see the dataset you published to Power BI Online in the previous section. Under Gateway connection, you should see a “Not configured Properly” error. Click on Actions ; then, click on Manually add to gateway.

- This should take you to Gateway Settings to Add a New Data Source under the gateway. In the DSN Name field, enter the name of the ODBC DSN you created on your machine; then, click Add. This validates the connection and, if it’s successful, the data source gets created.

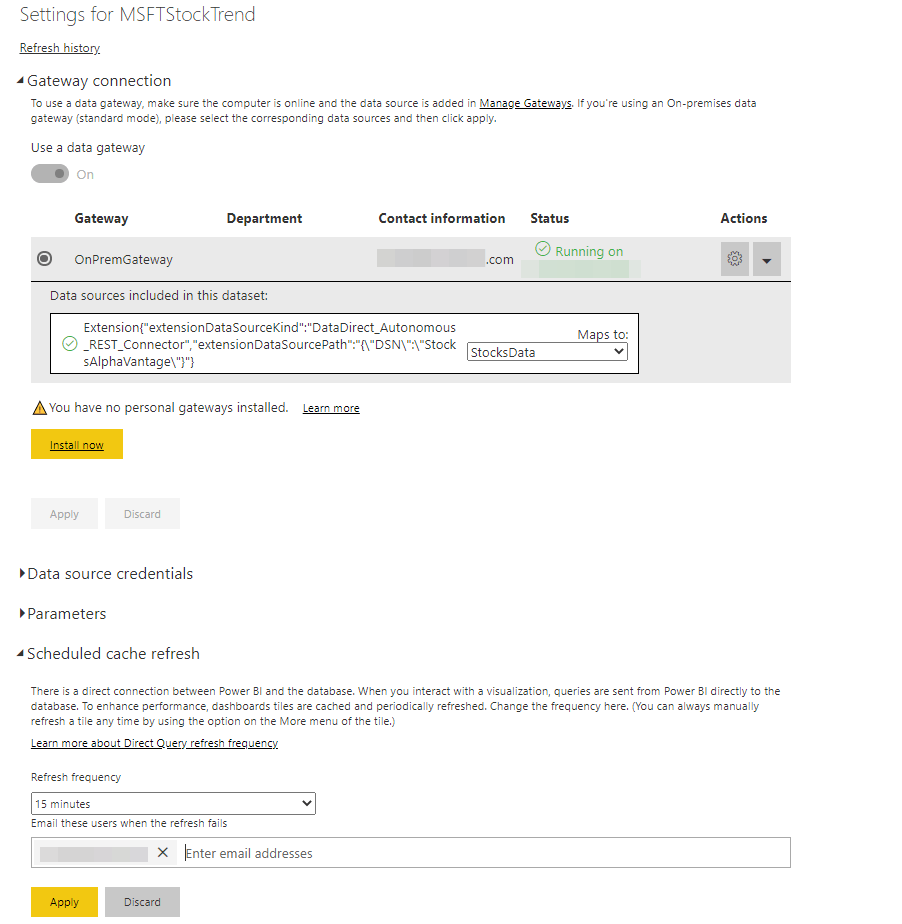
- Now go to Settings > Data Sets > Your Data Set > Gateway Connection. You should see Status as running and there should be a new dropdown Maps to choose the data source that you have just created above. Click Apply.

- Now you can schedule refresh for your data set under Scheduled Cache Refresh as shown below.
- Or you can refresh your report on-demand from the report settings. The data set will get refreshed by sending a query to your REST API in real-time with the help of Progress DataDirect Autonomous REST Connector.