Caching Salesforce Data In-Memory Using Apache Ignite
Introduction
Apache Ignite is an in-memory computing platform for transactional, analytical, and streaming workloads delivering in-memory speeds at petabyte scale. It can be used as an in-memory cache or as an in-memory database but that doesn’t mean everything has to move to Ignite. Users can keep their existing databases and deploy Apache Ignite on top of these data sources as a data caching layer that enables users to keep frequently accessed data in memory. We can also cache SaaS data sources like Salesforc or Oracle Sales Cloud for enabling high performance data processing, analytics and write to the source if we update the in-memory cache. Apache Ignite uses JDBC to integrate to relational databases and we can use this integration to cache our data with the help of Progress DataDirect’s JDBC Connector for Salesforce.
To get started, we will walk through how to connect and cache Salesforce data in Apache Ignite using the Progress DataDirect Connector for Salesforce.
Download and Install Progress DataDirect’s Connector for Salesforce
- Download the JDBC driver here.
- To install the driver, execute the .jar package by running the below command in the terminal or just by double clicking on the jar package.
java -jar PROGRESS_DATADIRECT_JDBC_SF_ALL.jar
- Complete the installation and note where the driver is installed. By default, we can find the Salesforce driver, sforce.jar, in the below paths.
On Linux
/home/<user>/Progress/DataDirect/JDBC_60/lib/sforce.jar
On Windows
C:\Program Files\Progress\DataDirect\JDBC_60\lib
Download and Configure Apache Ignite
- Download and extract Apache Ignite binary.
- Copy the folder ignite-rest-https from apache-ignite-2.7.6/libs/optional to apache-ignite-2.7.6/libs.
- Go to the bin folder in the extracted package and run the below command to start Apache Ignite.
On Linux./ignite.sh
On Windows
.\ignite.bat
- To import the metadata from Salesforce and configure the server, the easiest way is by using the Ignite Web Console.
- Pull the docker image of Ignite Web Console by running the below command:
docker pull apacheignite/web-console-standalone
- Start the web console by running the below command:
docker run -d -p 80:80 -v <host_absolute_path>:/var/lib/mongodb --name web-console-standalone apacheignite/web-console-standalone - Open http://localhost to start using the web console. Sign up and sign in to the console.
- On the Web console, click on the link Download Agent in the bottom right of the page to download web console agent.

- Extract the web console agent by unzipping the package ignite-web-agent-2.7.0.zip
- Copy Progress DataDirect Salesforce connector (sforce.jar) from the install location to ignite-web-agent-2.7.0/jdbc-drivers
- Go back to the web console in the browser and click on the Import from Database button to start, creating the cluster configuration to import the schema from Salesforce.
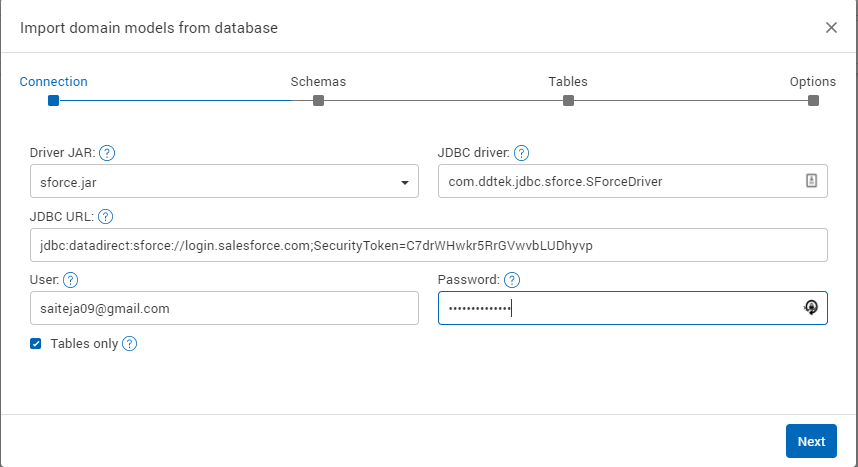
- Fill up the connection details for the Salesforce instance as shown below:
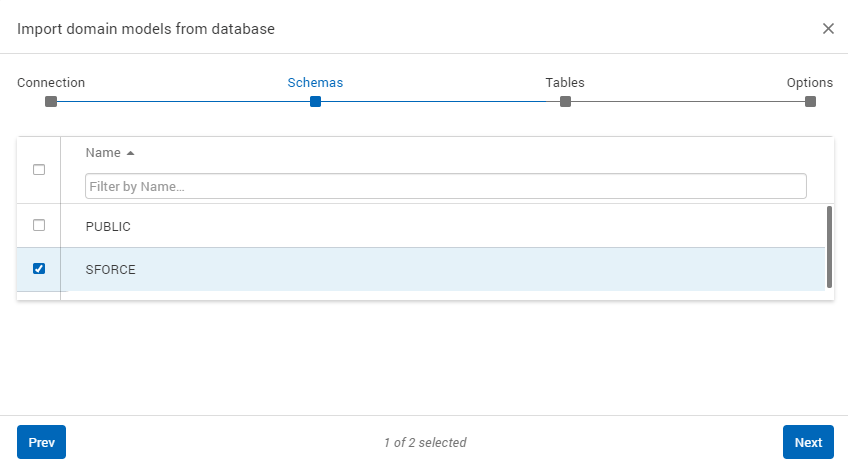
- Click on Next, choose SFORCE as your schema.
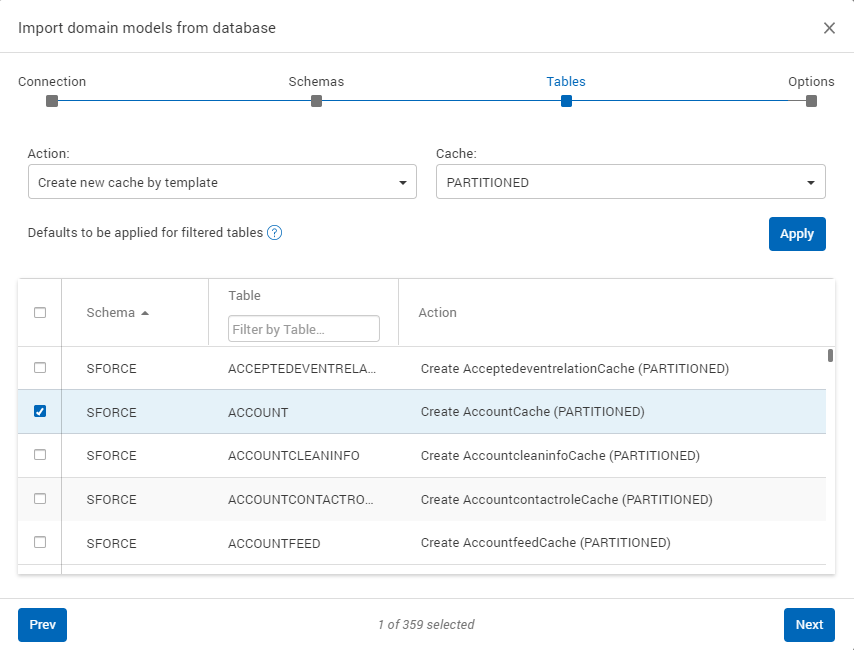
- On the next screen, choose the tables needed to create a cache in Apache Ignite.
- Click on Next and Save the configuration. Open the newly created configuration and click on Save. Download the project.
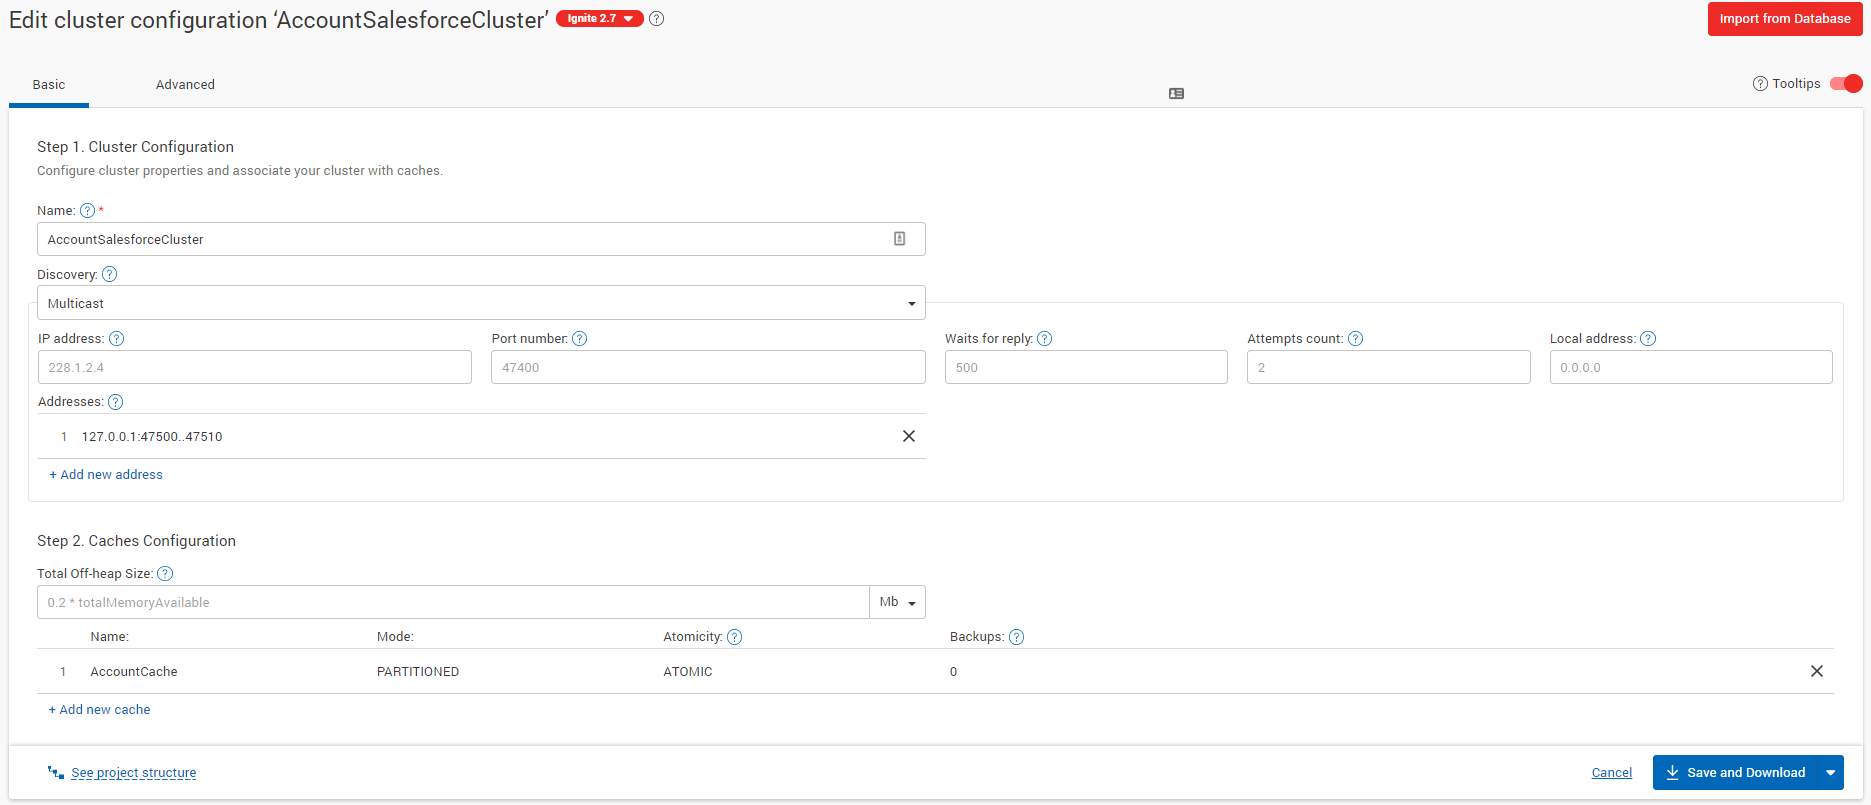
Importing Salesforce data to cache
- Open the downloaded project in Intellij or Eclipse.
- Copy the Progress DataDirect Salesforce connector (sforce.jar) to ImportedCluster-project/jdbc-drivers/ and Add it as a library to the project.
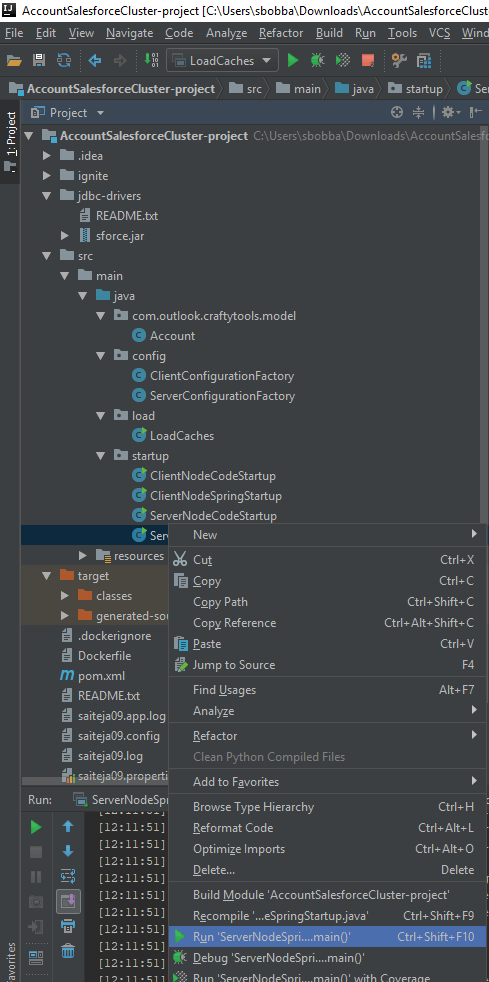
- Start Ignite Server nodes by running the ServerNodeSpringStartUp
- The below message appears from the server when it is ready.
- Go to the resources folder in the project, open secret.properties and configure the JDBC URL, Username and Password for the Salesforce account.
- Now load the Salesforce data into cache by running the LoadCache class in the project. The below message will appear after the data is loaded to cache.
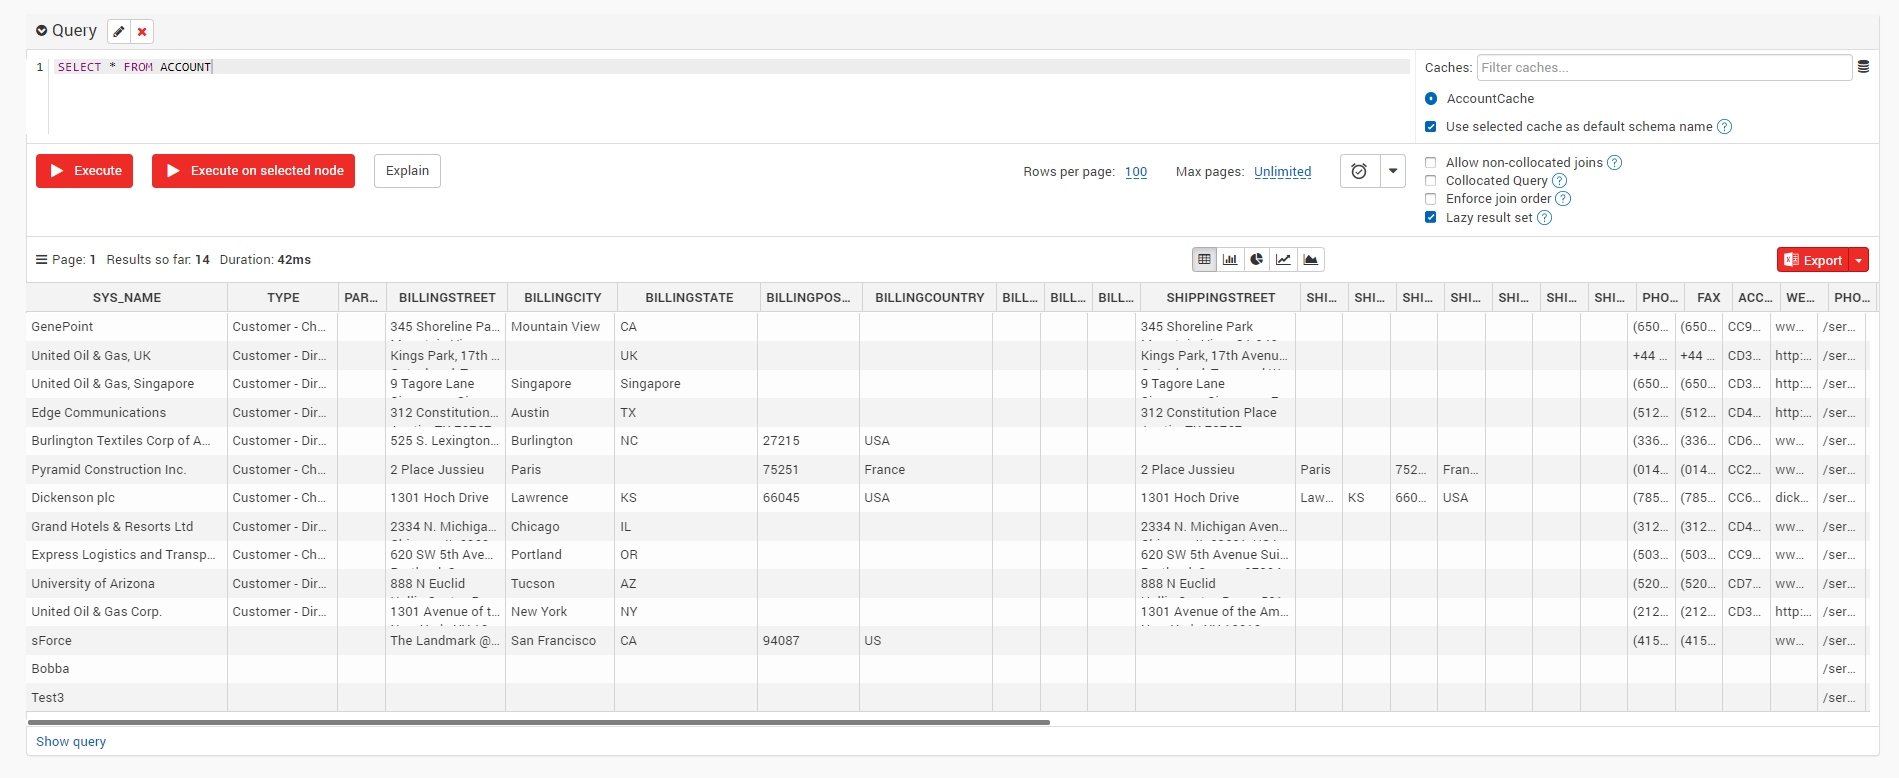
- We can now go to web console and query the cache or query and modify the cache from our applications.
We hope this tutorial helped import your Salesforce data to Apache Ignite cache for data processing, transactions, and analytics. Please contact us with any questions and we will be happy to help.
