Connect to TeamCity from Tableau for your Analytics and Reporting
Introduction
TeamCity is a build management and continuous integration server from JetBrains. There’s a lot of insights that can be discovered but accessing TeamCity data from tools like Tableau, Tibco, etc. can be tricky. With the Progress DataDirect TeamCity JDBC connector, you can now connect to your data in TeamCity as easily as you could with any JDBC driver. In this tutorial, we will walk you through how easily you can connect and access TeamCity data and generate reports on it from any supported JDBC compliant reporting tool.
Download and Install Progress DataDirect TeamCity JDBC connector
- Download Progress DataDirect TeamCity JDBC connector from here.
- Installing the Driver
- If you are on Windows, extract the PROGRESS_DATADIRECT_JDBC_TEAMCITY_6.0.0_WIN.zip and run the PROGRESS_DATADIRECT_JDBC_INSTALL.exe to install the JDBC driver.
- If you are on Linux, extract the PROGRESS_DATADIRECT_JDBC_TEAMCITY_6.0.0.zip and run the PROGRESS_DATADIRECT_JDBC_INSTALL.jar to start the installation.
- After you have completed the installation, you can find Progress DataDirect TeamCity JDBC connector
- On Windows, you will find it at
C:\Program Files\Progress\DataDirect\JDBC_60\lib\teamcity.jar
- On Linux, you will find it at /home/<username>/Progress/DataDirect/JDBC_60/lib/teamcity.jar
- On Windows, you will find it at
Gathering TeamCity authentication details
Before we get started on TeamCity connector configuration, let’s look at supported TeamCity authentication methods and the how you can get the details needed for the specific authentication method you want to use.
- Progress DataDirect TeamCity JDBC connector supports 2 authentication methods – Basic and Bearer Token
- For basic authentication, you will need to have Username and Password for your TeamCity instance provided to you.
- For Bearer Token authentication
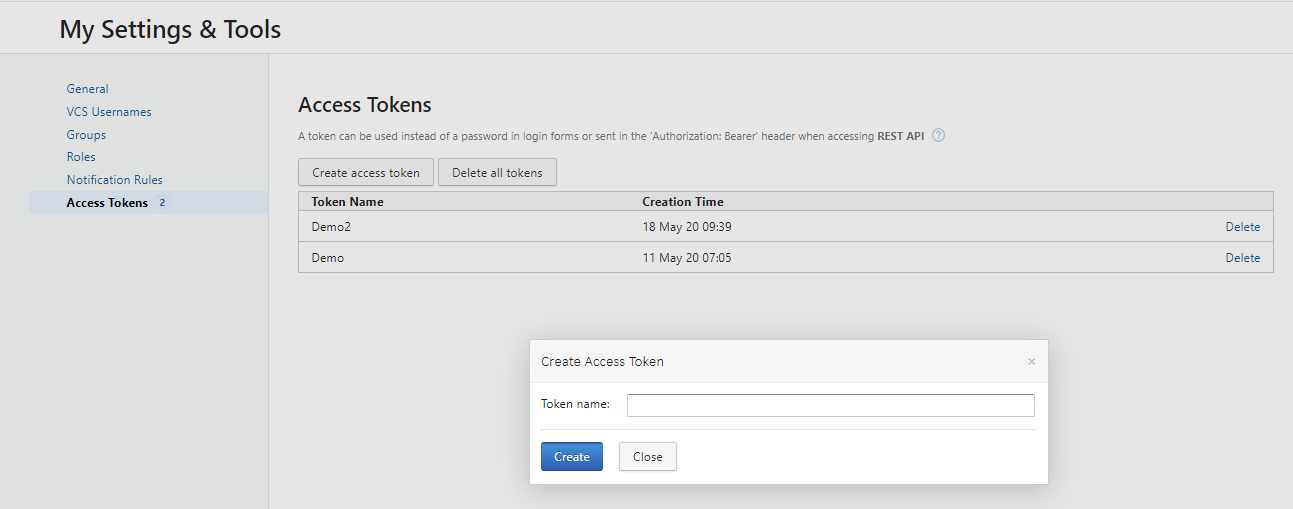
- Go to My Settings & Tools -> Access Tokens -> and Click on Create New Access Token
- Copy the Token that got generated and store it securely.
Configure Connection to TeamCity
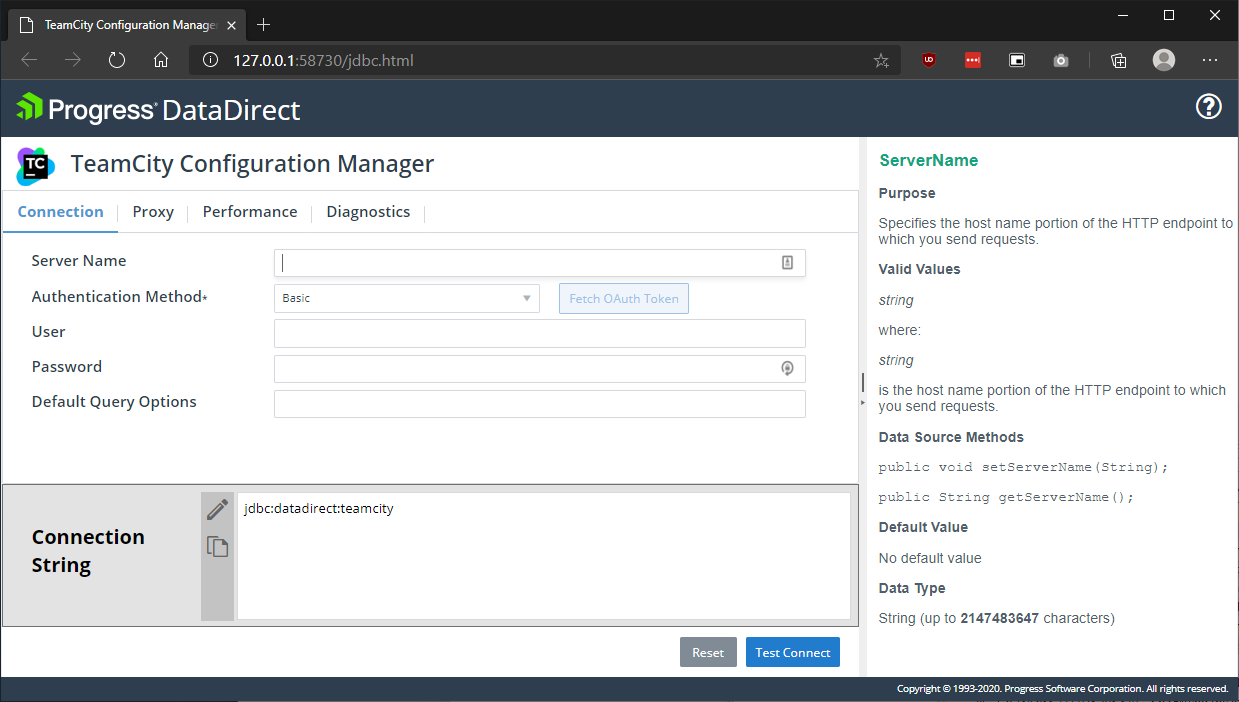
- Progress DataDirect TeamCity JDBC connector comes with a built-in JDBC Configuration manager that helps you easily configure the connection to your TeamCity instance.
- To Launch the TeamCity JDBC Configuration Manager, double click the TeamCity or run using java -jar teamcity.jar
- You should now see the below configuration manager launched in your browser
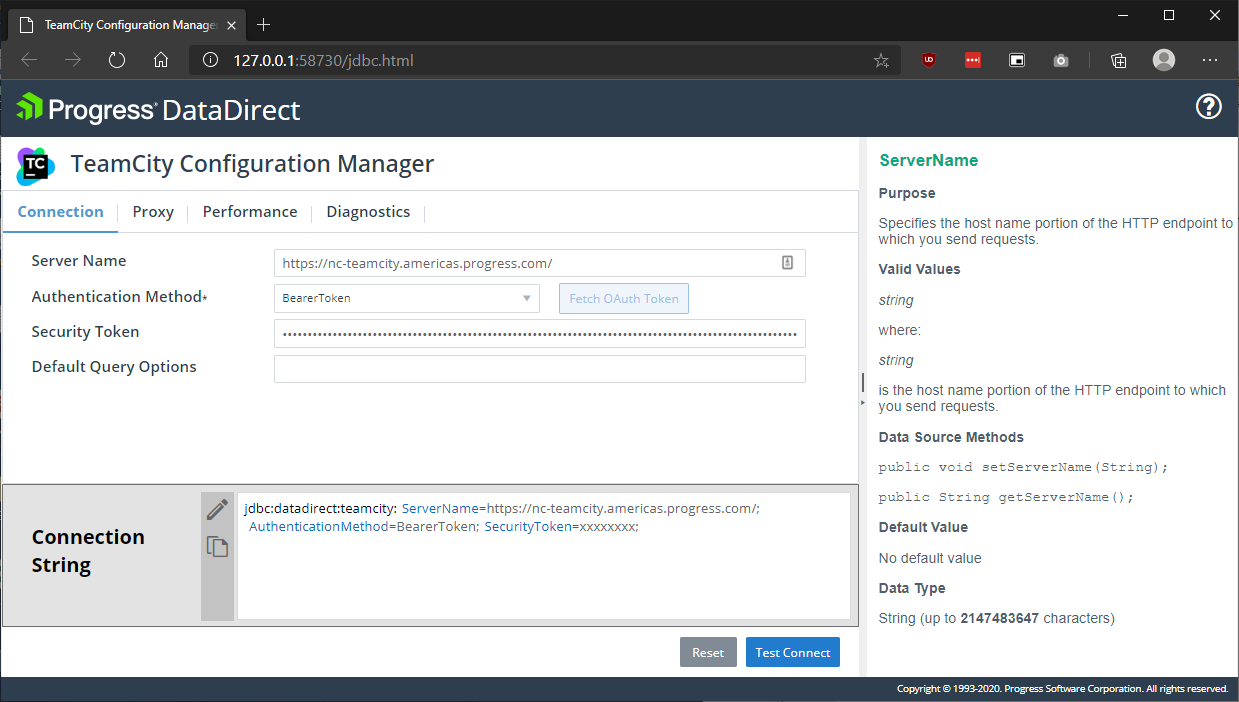
- Provide the Server name for your TeamCity instance in the Server Name text box.
- Next, choose the Authentication Method you want to use from the drop down.
- If you are using
- Basic – Fill in the username and password for your TeamCity
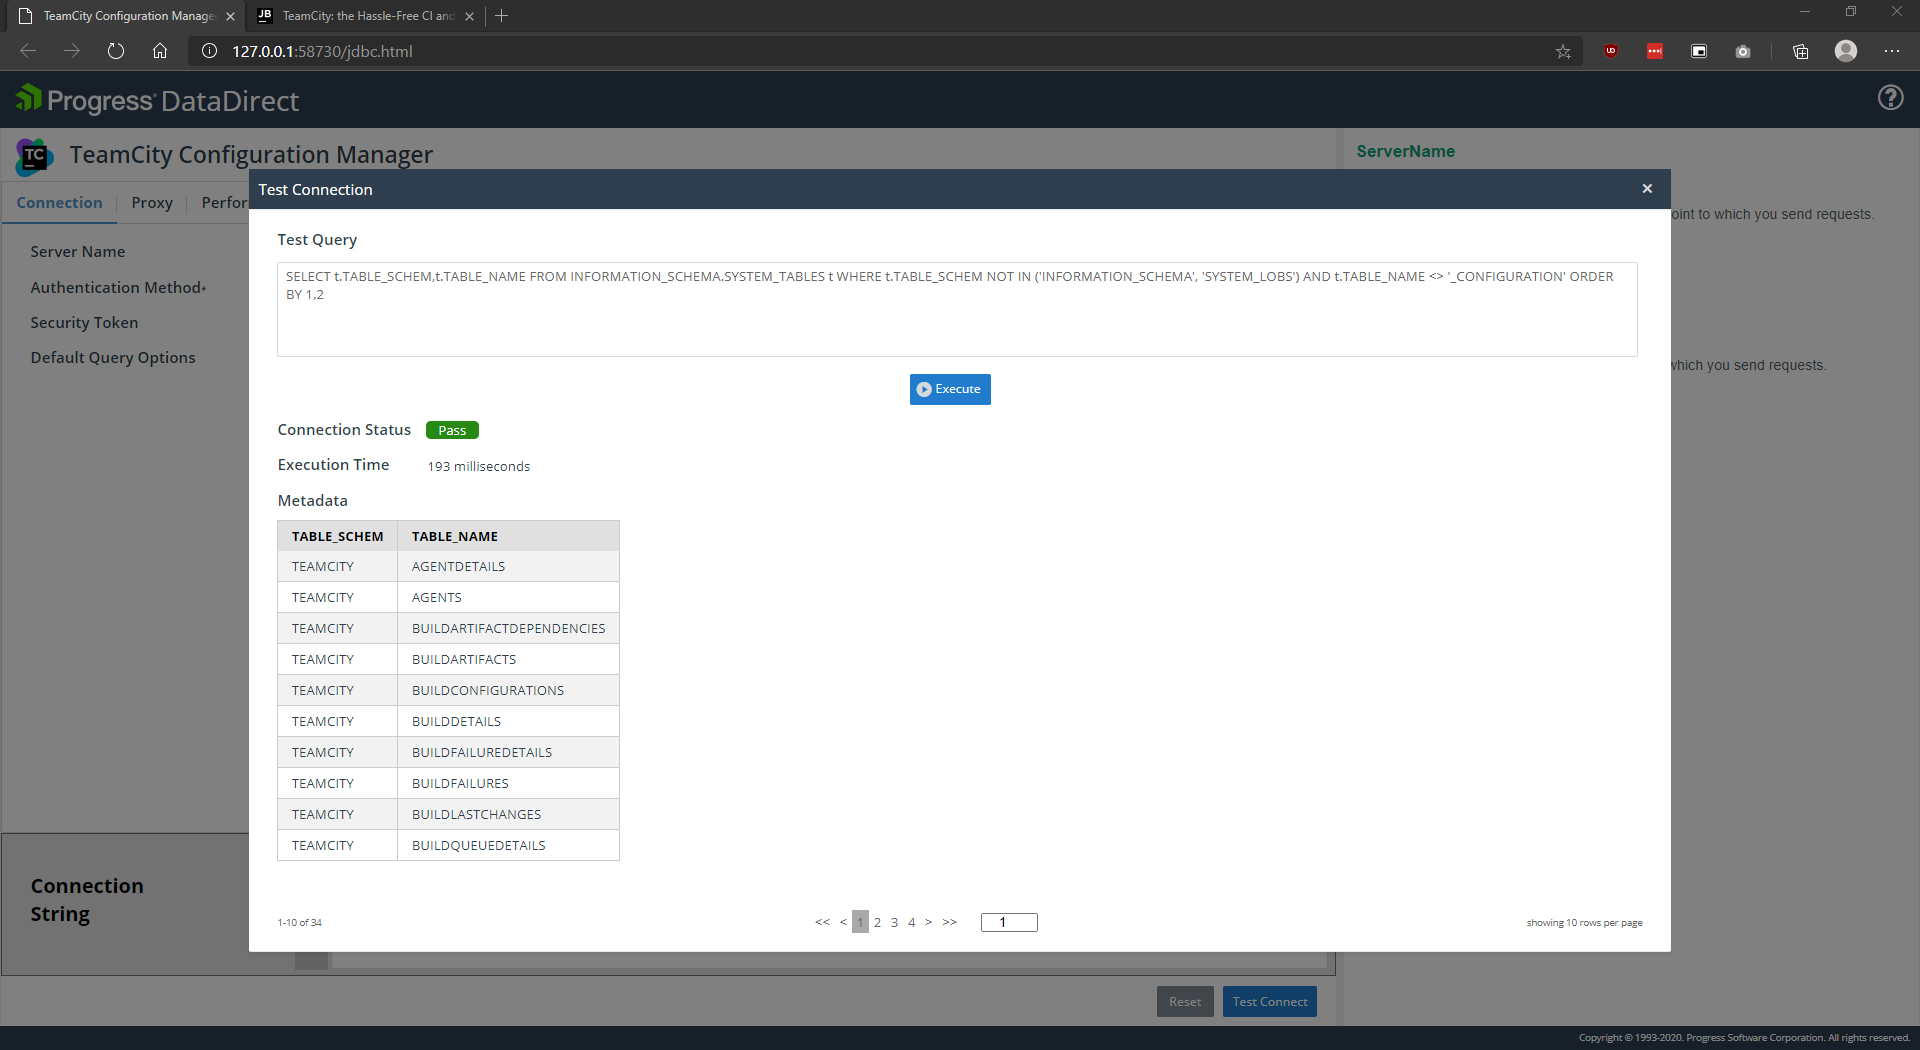
- Click on Test Connect. Now you should see list of tables exposed by the Progress DataDirect TeamCity JDBC driver.
- You can start testing out the queries, and once you are done – you can copy the JDBC connection string so that you can start using the Progress DataDirect TeamCity JDBC driver with other applications or in your programs.
Create Reports using your BI/Analytics tools
- Now that you are familiar with the TeamCity connector, you can start using the connector with your favorite tools like Tableau, Tibco, Jupyter, IBM Cognos, etc.
- Here’s an example of using Progress DataDirect TeamCity connector with Tableau to generate some reports.
- To get started, copy teamcity.jar to C:\Program Files\Tableau\Drivers from the install location of the TeamCity connector as describe in section 2.
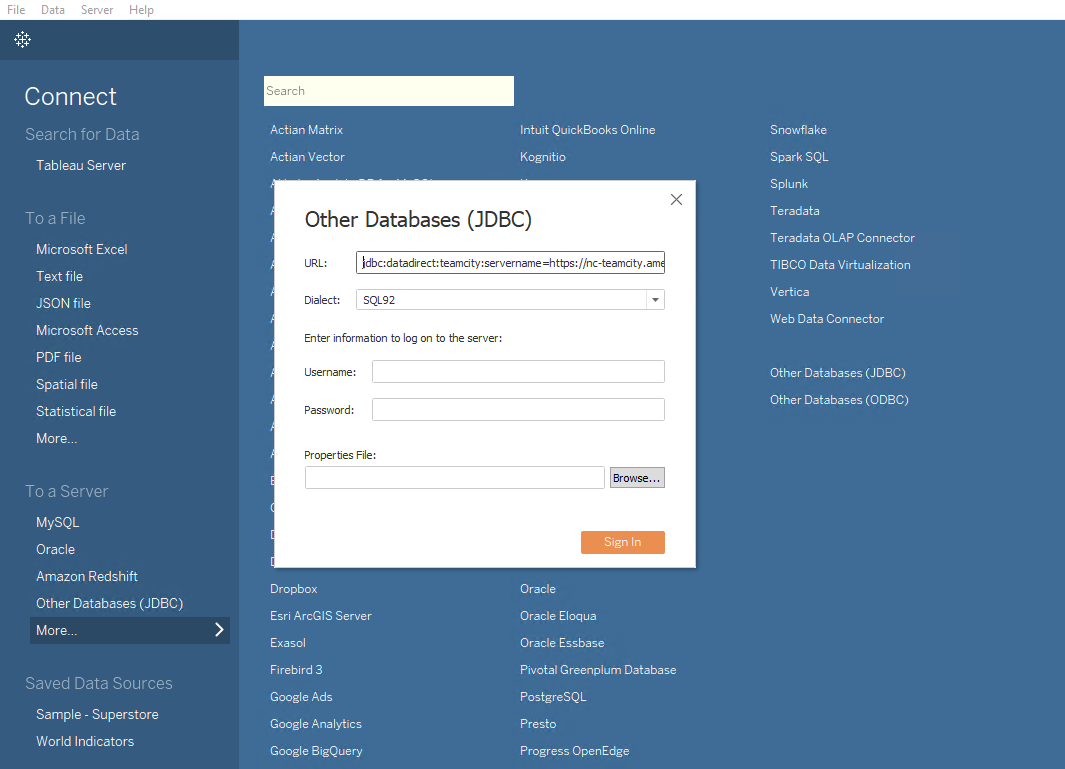
- Open Tableau and choose your datasource Other Databases (JDBC) as shown below.
- In the URL field, paste the connection string you generated in the previous section.
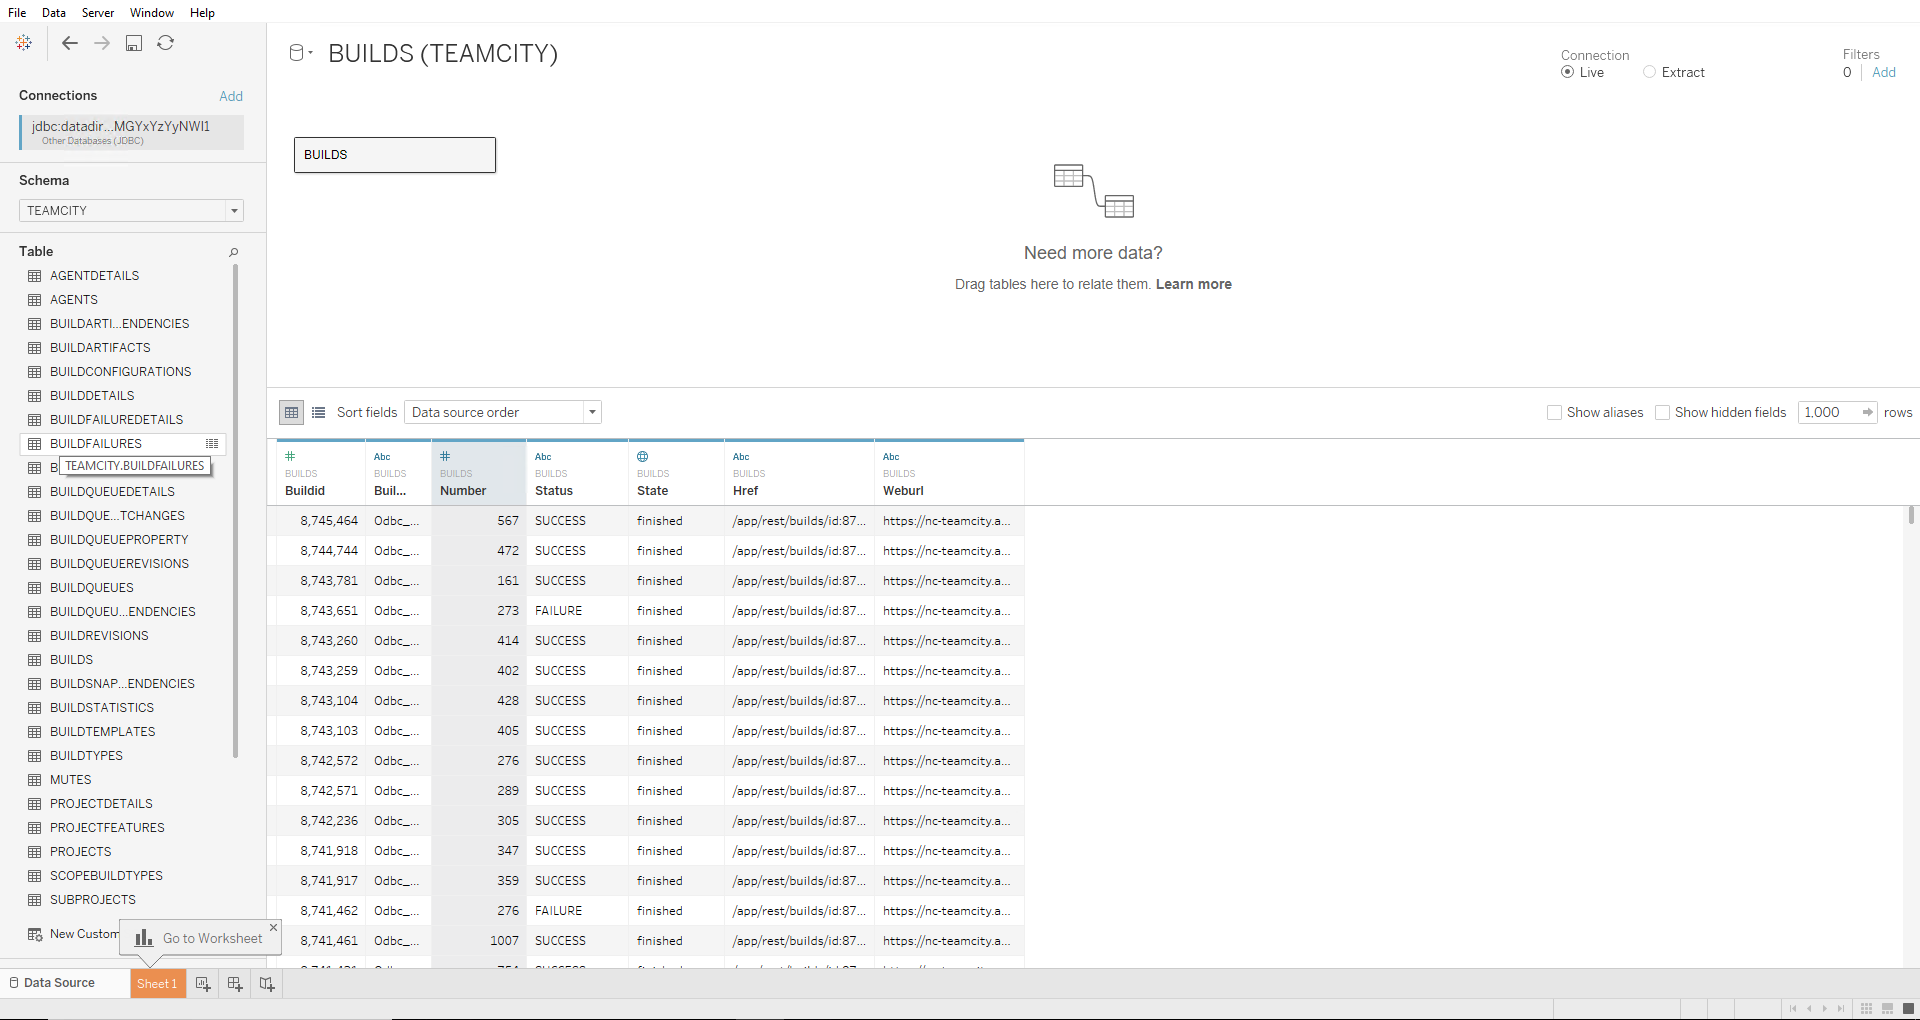
- Click on Sign In, now you should see list of schemas and on selection of schema TEAMCITY, you should now see list of tables as shown below.
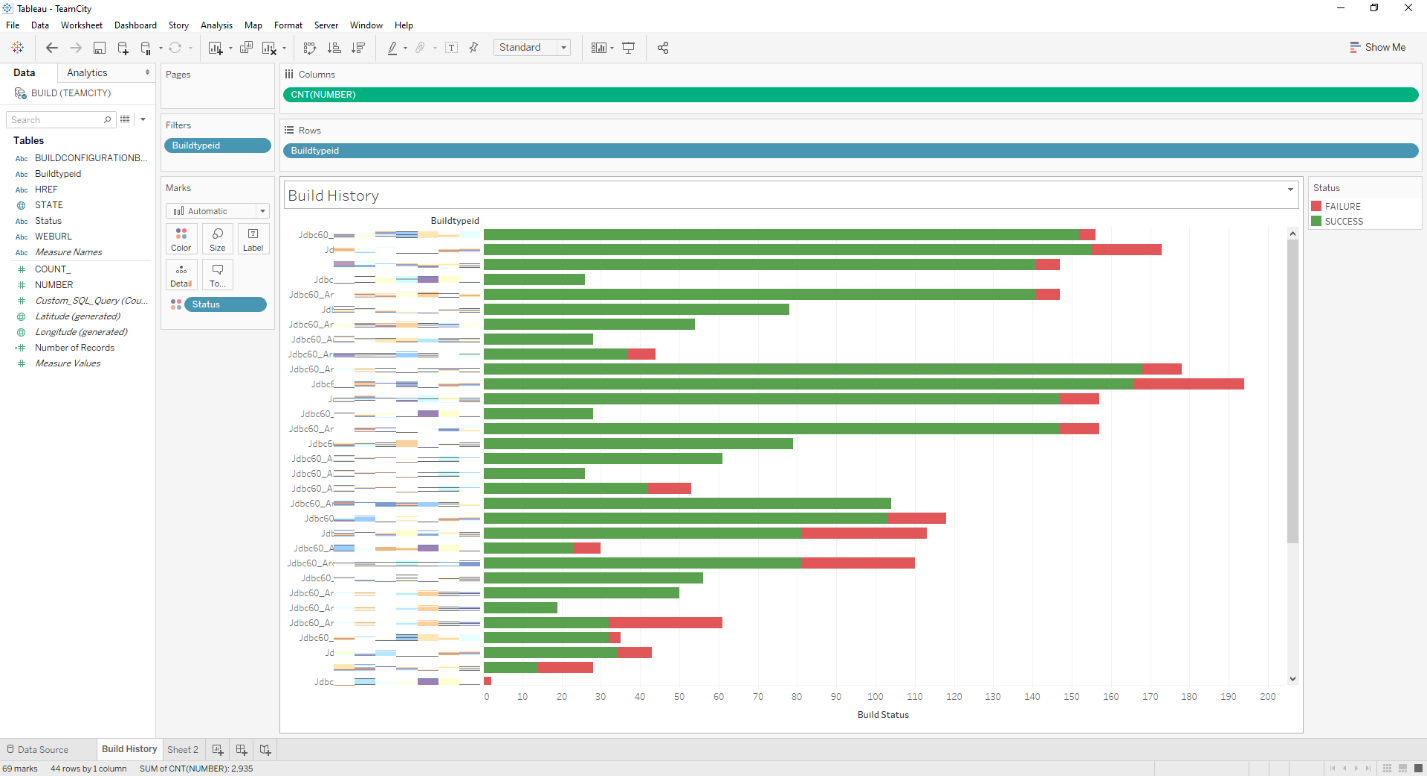
- You can now start dragging tables into the canvas or create custom queries and start creating reports like below.
We hope this tutorial helped you to get started with Progress DataDirect TeamCity JDBC connector and connect to your data in TeamCity. Feel free to contact us if you have any questions or issues using the driver, we will be happy to help you.
