Connect to HubSpot from Tableau
Can Tableau get data from HubSpot?
HubSpot is a popular automation and CRM platform for marketing, sales, and customer service. Business analytics tools such as Tableau, Tibco, and SAP Lumira can be used to visualize the data consumed by HubSpot, transforming it into valuable business insights. However, a key challenge in visualizing HubSpot data with analytics tools is the ability to connect to and securely access your HubSpot data. The Autonomous REST Connector from Progress DataDirect offers a secure, flexible solution for connecting Tableau to HubSpot. This tutorial walks you through the process of connecting Tableau to HubSpot using the JDBC connector (or driver) on Windows. The following tasks are covered:
- Download and install Autonomous REST Connector for Windows
- Select the HubSpot model and create a connection
- Connect Tableau to HubSpot
Download and install the Autonomous REST Connector for Windows
The following steps describe how to download and install the Autonomous REST Connector for JDBC.
Note: ODBC connectivity to HubSpot is supported with the Autonomous REST Connector for ODBC.
- Click the TRY NOW button.
- Provide the required information; then, click DOWNLOAD.
- After downloading the product, unzip the installer files into a temporary directory, and then double-click the installer program: PROGRESS_DATADIRECT_JDBC_INSTALL.exe
- Follow the prompts to complete the installation.
The Autonomous REST Connector for JDBC provides JDBC connectivity to HubSpot and many other REST APIs.
Select the HubSpot model and create a connection
The following steps show how to select a HubSpot model, connect to HubSpot, and test the HubSpot connection from within the connector.
- Open the Autonomous REST Composer by selecting the Autonomous REST Composer (JDBC) icon from your desktop or the Windows
Start menu. The Autonomous REST Composer opens in your default web browser.
Note: Autonomous REST Composer is the Autonomous REST Connector's interface for selecting or building REST API models.
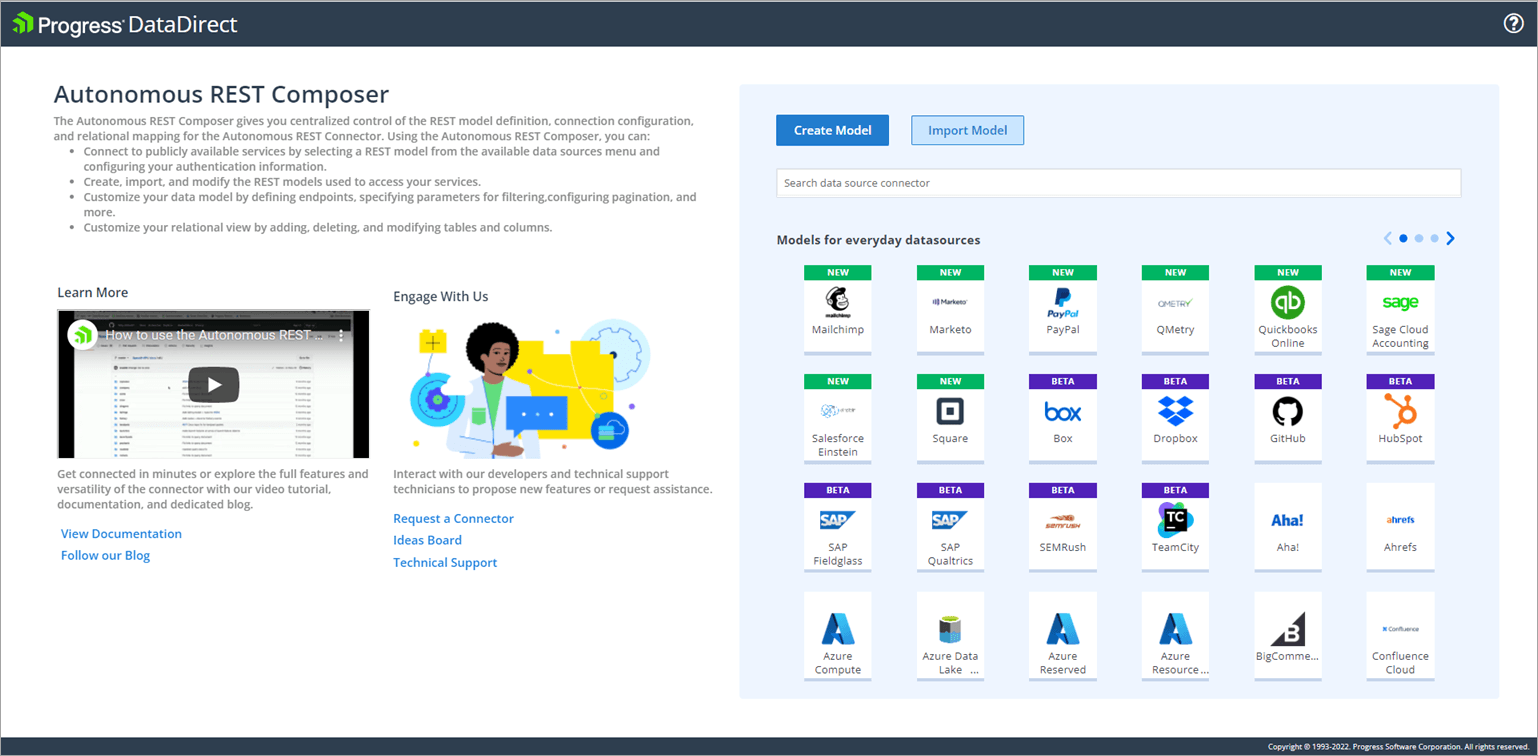
- Type HubSpot in the search field; then, select the HubSpot
model. The Connection tab for the HubSpot model opens.
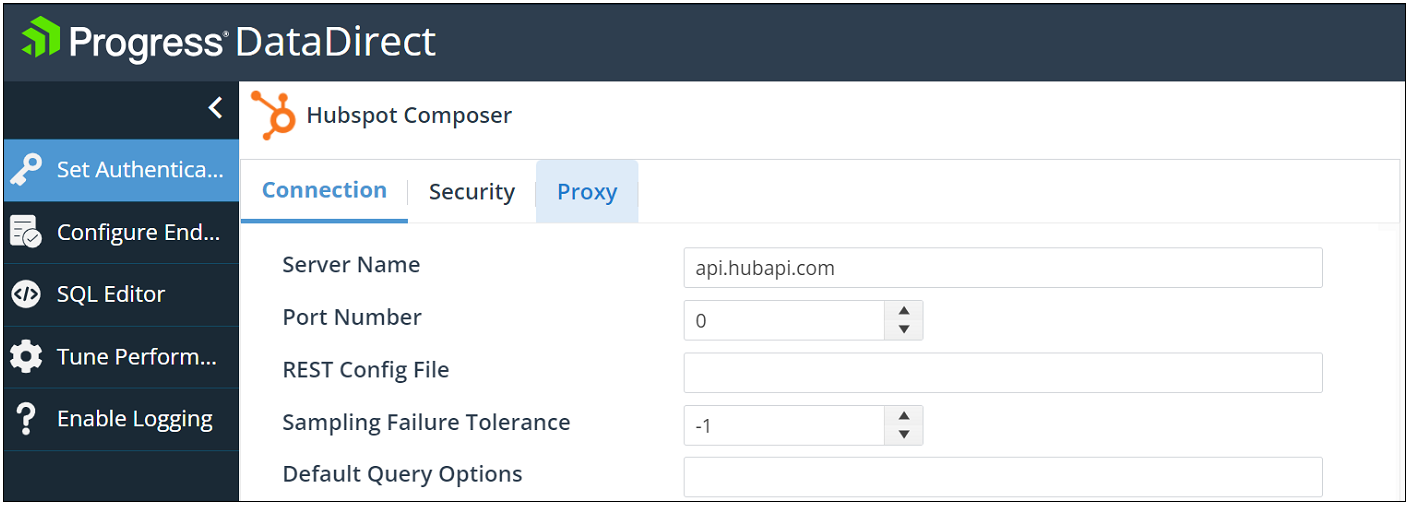
- Provide a value for the Server Name property. The value should be the host name portion of the HTTP endpoint to which you send requests. It should not include the preceding portion of the URL: https://. For the HubSpot model, the default is api.hubapi.com.
- From the Authentication Method drop-down,
select OAuth2. Then, provide values for the following
properties.
Note: Most values can be obtained by creating an app in a HubSpot developer account. Refer to the following page for details: https://legacydocs.hubspot.com/docs/methods/oauth2/oauth2-overview.
- Client ID: Specify the client ID key for your application.
- Client Secret: Specify the client secret for your application.
- Authorization URI: Specify the endpoint for obtaining an authorization code from a third-party authorization service. For example: https://app.hubspot.com/oauth/authorize
- Token URI: Specify the endpoint for retrieving access tokens. For example: https://api.hubapi.com/oauth/v1/token
- Redirect URI: Specify the endpoint to which the client will be returned after authenticating with a third-party service. For example: http://localhost/
- Set the values for any optional properties that you want to configure.
- To test your configuration:
- Click Test Connect or select the SQL Editor tab from the side menu.
- From the SQL Editor screen, expand AUTOREST in the Schema Tree pane to view a list of tables showing HubSpot data exposed by the connector.
- In the Editor pane, specify a query that you would like to test.
- Click Execute.
Note: If successful, the driver will return your results in the Results pane.
- Download your model file:
- Select the Configure Endpoints tab.
- Optionally, add, remove, or edit endpoints that are used to return data for use with SQL-based applications.
- Click Download to save your model file.
Note: When configuring the connection to HubSpot in Tableau, you will need to specify the fully qualified path to your HubSpot model file in the Tableau connection URL. The connection string generated by the Autonomous REST Composer does not automatically provide a location.
- As you provide values for properties, the Composer generates a connection string. You
may use this connection string as the basis for the Tableau connection to HubSpot. Take
the following steps to prepare the Tableau connection URL:
- On the Set Authentication tab, click the copy button and paste the connection string into a text editor.
Note: As the text editor contains the connection string, save it in a secure location and delete it after establishing the connection.
- Replace the server name information (servername=api.hubapi.com)
with the fully qualified path to your HubSpot model file using the Config property
(Config='C:\Users\windows-user\Downloads\HubSpot.rest').
The revised connection string may be used as the Tableau connection URL. For
example:
jdbc:datadirect:autorest:
Config='C:\Users\windows-user\Downloads\HubSpot.rest';
AuthenticationMethod=OAuth2;
ClientID=xxxxxxxx;ClientSecret=xxxxxxxx;
AccessToken=xxxxxxxx;RefreshToken=xxxxxxxx;
AuthURI=https://app.hubspot.com/oauth/authorize;
TokenURI=https://api.hubapi.com/oauth/v1/token;
RedirectURI=http://localhost;
- On the Set Authentication tab, click the copy button and paste the connection string into a text editor.
Connect Tableau to HubSpot
The following steps show how to connect Tableau to HubSpot using the Autonomous REST Connector for JDBC.
- Navigate to the \lib\xx subdirectory of the Progress DataDirect installation directory; then, locate the autorest.jar file. This is the Autonomous REST Connector driver jar file.
- Copy the autorest.jar file into the following
directory:
C:\Program Files\Tableau\Drivers
- Open Tableau. From the Connect menu, select Other Databases (JDBC).
- In the Other Databases (JDBC) dialog, provide
values for the following fields; then, click Sign
In.
- URL: Copy your connection URL from the
text editor and paste it into this field. For example:
jdbc:datadirect:autorest:
Config='C:\Users\windows-user\Downloads\HubSpot.rest';
AuthenticationMethod=OAuth2;
ClientID=xxxxxxxx;ClientSecret=xxxxxxxx;
AccessToken=xxxxxxxx;RefreshToken=xxxxxxxx;
AuthURI=https://app.hubspot.com/oauth/authorize;
TokenURI=https://api.hubapi.com/oauth/v1/token;
RedirectURI=http://localhost;
Note: The connection string generated by the Autonomous REST Connector may be used as the basis of the Tableau connection URL. The connection string must be modified such that server name information (ServerName=api.hubapi.com) is replaced with the fully qualified path to your HubSpot model file using the Config property. (Config='C:\Users\windows-user\Downloads\HubSpot.rest'). Downloading the HubSpot model file is described in Step 7 in the previous section: "Select the HubSpot model and create a connection".
- Dialect: Select SQL92 (the default) from the drop-down box.
- URL: Copy your connection URL from the
text editor and paste it into this field. For example:
- The Data Source window appears. In the Schema field, select the schema for the service you want to use.
- In the Table field, the tables stored in the selected schema are now exposed and available for selection.
Result: You have successfully accessed your data and are now ready to create reports with Tableau. For more information, refer to the Tableau product documentation at http://www.tableau.com/support/help.
More Information
Thank you for taking the time to consider the Progress DataDirect solution for connecting Tableau to HubSpot. Please contact us for additional information. Click the LEARN MORE button for additional product resources.
The Autonomous REST Connector provides JDBC and ODBC connectivity to HubSpot, GitHub, Jira, Azure, and many other REST APIs.