Importing Salesforce Data Into Amazon S3 via JDBC Driver

The following tutorial shows how you can leverage Progress DataDirect Salesforce JDBC drivers to import the data from Salesforce into S3 storage engine.
AWS Data Pipeline is a web service that lets you process, transform and move the data securely between AWS Storage and compute services in regular intervals. In addition to this there is also one neat feature which enables you connect to any database with JDBC driver and import the data in to S3 which you can use later to move it across either compute or storage services in AWS.
This tutorial explains how to leverage the Progress DataDirect Salesforce JDBC Driver to import the data from Salesforce into S3 storage engine with minimal effort and by creating a pipeline which you can essentially re-use multiple times.
Setting Up
- Download Progress DataDirect Salesforce JDBC drivers from here and install it on your machine. If you need help installing the drivers on your machine, visit this link for detailed documentation.
- Sign up for Amazon Web Services by visiting this link.
- Create an Amazon S3 Bucket from the AWS console by opening the Amazon S3 console at this link.
- Next, upload the Salesforce JDBC driver (sforce.jar) which can be found at \install_directory\ Progress\DataDirect\Connect_for_JDBC_51\lib to your newly created S3 bucket.
Creating the Data Pipeline
- From your AWS Console, go to Data Pipeline console and click on the button “Create New Pipeline.”
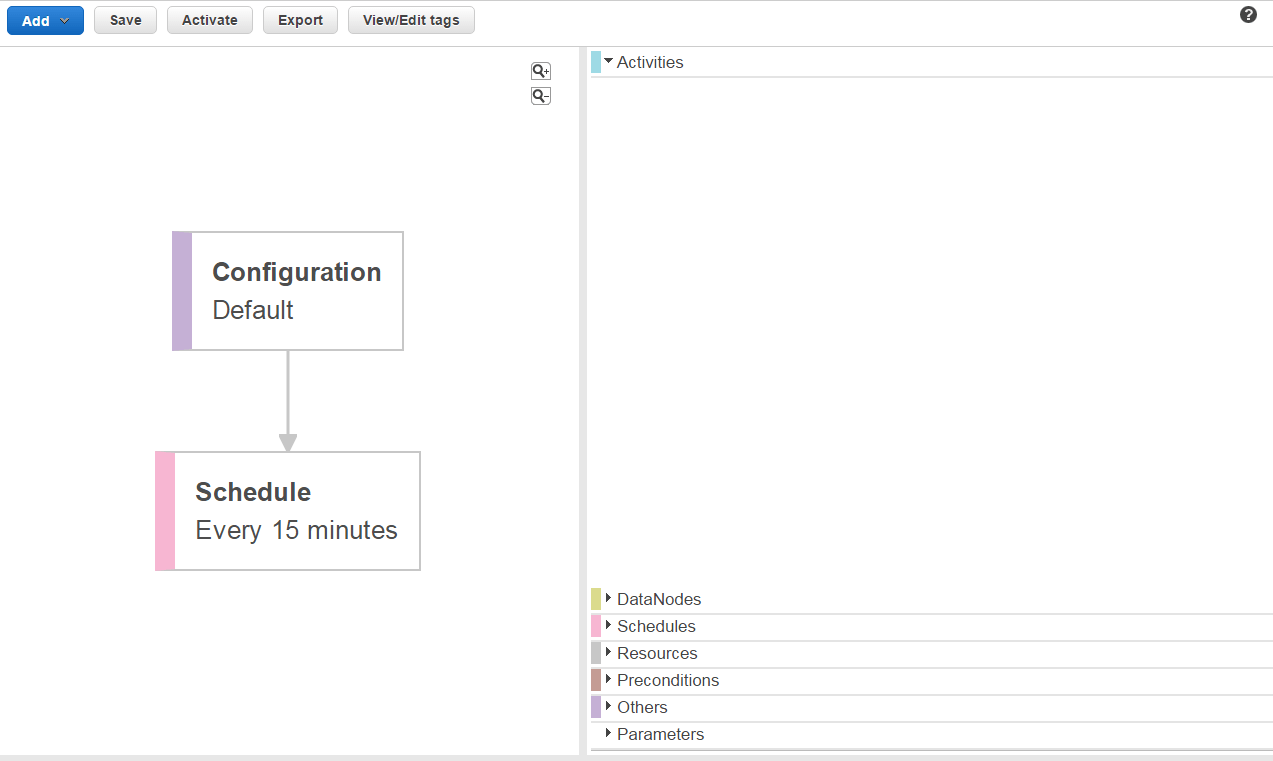
- Fill in the Name of your choice, select Source as "Build using Architect," choose your schedule that you would want to run this pipeline, choose the location for saving the logs on your S3 bucket and leave other options to default. At the end of the form, click on the button "Edit in Architect" to create the data flow. By default, you should see the following Pipeline.

- Add a New SQL Data Node, by clicking on Add button. Go to its configuration and click on drop down "Add an optional field" and select "Database." You should see a new database component in your pipeline.
- Click on the Database component and you should see its configuration. Configure it as below:
- Type: ‘JDBC Database’.
- Username: <Your Salesforce username>
- Password: <Your Salesforce password>
- Connection String: jdbc:datadirect:sforce://login.salesforce.com;;securitytoken=<Your Security Token>
- JDBC Driver class: com.ddtek.jdbc.sforce.SForceDriver
- JDBC Driver Jar Uri: s3://<your S3 bucket>/path/sforce.jar
- Revisit the SQL Data Node that you have created above and configure it as follows. For the sake of the tutorial, I am fetching the data from Account table in to S3.
- Table: SFORCE.ACCOUNT
- Select Query: SELECT * FROM SFORCE.ACCOUNT
- Next, add an S3DataNode. Configure it as follows. File path is location of file on your S# bucket where the data read through Salesforce JDBC gets saved.
- Type: S3DataNode
- File Path: s3://<Your S3 Bucket>/path/<filename>.csv
- Now add an CopyActivity and configure it as follows:
- Type: CopyActivity
- Input: <SQL Data Node> that you have configured above
- Output: <S3 Data Node> that you have configure above
- Runs On: <Create a new Resource>. This will create a new resource component in the workflow.
- Go to the newly created resource component and configure it as follows:
- Type: EC2 resource
- When you change it to EC2 resource, you should see Resource role and Role populated to default values
- Type: EC2 resource
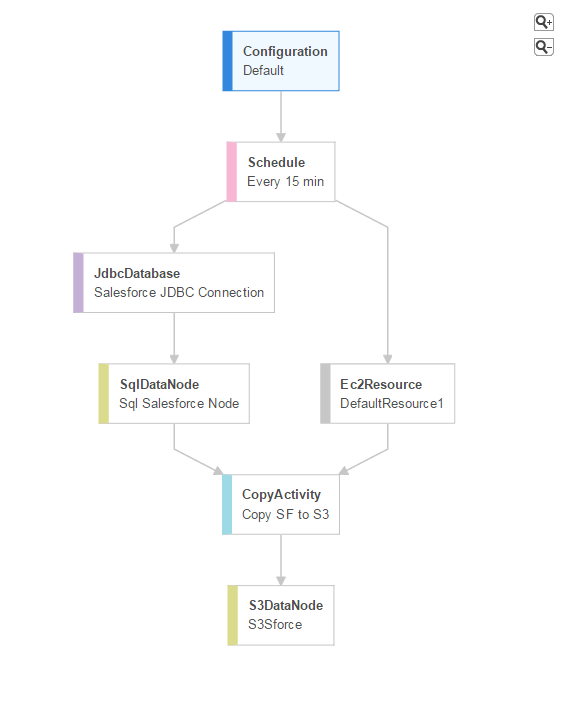
- Save the Pipeline and you should see no errors. If there are any they will be displayed on the bottom of the screen. Resolve them before proceeding ahead. Your final pipeline should look similar to the below screenshot.

Activate the Data Pipeline
Once the pipeline is saved without any errors, you can activate the pipeline. Depending on the schedule that you have configured, the pipeline should run and create a CSV file which contains Accounts Table data read from DataDirect Salesforce JDBC drivers. It should be present in the path that you have configured in the S3DataNode.
We hope this tutorial helped you to import Salesforce data into Amazon S3 using Amazon Data Pipeline, which you can use to import it in to various Amazon Compute services. This demonstration is not limited to Salesforce. In fact, you can create Amazon Data Pipeline with any of the DataDirect JDBC drivers to connect and import data from over 50+ data sources which includes your favorite SaaS, Relational and Big data sources.
Try Free for 30 Days

