Learn how to rapidly develop an app that securely connects to a backend and receives live updates with Progress Kinvey and Live Service.
I recently built a new app using Kinvey Live Service and I wanted to share my experience. This app, the IVy Intravenous Manager, helps nurses manage IVs. When an IV is empty, the IVy app pushes a message to the assigned nurse. Each app user is notified when new patient/IV is available through the Live Service. Nurses can scan a QR code to “claim” an IV or patient. This blog post explains how the app was created in just minutes with the Progress Kinvey high productivity platform.
Getting Started
To get started with the environmental setup, follow the steps here.
For a shorter route, use Kinvey Studio.
Once the Kinvey configuration is done, you should be able to Enable Live Service within your Kinvey app.
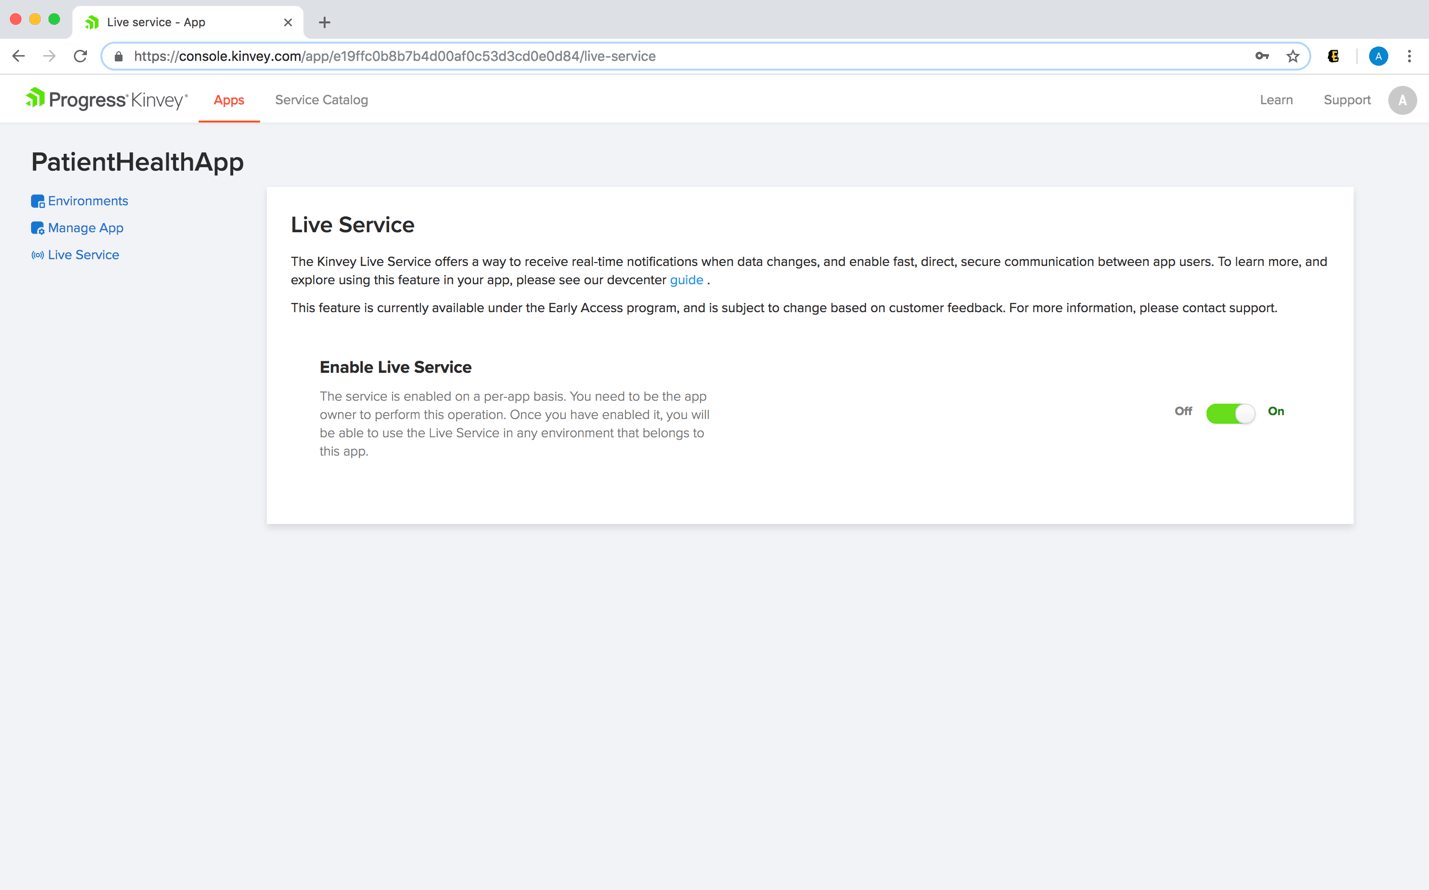
If you’re unfamiliar with Kinvey Live Service, you can access the documentation here.
Adding Barcode Scanner
You’ll need to install Barcode Scanner in your app to scan an IV and enter the patient’s pertinent information.

After adding the plugin, follow these steps so you’ll be able to get the scanner on both an Android and an iOS emulator.
import { BarcodeScanner } from 'nativescript-barcodescanner';import { registerElement } from "nativescript-angular/element-registry";registerElement("BarcodeScanner", () => require("nativescript-barcodescanner").BarcodeScannerView);This should be added to the module.ts, and in the component you can call Barcode Scanner with the following code:
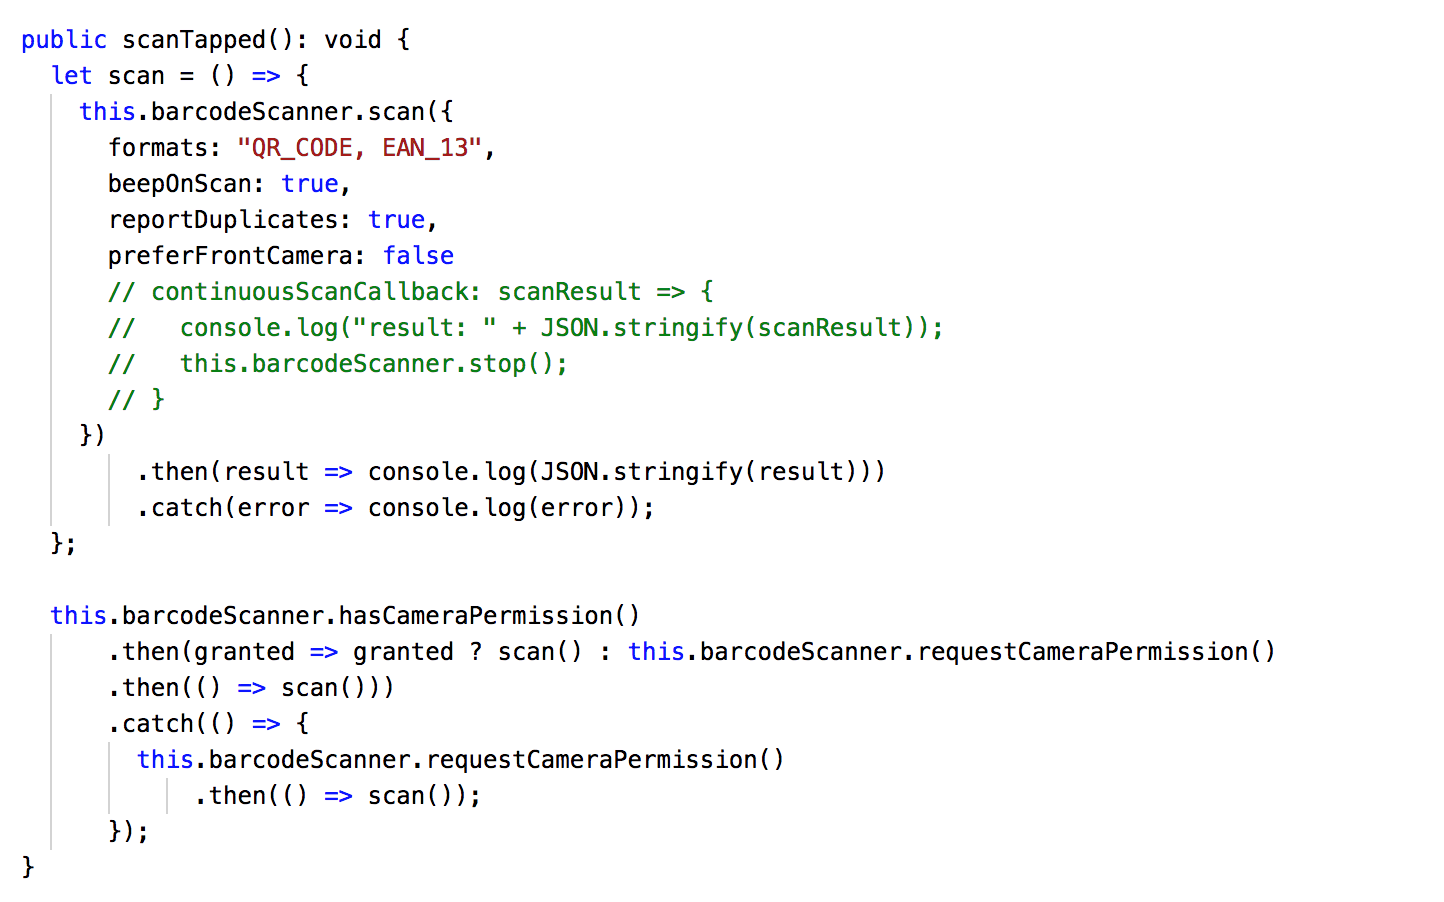
Because it’s a little bit tricky, you have to Add the Android scan sample and make the embedded iOS sample conditional so that it can work on both iOS and Android.
Include the following code in your HTML file for Barcode Scanner. It will open a new camera window.
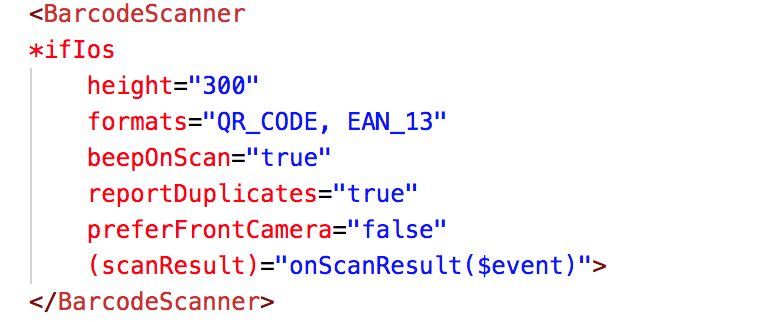
You should now be all set with Barcode Scanner. Here are screenshots of what it should look like on both iOS and Android:
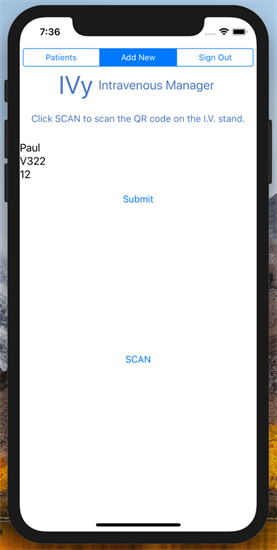
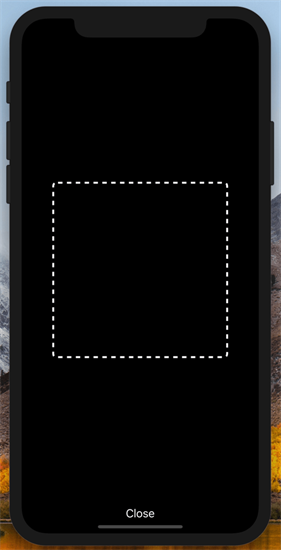
When the user presses the submit button, it should subscribe to the messaging for Live Service and for that specific patient, then it will show an immediate alert on the device as to which patient detail is added. After that, you’ll be able to see that patient’s detail on the table of the main screen page.
When the user submits the details, the data is saved to the Kinvey datastore with this code:

For the segmented bar, you can use this HTML code snippet for different views:
<SegmentedBar [items]="items" (selectedIndexChange)="onSelectedIndexChange($event)" class="m-5" ></SegmentedBar><GridLayout [visibility]="selectedIndex === 0 ? 'visible' : 'collapsed'" backgroundColor="white"> <Label [text]="'The new selectedIndex is: ' + selectedIndex" class="m-15 h3 p-5 text-center"></Label></GridLayout><GridLayout rows="*" [visibility]="selectedIndex === 1 ? 'visible' : 'collapsed'" backgroundColor="green"> <Label [text]="'The new selectedIndex is: ' + selectedIndex" class="m-15 h3 p-5 text-center" color="white"></Label></GridLayout><GridLayout rows="*" [visibility]="selectedIndex === 2 ? 'visible' : 'collapsed'" backgroundColor="red"> <Label [text]="'The new selectedIndex is: ' + selectedIndex" class="m-15 h3 p-5 text-center" color="white"></Label></GridLayout>And you can follow this TypeScript code to write a title on the segmented bar:

When you navigate to the segmented page “Patients,” IVy displays a list of the patients as below:
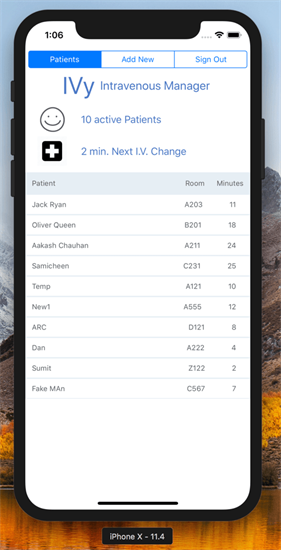
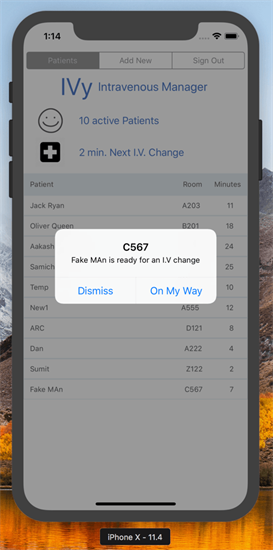
For this list in the app, you must first register for the Live Service. You can subscribe to messages from the collection. In this app, we want to use a snippet (as per my GitHub code) where we can show a dialog box when the patient’s remaining IV time ends.
This is the dialog box the user sees when a patient is ready for an IV change:
Adding More Functionality
For a status update that gives the minimum time before the next IV change is required, we can add a function to the JavaScript:
min = Math.min.apply(Math,this.contactName.map(function(item){return item.time;}));Here we have a table of the patient name and details. To build that we can use “RadListView” as below:
<RadListView [items]="contactName" backgroundColor="transparent" height="500"><ng-template let-item="item" let-i="index"> <GridLayout columns="*, auto, auto" rows="*" class="table table-standings"> <Label text="{{item.test}}" textWrap="true" row="0" col="0" class="td team"></Label><Label text="{{item.r_number}}" textWrap="true" row="0" col="1" class="td Z"></Label> <Label text="{{item.time}}" textWrap="true" row="0" col="2" class="td V"></Label> </GridLayout> </ng-template><ListViewGridLayout tkListViewLayout itemHeight="34" scrollDirection="Vertical" spanCount="1"></ListViewGridLayout></RadListView>That’s All There is to It
Using Live Service in a Kinvey app is easy, and with minimal design work we were able to develop a production-ready app. Kinvey is a powerful high productivity tool that accelerates development and significantly reduces the time it takes to build an app. With just a little JavaScript experience, building this cross-platform app, complete with a secure backend, took just minutes.
Give Kinvey a try for yourself. Sign up for the free developer edition.
For this project’s full source code, click here.
Please post a comment if you have any questions or need help.


