Getting started with the Sitefinity’s MVC capabilities (AKA Feather)

[This post is part in of the "getting started" series, you can find the others here:
Getting Started with Sitefinity - APIs and Providers]
Before you start developing with Sitefinity, you need to choose between a WebForms and MVC approach. While both can provide a beautiful experience today, the MVC capabilities are the future of the Sitefinity CMS and should be your choice. This post will look at the big picture covering the main MVC capabilities of Sitefinity in a comprehensive way and explain how to start working with them.
But, before we continue, I want to clarify one thing—Sitefinity MVC capabilities and Project Feather refer to the same thing.
Here are some key things you should understand about the MVC capabilities of Sitefinity:
-
Everything is convention-based
-
The UI is mobile-first and it is based on Bootstrap
-
There’s an option for custom UI frameworks other than Bootstrap
-
The default widgets, functionality and appearance can be easily modified and the files are packaged into a specific folder structure
-
All MVC widgets are open source and you can modify them in the way that you want
Let’s take a deeper look into these features and capabilities. At the end of each section, you will find links to helpful articles with more details.
Major Pillars of Sitefinity MVC capabilities
The following pictures help visualize the major parts of the MVC concepts in the CMS and how they are working together:

The widgets follow the Model, View, Controller or Model-View-Viewmodel patterns. The templates and the widget designers use the Razor engine for rendering.
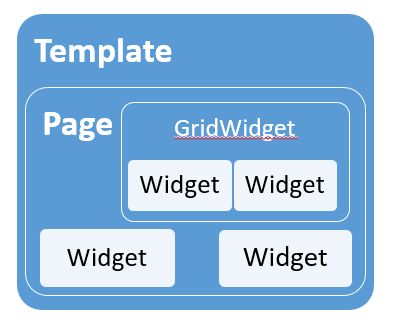
The content is shown in a particular layout with the help of the Bootstrap framework.
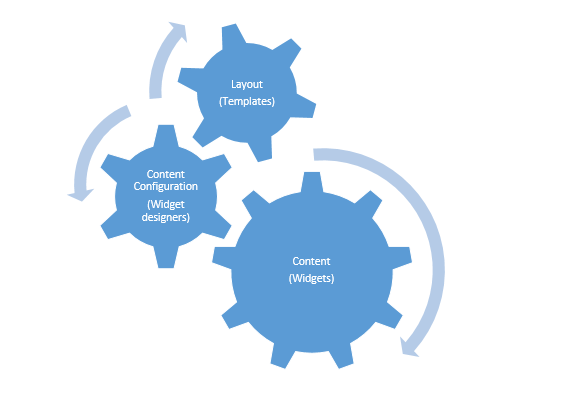
On a high level, all of the entities are connected.
Before continuing with each entity, I want to show you where the MVC widgets reside and how to start a new package which contains your templates.

All of the MVC widgets should be placed in the MVC folder. You also have the option to create them in a separate project and reference it.

Before you start you should include the ResourcePackage folder in your project, copy/paste the Bootstrap folder and rename it.
Going Into Details
Now that you know how the presentation layer is structured, let’s take a deep dive into each aspect of it and see how all of them work within a sample project.
Templates
If you’re wondering why you copy/paste the Bootstrap folder, it’s because you have to keep the same folder structure and it is easier to reuse everything from Bootstrap instead of starting from scratch.
Here is the folder structure to follow for your template to appear in the BackEnd.
Convention:
ResourcePackages\[MyPackage]\MVC\Views\Layouts\[MyLayout.cshtml]
Follow the path and you will find a default.cshtml file in the “Layouts” folder. Rename it to “MyLayout” and open the BackEnd. Keep in mind that those layouts are rendered by the Razor engine and any Razor markup is valid (e.g Html.SfPlaceHolder("HeaderPlaceholder") renders a placeholder for menu widgets). This should be the result:
You can read about another approach here.
There’s one more thing to cover about templates: how to create the small layouts available on each page.

To create a new Grid Widget you need to create a .html file in the following folder:
Convention:
ResourcePackages\[MyPackage]\GridSystem\Templates\MyGridWidget.html
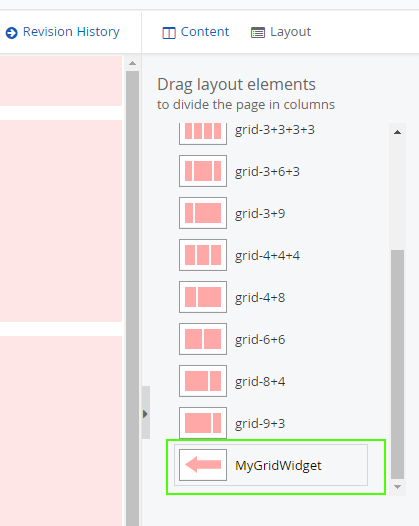
The quickest way to understand how the Grid Widgets work is to copy/paste an existing one and start playing with it:

Result:
You can find more information here.
Custom Widgets
The custom widgets use the controller/view/model pattern from MVC. Let’s create a HelloWorld controller. Go to the MVC folder and add it in the controllers’ folder. Also add a model and a view. In order to view your widget in the toolbox in the BackEnd, you need to mark your controller with the ControllerToolboxItem attribute.
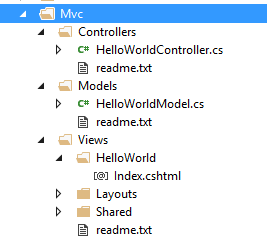
Here is the code for a reference:
[ControllerToolboxItem(Name = "HelloWorldWidget", Title = "HelloWorld Widget", SectionName = "CustomMVCWidgets")]public class HelloWorldController : Controller{ // GET: HelloWorld public ActionResult Index() { var model = new HelloWorldModel(); model.Message = "Hello World"; return View(model); }}public class HelloWorldModel{ public string Message { get; set; }}@model SitefinityWebApp.Mvc.Models.HelloWorldModel<div> @Model.Message</div>Note: If you changed the name of a previously registered widget in the attribute definition, a new widget will be automatically generated in the toolbox in the BackEnd and the old one will remain. You need to remove it manually. You can find more information here.
Extend Existing Widgets
You can change existing widgets in two ways—via the presentation and the model layers.
Presentation Layer
To change the presentation layer, you need to open a physical file from the ResourcePackage folder, which holds the default implementation, and add our implementation. Open the following folder and look at what kind of files you have there.
Convention:
ResourcePackages\[MyPackage]\MVC\Views\
Here is how our folder should look like:
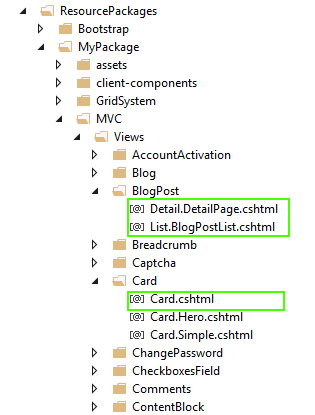
You basically have two types of widgets: lists with details and standard ones. The files with the “List” prefix are holding the implementation for the list type of widgets e.g. events, news, etc. The files with the “Detail” prefix are holding the detailed view of each item from the list.
Change some of the files and check out the difference in the BackEnd. Below is what the Card widget looks like with some text added:
Result:
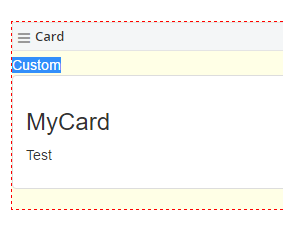
When you add only static HTML, you don’t need to build your solution, but otherwise you’ll need to. All of these view files are rendered by the Razor engine.
To create your own widget template, the best approach is to copy/paste an existing template and then modify and rename it. Keep in mind that you should keep prefixes in the names, otherwise the project will not recognize them as a new template option in the designer configurator.

Result:

You can find more information about this here.
Model Layer
You know how to change the presentation layer of existing widget, but this is not enough. Most of the time you’ll want to add new properties to the data model and visualize them in the view. This is possible but it requires some coding, and probably 10 minutes of your time. The point is that the model is fully extensible and you can create your own models and use them. Check out this sample showing how this can be done.
Widget Designers
Before we start with the widget designers, we need to understand which technologies they utilize. The implementation of each designer is in a Razor view and it uses the client-based frameworks AngularJS (1.x) and Bootstrap. We are able to extend the designers of existing widgets and create new ones for your custom MVC widgets.
Extend an Existing Widget Designer
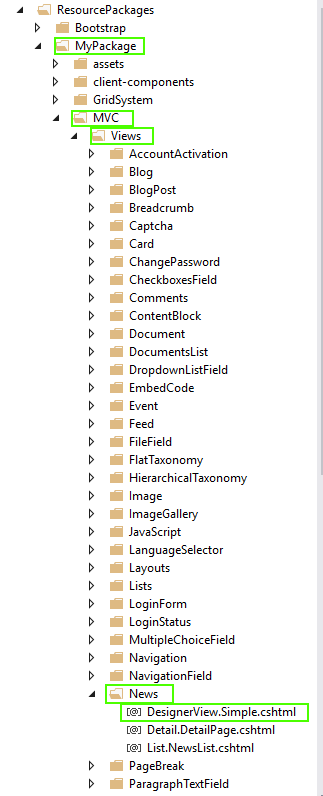
Here is the convention that we need to follow to apply a new implementation of an existing widget.
Convention:
ResourcePackages\[MyPackage]\MVC\Views\[WidgetName]\DesignerView.[ViewName].cshtml
Or
Convention:
MVC\Views\[WidgetName]\DesignerView.[ViewName].cshtml
The best way to extend the widget designer is to get its implementation from the source code, copy/paste it and add our custom code.
You can find the source code of all widgets here.
The other solution is to go in the Bin folder of your project, find the .dll for the respective widget, decompile it with JustDecompile and see the embedded resources.
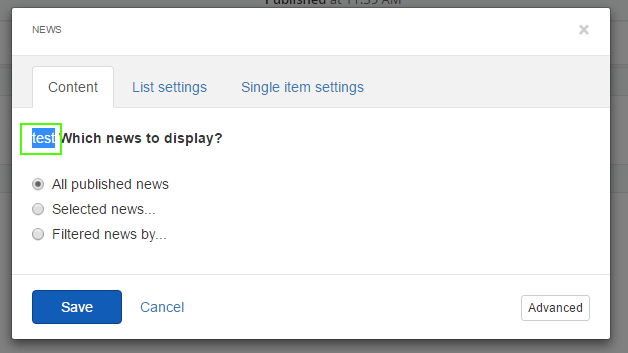
Let’s create a quick demo showing how this can be achieved. Grab the source code for the News designer here and paste it into our project, following one of the above conventions.
I added custom text to the designer and here is the result in the BackEnd.
Result:
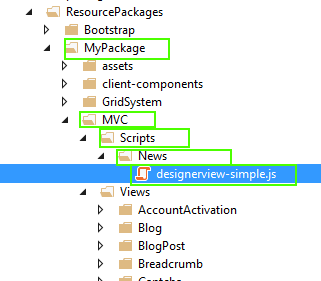
To extend both the appearance of the designer and its logic, you need to get its AngularJS implementation, then put it in your project and change it. This is the convention that you need to follow:
Convention:
ResourcePackages\[MyPackage]\MVC\Scripts\[WidgetName]\DesignerView-[ViewName].js
Or
Convention:
MVC\Scripts\[WidgetName]\DesignerView-[ViewName].js
Similar to the sample above, the screenshot below is how this would look in your project. The source code was obtained here.
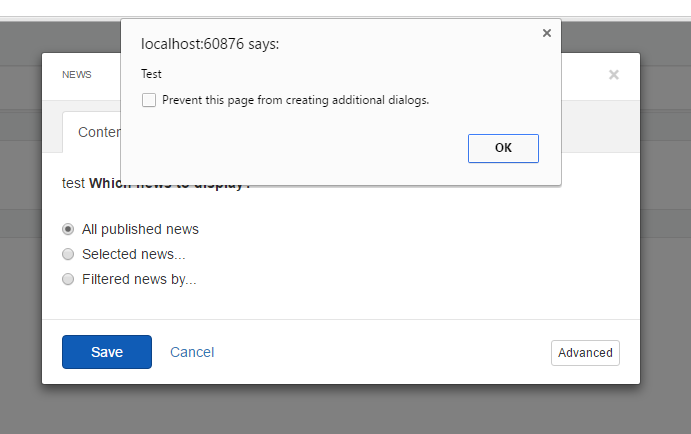
I added one alert message for the sake of test:
In the documentation you can find more details about how to extend the widgets. Keep in mind that the best recommendation is to use the source code of the MVC widgets as a reference—that way you will be using the latest version that is fully tested.
Custom Widget Designers
Here you use the same folder and file structure:
Convention:
MVC\Scripts\[WidgetName]\DesignerView-[ViewName].js
The first thing that comes to everyone’s mind is “How do I connect fields from my designer to my controller?” Here is a sample how this can be done.
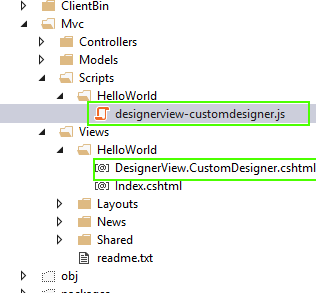
And here is the code:
HelloWorldController.cs
[ControllerToolboxItem(Name = "HelloWorldWidget", Title = "HelloWorld Widget", SectionName = "CustomMVCWidgets")]public class HelloWorldController : Controller{ public string Message { get; set; } // GET: HelloWorld public ActionResult Index() { var model = new HelloWorldModel(); model.Message = Message; return View(model); }}designerview-customdesigner.js
angular.module('designer') .controller('CustomDesignerCtrl', ['$scope', 'propertyService', function ($scope, propertyService) { $scope.feedback.showLoadingIndicator = true; // Get widget properies and load them in the controller's scope propertyService.get() .then(function (data) { if (data) { $scope.properties = propertyService.toAssociativeArray(data.Items); } }, function (data) { $scope.feedback.showError = true; if (data) { $scope.feedback.errorMessage = data.Detail; } }) .finally(function () { $scope.feedback.showLoadingIndicator = false; }); $scope.$watch('message', function (newValue, oldValue) { if (newValue) { var timeStamp = new Date(); $scope.properties.Message.PropertyValue = newValue + " " + timeStamp.toString(); } }); }]);DesignerView.CustomDesigner.cshtml
<div> <label>Your Message: </label> <input type="text" ng-model="message" /></div>To make things easier, Sitefinity offers a bundle of client components that you can use to speed up your development when it comes to widget configurations. You can find more information about them here.
Summary
We’ve now gone through the major MVC capabilities of Sitefinity. The presentation layer is the place where you’ll heavily invest your time. Working with a convention based framework, it is easy to start developing without any additional configurations and registrations. Follow the patterns, and if something is not clear, open the existing implementations and review the code. Try to reuse and extend the default widgets as much as possible. If something does not satisfy your needs you always have the option to develop everything from scratch.
Happy coding and enjoy your exploration into Sitefinity MVC/Feather!

