Configure Connect for JDBC MongoDB driver with JBoss EAP 6.4

Step-by-step instructions on how to easily integrate and configure Connect for JDBC MongoDB driver 6.0 with JBoss EAP 6.4.0.
This is the latest from our tutorial rumble where our engineers put their heads together and thought of ways to help our customers succeed. Don't see the tutorial you need? Contact us and we will be glad to help.
The set up steps detailed and demonstrated below are for a Windows machine. The 4 main steps include:
- Download and Install Mongo JDBC 6.0 driver
- Download and Install JBoss EAP 6.4.0
- Register the MongoDB driver jar with JBoss EAP 6.4 and Install JDBC Driver as a Core Module
- Add, register, configure, enable and test connect the data source in the JBoss Administration Console
Lets Get Started
While the focus is on MongoDB here, the same steps apply to any of the data sources that Connect for JDBC supports.
JBoss EAP 6.4.0 is the Enterprise version of JBoss AS Wildfly 7.5.0 (so internally most of its components are the same as JBoss AS 7.5.0 ). The configuration steps will also apply to JBoss AS Wildfly 7.5.0.
- Download and Install Mongo JDBC 6.0 driver from https://www.progress.com/jdbc/mongodb
- Run PROGRESS_DATADIRECT_JDBC_INSTALL.exe as Administrator

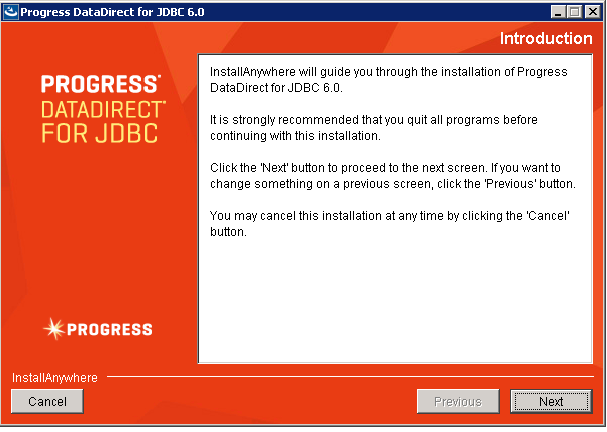
- Install the driver either as EVAL or licensed installation into C:\Program Files\Progress\DataDirect\JDBC_60
- Run PROGRESS_DATADIRECT_JDBC_INSTALL.exe as Administrator
- Download and Install JBoss EAP 6.4 in location C:\jboss\EAP-6.4.0
- To start JBoss Server run standalone.bat in the location C:\jboss\EAP-6.4.0\bin
- To access the JBoss Administration Console, open a browser and use this link: http://localhost:9990/console/App.html
- Login with Username and Password (In my case it was set to UID = admin, PWD = passw0rd! )
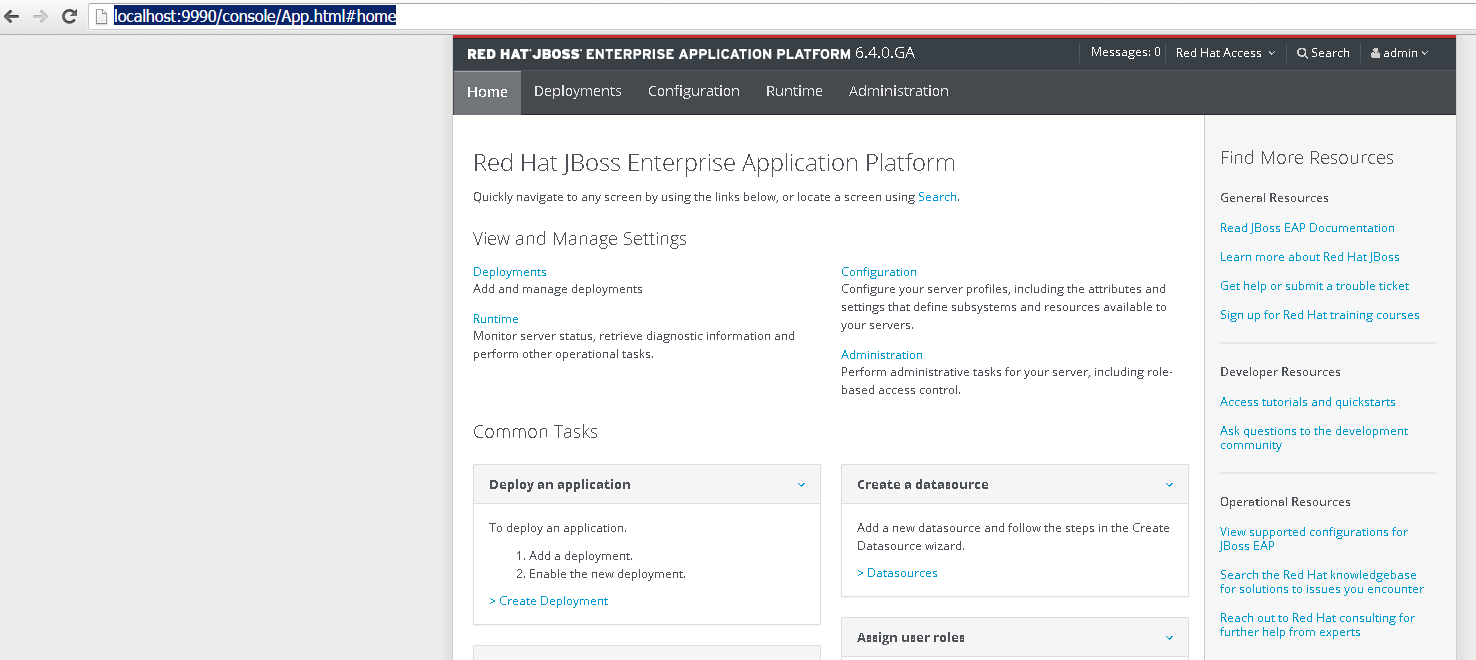
- You should see a screen as below:
- Now stop the server by running Management CLI jboss-cli.bat located in C:\jboss\EAP-6.4.0\bin
- Type connect
- Type shutdown
- This command will shutdown the server

- Register the MongoDB driver jar with JBoss EAP 6.4 and Install JDBC Driver as a Core Module
- Navigate to location C:\jboss\EAP-6.4.0\modules. Create a folder com. Within it create a folder mongodb. Within this create a folder main.
- Copy the mongodb.jar from C:\Program Files\Progress\DataDirect\JDBC_60\lib into C:\jboss\EAP-6.4.0\modules\com\mongodb\main
- Create a file module.xml with the following contents in C:\jboss\EAP-6.4.0\modules\com\mongodb\main
<?xmlversion="1.0"encoding="UTF-8"?><modulexmlns="urn:jboss:module:1.0"name="com.mongodb"><resources><resource-rootpath="mongodb.jar"/></resources><dependencies><modulename="javax.api"/><modulename="javax.transaction.api"/></dependencies></module> - Location C:\jboss\EAP-6.4.0\modules\com\mongodb\main should look like the screenshot below:

- Start the Server [standalone.bat]
- Start the Management CLI [ jboss-cli.bat]. Type connect.
- Run the following CLI command to add the JDBC driver module as a driver:
/subsystem=datasources/jdbc-driver=mongodb:add(driver-name=mongodb,driver-module-name=com.mongodb,driver-xa-datasource-class-name=com.mongo.jdbc.jdbc2.optional.MongodbXADataSource)
GENERAL SYNTAX/ FORMAT of the CLI command is as indicated below: /subsystem=datasources/jdbc-driver=DRIVER_NAME:add(driver-name=DRIVER_NAME,driver-module-name=MODULE_NAME,driver-xa-datasource-class-name=XA_DATASOURCE_CLASS_NAME)
- Add, register, configure, enable and test connect the data source in the JBoss Administration Console
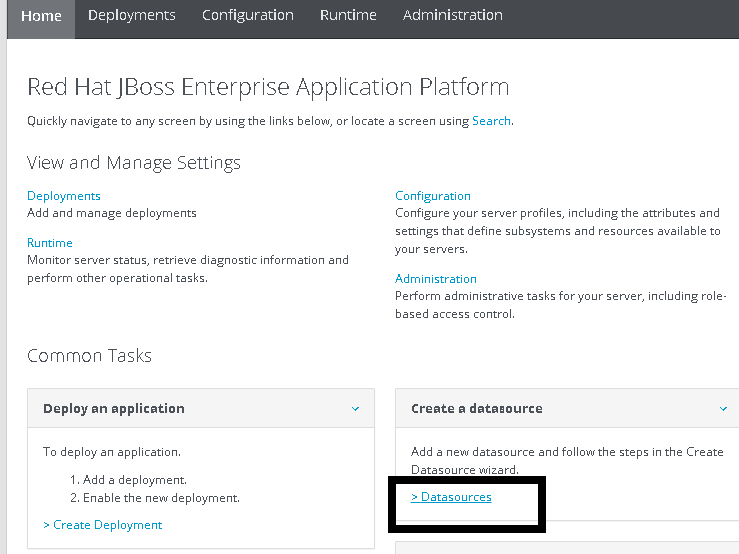
- On a browser go to http://localhost:9990/console/App.html, login using username and password and click on Datasources link
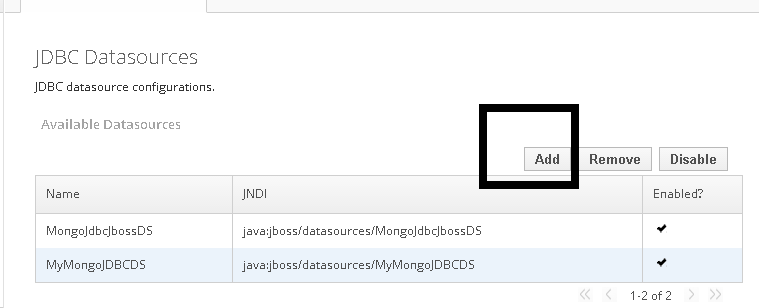
- Click on Add button
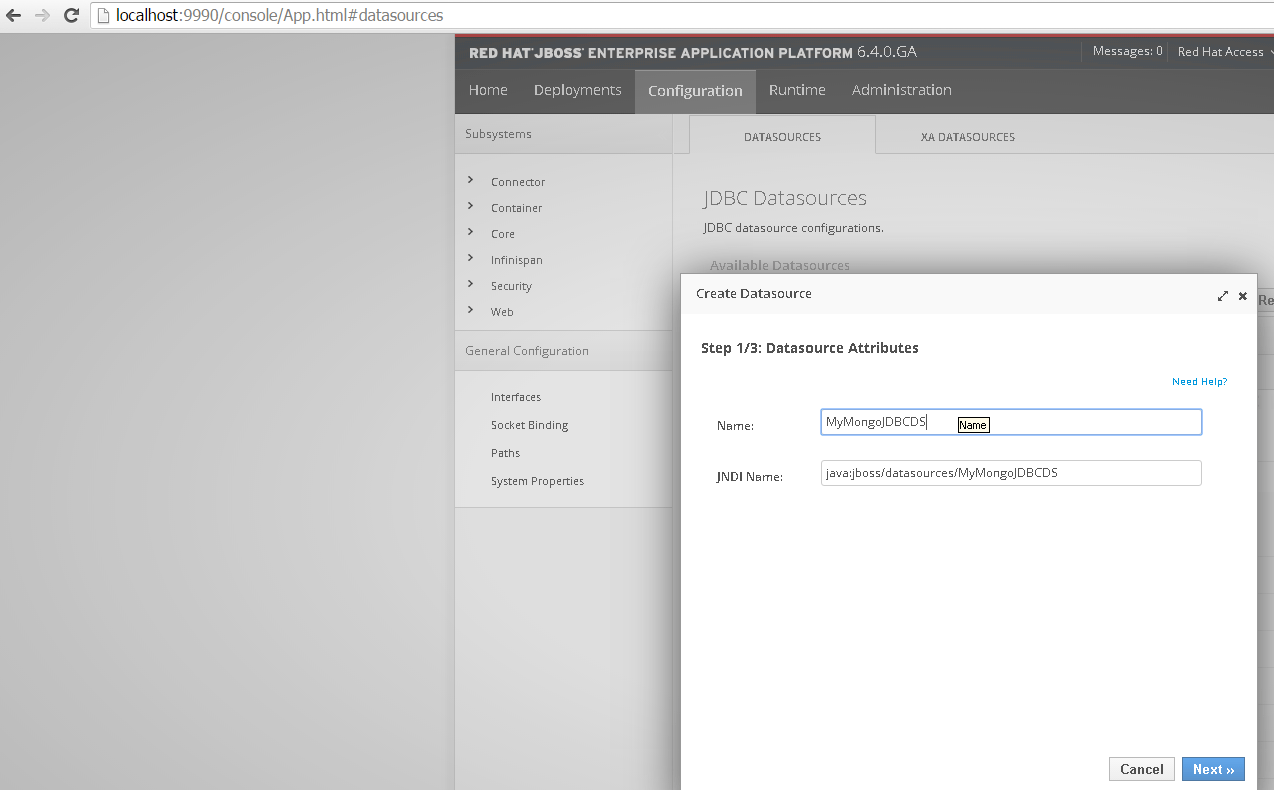
- Give the Datasource a name and JNDI Name:
Example:
Name—MyMongoJDBCDS
JNDI Name—java:jboss/datasources/MyMongoJDBCDS
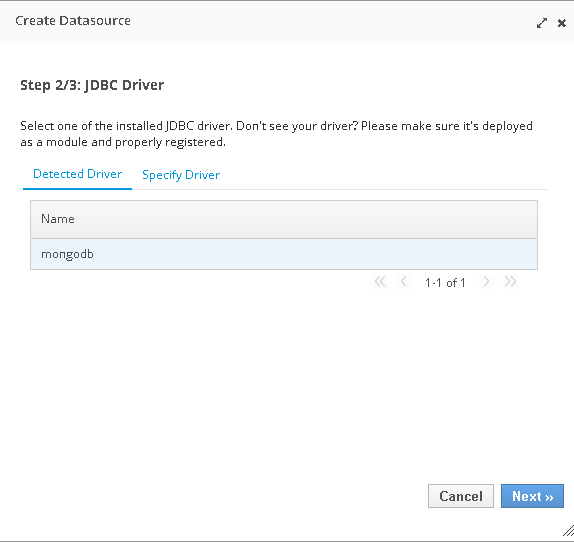
- Select mongodb driver that is detected [This is the driver we registered in Step 3]
- Provide the Connection URL and Username and Password
Example: Connection URL: jdbc:datadirect:mongodb://<Machinename>:<port>;schemaDefinition=<User_Specified location>
Username and Password required to connect to the MongoDB database
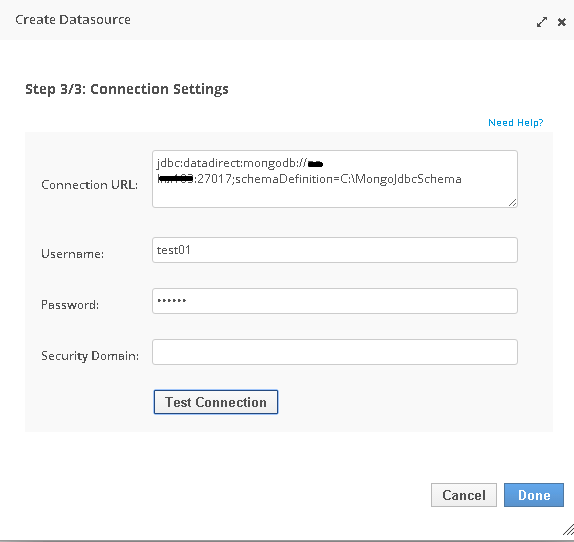
The screenshot here shows that the schemaDefinition location is specified as C:\MongoJdbcSchema.

This will create the .map, .properties, .script, .config and .native files in location C:/ as shown in screenshot below with the suffix MongoJdbcSchema
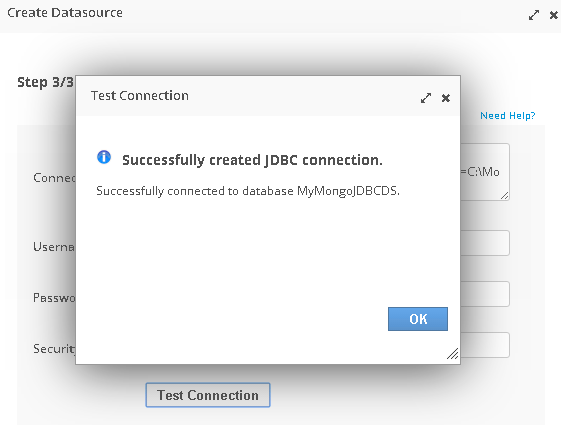
- Click on the Test Connection button. This should show successful. Click OK.
- Enable the datasource
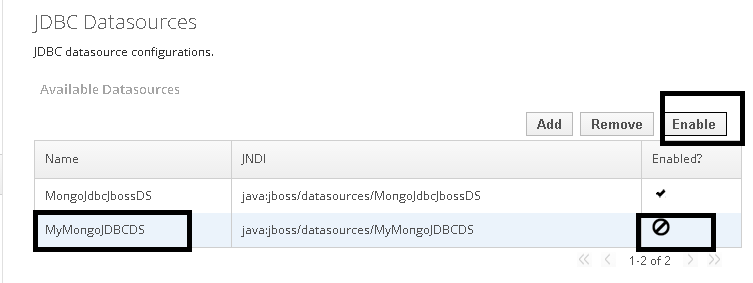
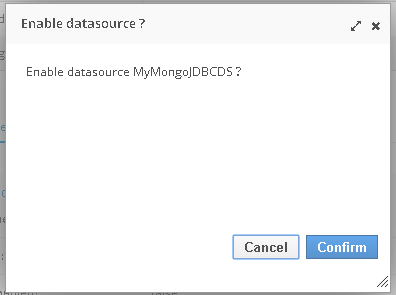
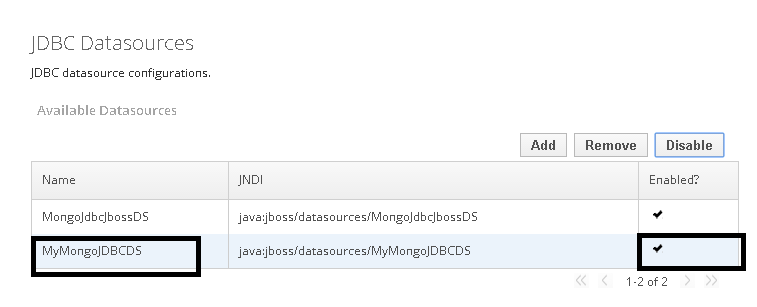
- You can edit the datasource by choosing edit link. Make the configuration changes and hit save
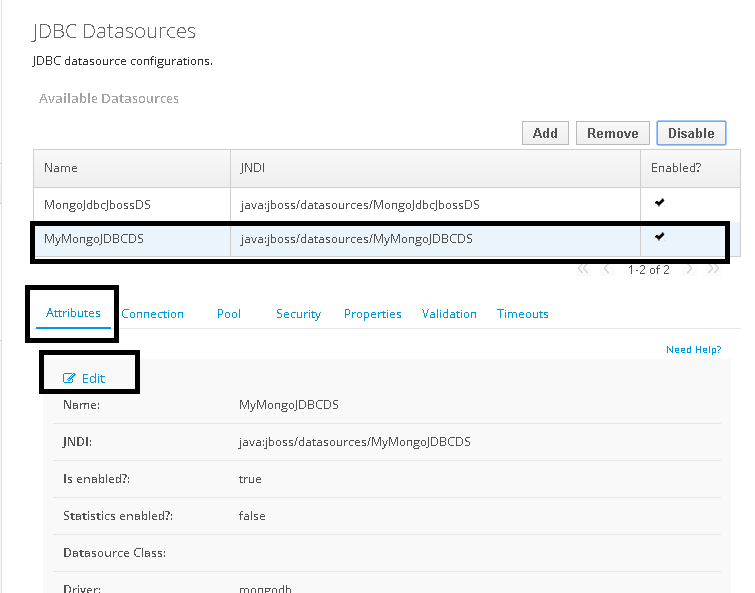
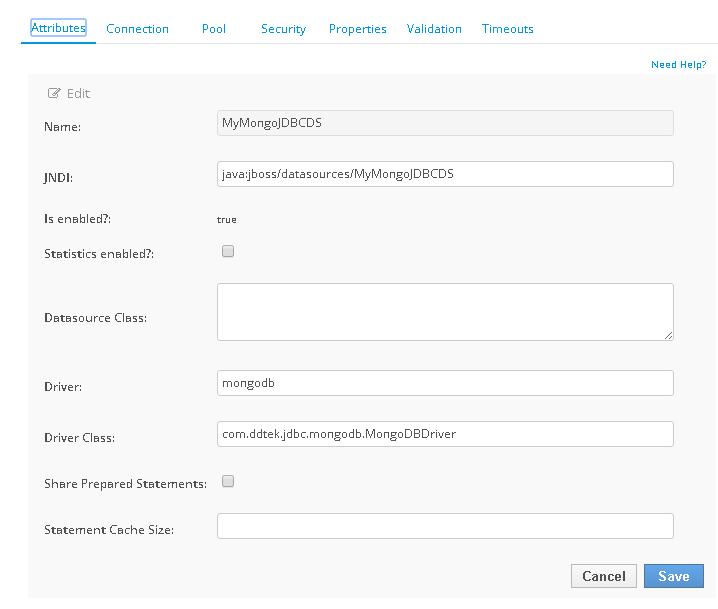
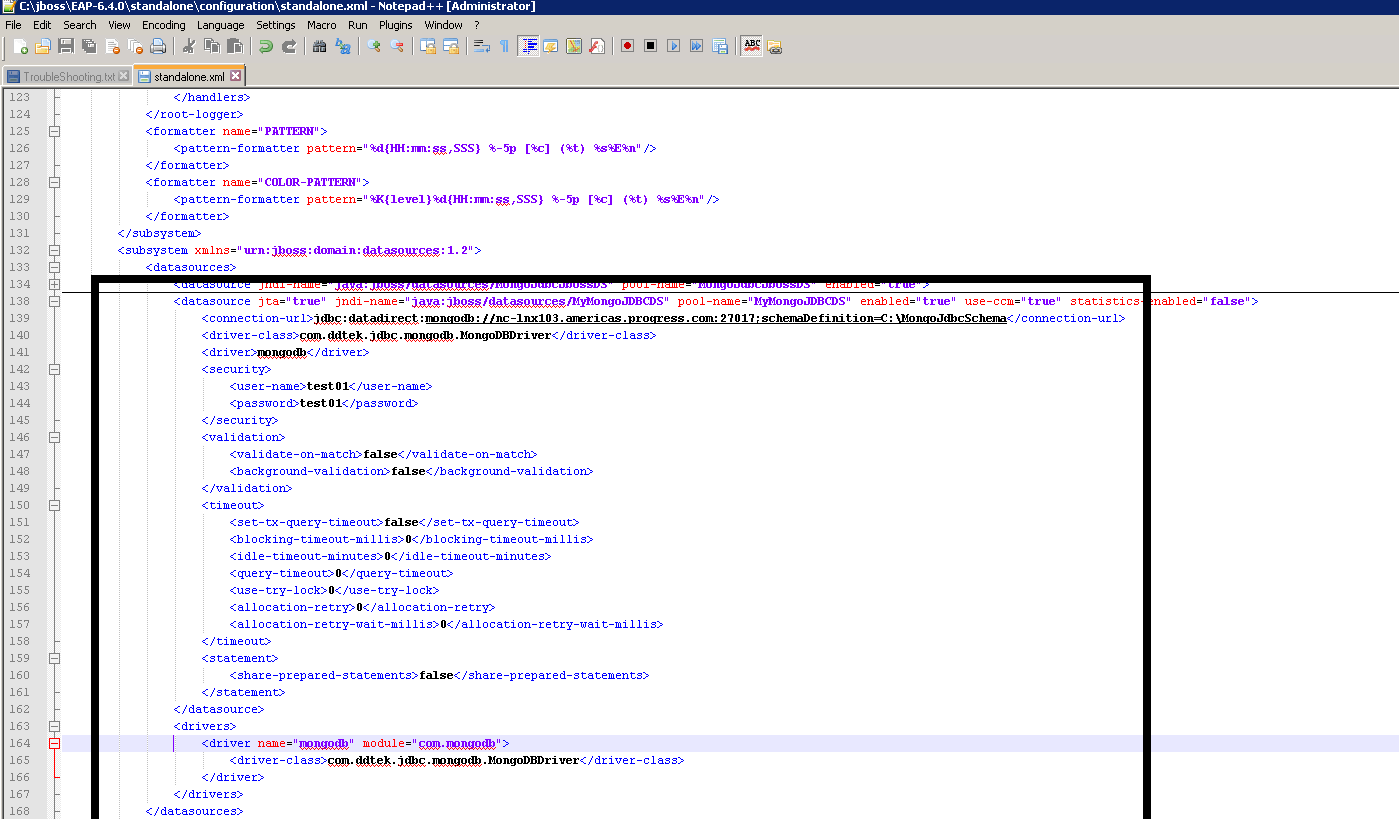
- These configuration values specified in the Admin Console for JBoss are stored in the standalone.xml located in C:\jboss\EAP-6.4.0\standalone\configuration
You may choose to directly edit the standalone.xml directly to make changes to the datasource instead of using the Admin Console GUI
Screenshot of the standalone.xml below:
- The next time you start the server you should see this in the command window:

- On a browser go to http://localhost:9990/console/App.html, login using username and password and click on Datasources link
All Finished
MongoDB connectivity via JDBC or ODBC is easier than ever with DataDirect JDBC and ODBC connectors for MongoDB. They provide fast SQL access to business critical data while also enabling you to access NoSQL data without additional server installations. Integrate your MongoDB data without having to duplicate data or flatten complex documents. Visit our information page to learn more or try it free for 15 days.
Try Now—JDBC
Try Now—ODBC

Jan Krishnamurthy
Jan is a Sr. Support Engineer at Progress. She is responsible for assisting Progress customers and application partners solve technical issues by providing efficient and effective technical support. She has background in the areas of Business Rules, Database Drivers, Business Process Management, Complex Event Processing.
