Upgrading Sitefinity 4 Websites

The content you're reading is getting on in years.
This post is on the older side and its content may be out of date.
Be sure to visit our blogs homepage for our latest news, updates and information.
One of the most helpful features of the new Sitefinity 4 Project Manager is the built-in ability to update projects to the latest version. Now that the SP1 update has been released, this helpful guide should walk you through the process of using the Project Manager to ensure all your sites are up to date.
Overview
When upgrading a website via the Project Manager, it will update only the website files and binaries (DLL) within your project; It does not perform any changes or updates to the site database.
After you upgrade the website, launching it for the first time is when it will automatically execute an upgrade to the database. This takes only a moment as is done in place, after which your website upgrade is complete!
Follow these simple steps to get started.
Step 1: Backup
Although every effort has been made to ensure maximum compatibility and effortless updating, it is always good practice to have a backup of your work.
Both the live server and your development project as well as their related databases should be backed up before upgrading so that you can easily restore if necessary.
Restore this backup to a development or staging server. This way you can apply the update and test its results locally before publishing the upgrade to your live server.
Step 2: Download the Updated Project Manager
All Sitefinity releases are available in two forms: the standalone Project Manager and the full SDK, both available in your Sitefinity account.
The SDK download is only required to update your existing SDK installation. If you have never run the SDK installer, you only need to download the Project Manager.
![Sitefinity-4-Project-Manager-Downloa[1]](http://www.sitefinity.com/docs/metabloglib/Windows-Live-Writer-Upgrading-Sitefinity-4-Websites_8042-Sitefinity-4-Project-Manager-Downloa_1__2.png?sfvrsn=d52e4fcf_0 "Sitefinity-4-Project-Manager-Downloa[1]")
The SDK installer will also install an updated version of the Project Manager. However, this is generally installed to the path %PROGRAMFILES%\Telerik\Sitefinity 4.0. If the project manager you use for your Sitefinity projects is elsewhere, be sure to update that copy with the latest version.
Run the updated Project Manager and verify the Sitefinity version number in the title. This should match the version number from the file you downloaded as mentioned above.
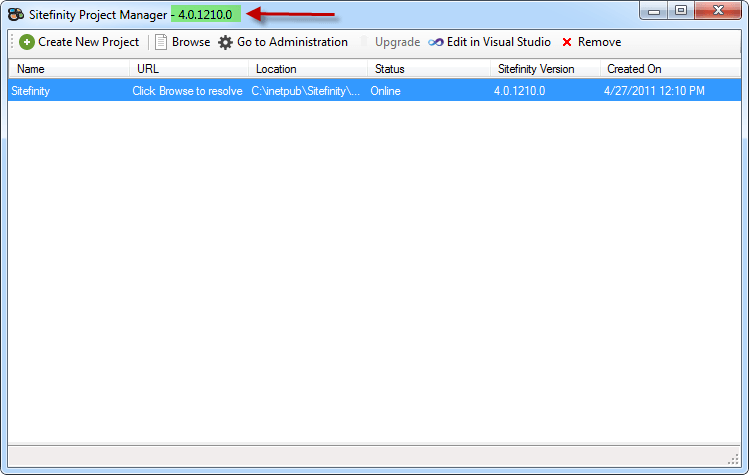
If your project is in the list, you are ready to move on to step 2 below. If it is not in the Project Manager, or if your Project Manager is blank, read on for how to register your existing project for updating.
Add Existing Project to Project Manager
In some cases, your Sitefinity project may no longer be available in the Project Manager. This will certainly be the case if you deleted the project manager after creating your project, since it is only required for creation of a new site.
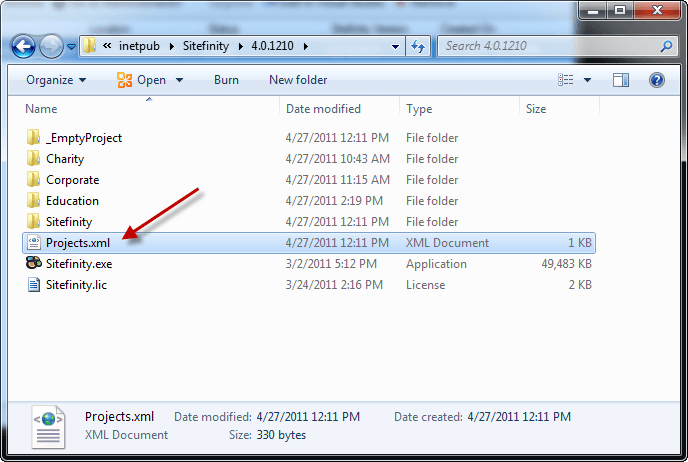
Fortunately, the Project Manager uses a simple XML file to populate its list of projects. This file is automatically created upon creation of the first project.
To add your existing project, simply copy a complete <project> node and paste it in the list of project nodes. The order of the nodes matches the order listed in the Project Manager, but it is not important which order you place it.
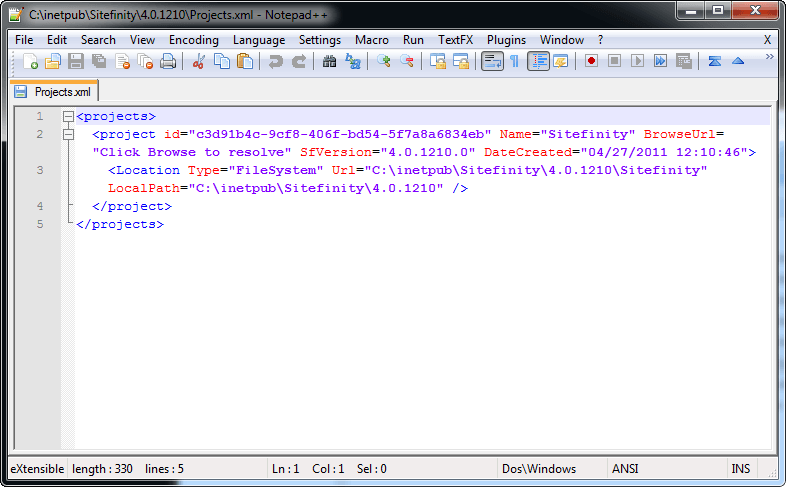
Note: be sure to modify the project id since it is required that this value be a unique guid. You can either use an online guid generator tool, or simply modify a few characters from the pasted project so that it is unique.

If there is no Projects.xml file, simply create a dummy blank project and it will be created automatically. Then modify the generated XML to point to the location of your project.
When you’re finished modifying the XML file, restart the Project Manager to see your added project.
Future releases of the Project Manager will support adding projects through the user interface so that this manual process can be simplified.
Step 2: Upgrade!
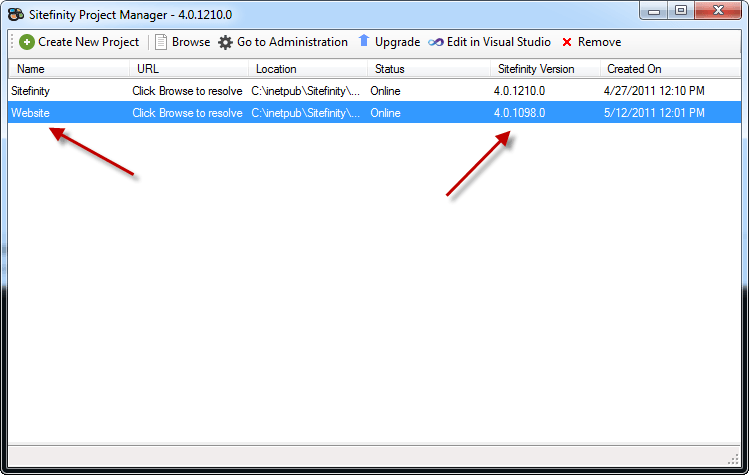
If the Sitefinity Version property of your project is lower than the version of the Project Manager, you will see the “Upgrade” button enabled when you select it.
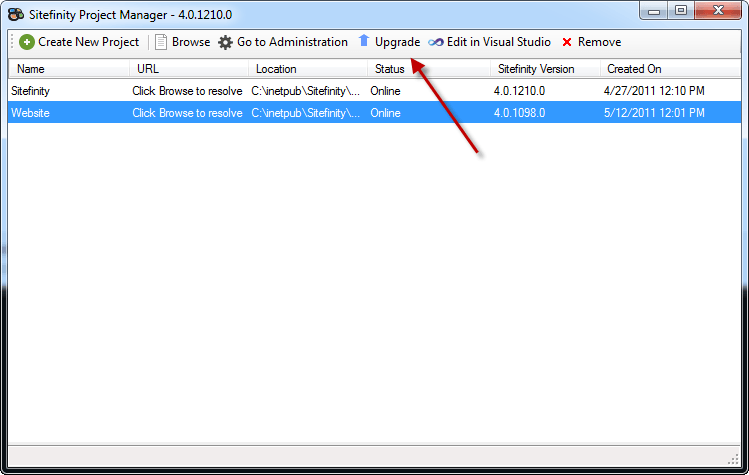
Click the upgrade button and let the Project Manager work its magic. When complete the version numbers will match, and you can now open your project in Visual Studio (or however your development environment is setup) for testing.
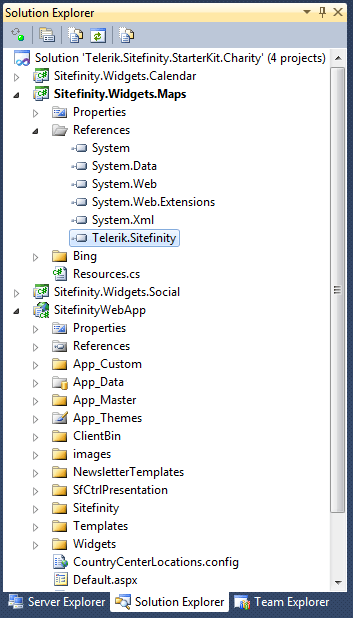
Upgrade External Project References
If you have developed any custom libraries that reference Sitefinity, be sure to update the references in that project to match the version for your website. Otherwise you will encounter an error such as:
'The located assembly's manifest definition with name 'Telerik.Sitefinity' does not match the assembly reference.'
Be sure to update the referenced assemblies to match that of your updates site before rebuilding and deploying them to your webserver.
Step 3: Deploy
Once you’re satisfied with and have thoroughly tested the update, you’re ready to push your changes back to the live server. Upload your updated website project, excluding the configuration folder at ~/App_Data/Sitefinity/Configuration then launch your site. This will update your production database and you’re done!
IMPORTANT NOTE: When uploading your project, be sure that you do not upload the configuration folder located at ~/App_Data/Sitefinity/Configuration. The upgrade tool updates this folder automatically when you upload your updated project. If you push your already-updated configuration folder, the upgrade will not execute, and your production database will not be updated.
Additional Note: If permissions on your web server prevent you from running the database upgrade in place, an alternative is to copy the updated local database over to the live server. However, be sure that you verify that data is not lost between the time you upgrade and when you publish.Get Started
A service pack for Sitefinity 4 has already been released, so visit your Sitefinity account and download it now. Be sure to remember to backup both your project and your database before applying the update.
As always, your feedback and experiences are welcome via our Sitefinity discussion forums.
