Upgrading from the Sitefinity 4.0 BETA1 to the BETA2

The content you're reading is getting on in years.
This post is on the older side and its content may be out of date.
Be sure to visit our blogs homepage for our latest news, updates and information.
 Yesterday the Sitefinity team released the Sitefinity 4.0 BETA2. This latest pre-release build of Sitefinity 4.0 includes support for .NET 4.0, new taxonomy options and lots of additional polish. If you haven’t already, be sure to download this latest release.
Starting with BETA1 release of Sitefinity 4.0, we’re now maintaining a migration path from these pre-release builds to the official Sitefinity 4.0 release. This enables early adopters to begin building new web sites on Sitefinity 4.0 today.
In this blog post I’ll demonstrate how to upgrade a Sitefinity 4.0 BETA1 web site to the latest BETA2 release. Similar instructions can be used to upgrade from the BETA2 to the RC (when it is released), and finally to the official release.
As with any Sitefinity upgrade, be sure to backup your data.
Upgrading Sitefinity - the easy way
Sitefinity 4.0 downloads as a ZIP file containing a single self-contained EXE file. This EXE file, when double-clicked, opens Sitefinity’s new Project Manager. This Project Manager can not only be used for creating new projects, it can also be used to upgrade existing projects.
To upgrade your Sitefinity project using Sitefinity 4.0 Project Manager:
1. Download and unzip the Sitefinity 4.0 BETA2
2. Copy the sitefinity.exe to the folder where the BETA1 exe is contained:
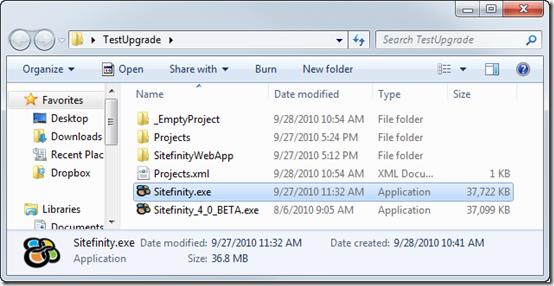
3. Double-click the Sitefinity.exe to load Sitefinity’s Project Manager
4. Select the project to be upgraded.
5. Click the Upgrade button
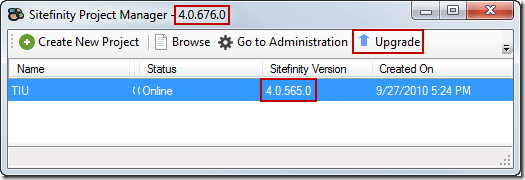
Sitefinity will now open a license window. This feature is not fully implemented in the BETA2.
6. Click Cancel to exit the license window
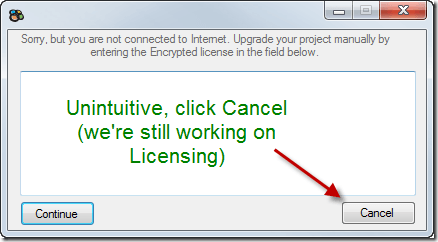
You’re finished. Despite clicking Cancel, Sitefinity’s Project Manager will upgrade the selected project.

Upgrading Sitefinity - the other easy way ;)
The upgrade procedure described above assumes that you’re active using the Sitefinity 4.0 Project Manager to manage your Sitefinity projects. However, many developers (myself included) will use the Project Manager to create new projects, but then migrate these projects to other locations (source-control). Once the project is migrated, it’s difficult to use the Project Manager to upgrade the project.
Thankfully it’s very easy to manually upgrade a Sitefinity project. Below are these instructions:
1. Download and unzip the Sitefinity 4.0 BETA2
2. Use the Project Manager to create a new (fresh) project
3. Open the _EmptyProject folder created by the Sitefinity 4.0 Project Manager
4. Select all the files in this folder
5. Right-click and click Copy
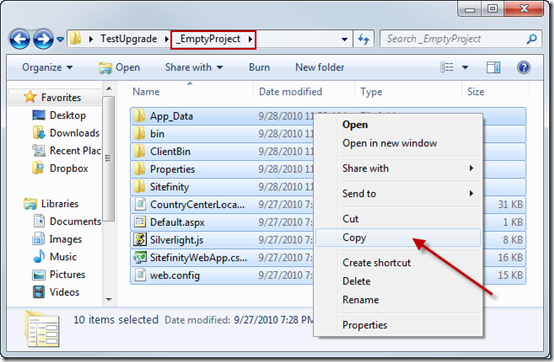
6. Navigate to the folder of the project to be upgraded
7. Right-click and click Paste
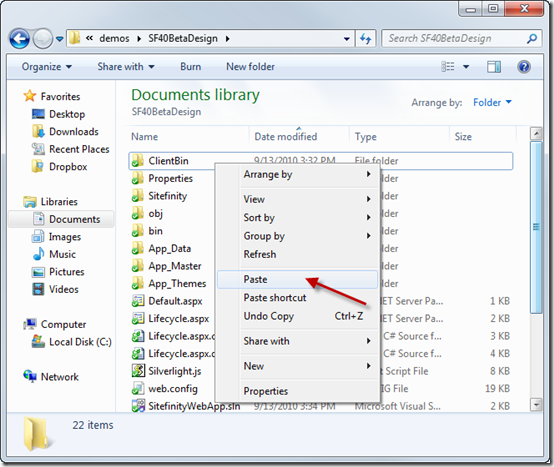
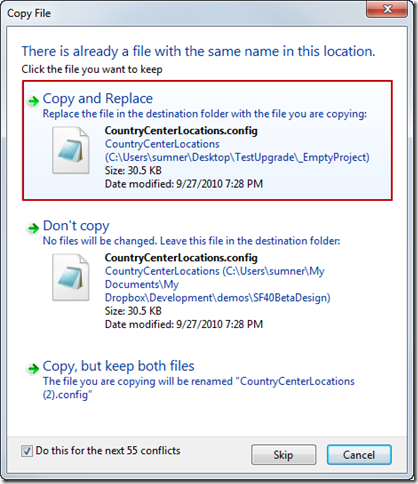
8. Overwrite all the files in this directory ** see note below
Creating bullet proof upgrades
A few months back, I wrote a blog post that describes the work done by the Sitefinity Team to ensure upgrades go smoothly. Our goal was to create a reliable 1-click upgrade experience. Because Sitefinity embeds almost all files in the assemblies and removed Sitefinity configuration from the web.config it is very unlikely that upgrades will overwrite your customizations.
Be sure to read this blog post for more details.
Give it a try and be sure to report your results.

