Skinning the Sitefinity Navigation

The content you're reading is getting on in years.
This post is on the older side and its content may be out of date.
Be sure to visit our blogs homepage for our latest news, updates and information.
Ever seen a website with no navigation? I certainly haven’t. It’s an essential element in every website and there’s a golden rule that the navigation has to be visually appealing and has to really do the job of helping your visitors find their way through your website easily. Sitefinity helps you create your website navigation easily and quickly thanks to the Navigation Widget, which actually wraps around several of the well known Telerik ASP.NET AJAX RadControls - specifically the RadMenu, RadPanelBar, RadTreeView, RadTabStrip and RadSiteMap.
Changing the appearance of these controls is quite easy and as the numerous developers and designers who use them worldwide know, only sky is the limit for what appearance you can achieve with them. There are several approaches that one can take.
Changing the appearance of the Sitefinity Navigation using the embedded skins
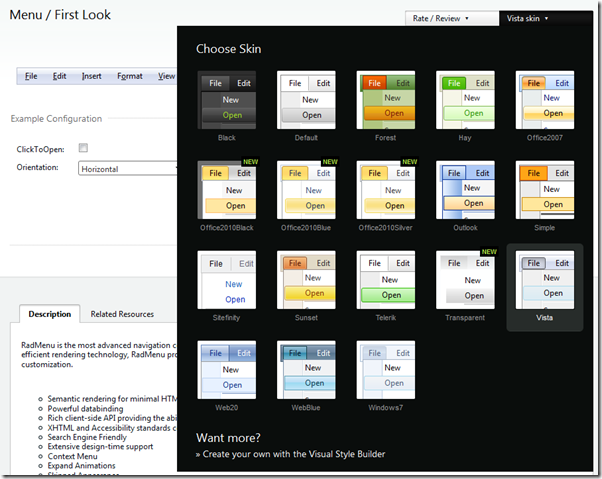
The navigation controls, that are wrapped in the Sitefinity Navigation widget, being a part of the Telerik ASP.NET AJAX RadControls Suite, have their own documentation, samples and demos. There are plenty of resources that illustrate how you can customize and skin them, as well as give detailed information about the different skins that are embedded into each control:
“Embedded” means that those skins ship out of the box with the controls and consequently with Sitefinity, so you can switch to and between them right away. Doing so is pretty easy:
Step 1. Drag and drop your Sitefinity Navigation widget on your page or page template

Step 2. Click on the Edit button and select the desired behavior of the widget: 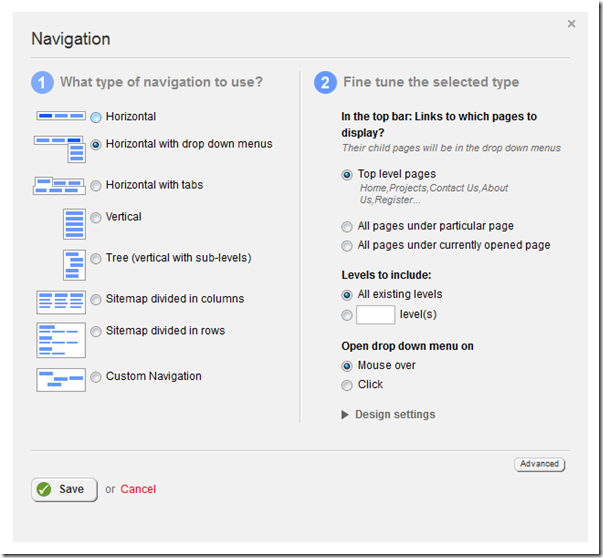
By now your widget would look something like this:
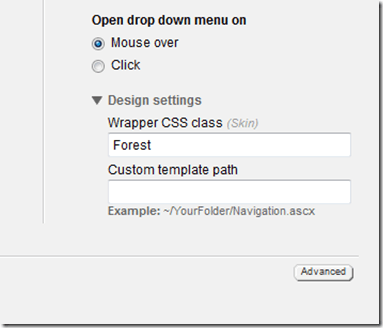
Now, you can open the Design settings, visible on the screenshot of the widget designer above, and add the name of the desired embedded skin in the field “Wrapper CSS Class”. As mentioned, listing of the skins and their names can be obtained in the demo or documentation pages of the RadControls:
The result:
Horizontal Navigation:
Horizontal navigation with dropdown menus:

Horizontal navigation with tabs:

Want to go even further? Create a custom skin using the Visual Style Builder!
The Telerik Visual Style Builder is an absolutely free-to-use tool that you can use to create custom skins from scratch or based on one of the existing embedded ones without touching a single line of CSS. Todd Anglin demonstrates how to use it in a video here. It is easy to use and it lets you customize different RadControls in the same time.
Step1. Set a skin name (that is an important step that will be used shortly afterwards)
Step 2. Choose which controls you would like to skin
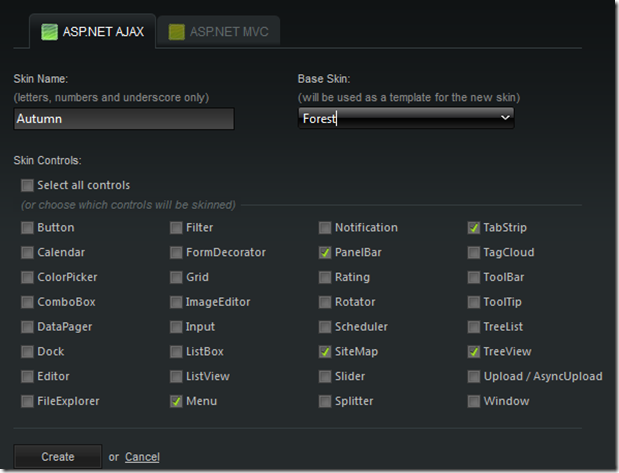
Step 3. Click Create
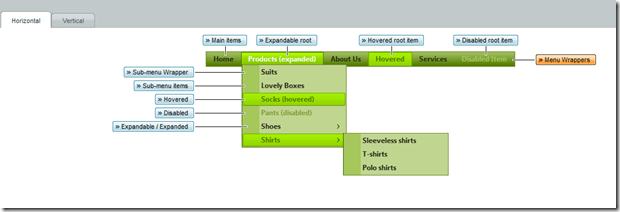
Here, in accordance with the explanations that you got from Todd’s video, you can change base colors, change hue, saturations and fine tune all the elements of your controls. Here are my own variations of the Forest base skin:
We are nearly there! Now we can click on the download button and will get a ZIP file which contains our Navigation Widget templates:
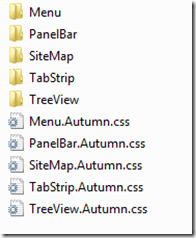
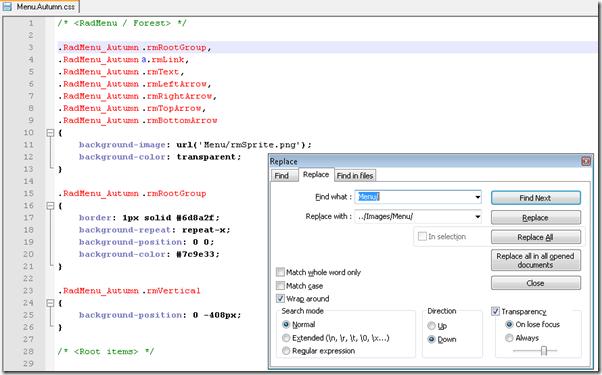
These are the cascading style sheets that would skin our navigation and the folders contain any images that the skins use (depends on what you created with the Visual Style Builder). You can just copy all of these in the Global folder of your website theme, or if you would like to make your theme consistent with the recommended practices from the designer guide, you can move the images to the Images folder and correct the path to them from within the CSS files:
That’s it! As you might have noticed above, the skin name that we set in Step 1 now exists in our CSS as part of the CSS classes (i.e. RadMenu_Autumn). For Sitefinity, this is actually a wrapper CSS class, so we can easily just put Autumn in the Wrapper CSS class field and start using the skin we just created:

Geeks-R-Us
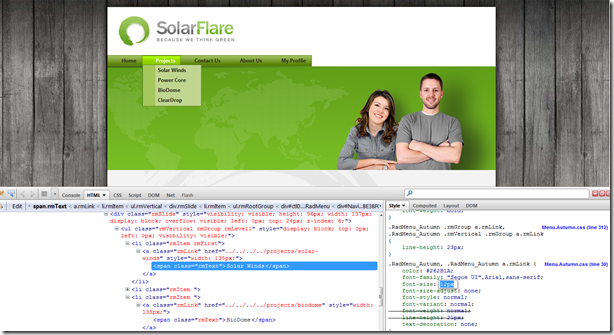
Those of you who strive for maximum perfection are always welcome to make final adjustments directly in the CSS files. You can always refer to the ASP.NET AJAX controls documentation to find out about the CSS classes the controls use. I personally find it really convenient to use browser features like Mozilla’s Firebug add-on to experiment and fine tune my styles and then introduce the changes into my CSS:
And there you have it! A streamlined way to professionally create a sleek navigation skin with minimum effort!

