
The Progress MarkLogic Spark Connector is an Apache Spark intermediary tool that supports reading and writing data in MarkLogic Server. Apache Spark is a unified analytics engine for large-scale data processing. Many data analytics tools like Apache Spark require data in rows. MarkLogic Server stores data as documents, but the Connector combines the capabilities of Apache Spark and MarkLogic Server by transferring data in rows between each tool.
In this post, we will work through an example task to explore how the MarkLogic Spark Connector reads data by converting it from documents to rows. We will use Python scripts to retrieve data from MarkLogic and create a Spark DataFrame. This task will demonstrate how easily its efficient technology facilitates this operation with little MarkLogic expertise from the user.
Example Task: Retrieving Data from MarkLogic
In this section, we will create a Spark DataFrame by retrieving data from MarkLogic. Before you can start this task, you must download the Spark Connector and set it up by deploying an example application. Find the instructions here.
Initializing Spark
To begin, start Juypter Notebook and open a new kernel:
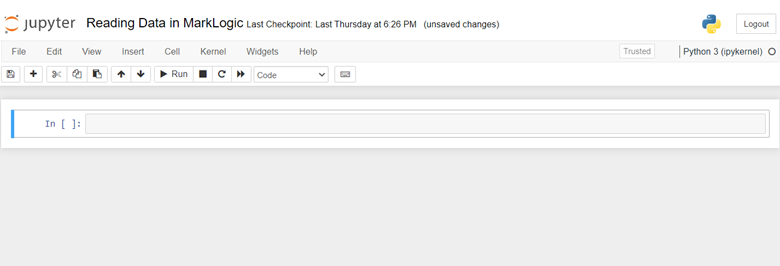
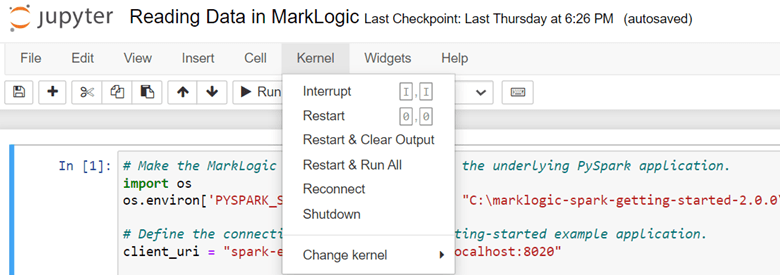
Run this script:
# Make the MarkLogic connector available to the underlying PySpark application.
import os
os.environ['PYSPARK_SUBMIT_ARGS'] = '--jars "C:\marklogic-spark-getting-started-2.0.0\marklogic-spark-connector-2.0.0.jar" pyspark-shell'

# Define the connection details for the getting-started example application.
client_uri = "spark-example-user:password@localhost:8020"

# Initialize a Spark session.
from pyspark.sql import SparkSession
spark = SparkSession.builder.master("local[*]").getOrCreate()
spark.sparkContext.setLogLevel("WARN")
spark
This script allows Jupyter Notebook to access the Spark Connector and initialize Spark. It returns the following output according to the configurations in the script.
Note: If Jupyter Notebook returns the error, “no module named ‘pyspark’,” run pip install pyspark in a new cell and try to run the script again. Also, to ensure Jupyter Notebook can find the
data source, set the .jar file to the absolute path as in the example above.
Optic Queries
The Spark Connector retrieves data from MarkLogic with an Optic DSL query. Optic is the primary query language of MarkLogic, able to process anything from a routine SQL-like query to a complex quest with various specifications. When MarkLogic receives a query, the Connector returns the data as rows. This makes the data instantly applicable to Apache Spark (which requires data in rows) without further input from the user. When the Connector retrieves the data from MarkLogic, it converts it into a Spark DataFrame.
Run this script:
# Load a DataFrame and view the first row.

df = spark.read.format("com.marklogic.spark") \
    .option("spark.marklogic.client.uri", client_uri) \
    .option("spark.marklogic.read.opticQuery", "op.fromView('example', 'employee', '')") \
    .option("spark.marklogic.read.numPartitions", 1) \
    .load()

df.head()
This script converts the employee document in MarkLogic to rows and produces a Spark DataFrame. The output shows the first row of data.
The MarkLogic Optic API supports multiple kinds of queries, from basic to document queries. The Connector’s advanced functionality removes any limitations to possible search queries. To access Optic queries that perform various functions, read about the Kinds of Optic Queries in our documentation.
Pushing Operations to MarkLogic
The Connector creates an efficient process by pushing down multiple operations to MarkLogic. By distributing the workload between Spark and MarkLogic, the entire operation performs more smoothly and gives Spark a lighter workload.
Run this script to view this process in action:
# Demonstrate several operations being pushed down to MarkLogic.

from pyspark.sql.functions import desc
df.filter("HiredDate < '2020-01-01'") \
  .groupBy("State", "Department") \
  .count() \
  .orderBy(desc("count")) \
  .limit(10) \
  .show()
This example task demonstrates how simply a user can download the Connector, run a query and load a Spark DataFrame by retrieving data from MarkLogic with a few Python scripts.
To learn more about how the Spark Connector accesses data from MarkLogic, visit Reading Data for more information. To test the scripts in the example above, visit our Jupyter Notebook file.
Note: If Jupyter Notebook returns an error message, restart the kernel and run the first script to initialize a new Spark session.
Other Spark Scripts
The Spark Connector can load data with different configurations to yield varied results. Instead of grouping the employee documents by "State" with a limit of "10" as with the last script, a user can group the documents by "City" in alphabetical order with a limit of "5."
Run this script:
spark.read.format("com.marklogic.spark") \
    .option("spark.marklogic.client.uri", "spark-example-user:password@localhost:8020") \
    .option("spark.marklogic.read.opticQuery", "op.fromView('example', 'employee', '')") \
    .load() \
    .filter("HiredDate < '2020-01-01'") \
    .groupBy("State", "Department") \
    .count() \
    .orderBy("State", "count") \
    .limit(5) \
    .show()
This script produces a new set of results according to the altered query parameters.
Conclusion
The MarkLogic Spark Connector supports reading and writing data, with additional functionality for Spark users. The example task demonstrates how simple it is to retrieve data from MarkLogic for use in Spark. With a few Python scripts, the user can access data from MarkLogic and create a Spark DataFrame. The Connector initializes a Spark session and uses the Optic DSL query language to convert the data in MarkLogic from documents to rows, making it instantly accessible for Spark users in their existing ecosystems. For additional efficiency, the Connector pushes down operations to MarkLogic, creating a faster process for the user. The Connector also displays a query result based on any number of parameters in the script, creating unlimited possibilities for retrieving and modeling data.

