
Running MarkLogic Server in Docker containers is a fantastic way to streamline your development process, and as we move forward, it will be the preferred way to use MarkLogic Server on macOS. In this post, I’ll show you just how easy it is to get started.
We’ll be using Rancher Desktop as our container management tool, but other options are available, including Docker Desktop, Colima and more. Let’s dive in and explore the simplicity and efficiency of running MarkLogic Server in a containerized environment.
MarkLogic Docker Image
The MarkLogic Docker image facilitates the swift deployment of MarkLogic Docker containers. This purpose-built image is designed to enhance your experience in creating and managing MarkLogic Server clusters in Kubernetes. By leveraging Docker to encapsulate applications, developers gain a straightforward method to write, package and deploy applications with ease. These applications can then be deployed anywhere, whether in the cloud or on premises.
Key benefits of the MarkLogic Docker image include:
Multi-Layered Security: Easily deploy applications built on the MarkLogic platform while supporting security at the application layer
across deployed apps. No matter where your applications reside,
MarkLogic Server helps to keep your data more secure.Rapid Deployment: Create and run a MarkLogic Server instance on containers in mere seconds. Adapt to varying query capacity needs in
near real time, enabling agility in your infrastructure.CI/CD Peace of Mind: Seamlessly integrate the MarkLogic platform into your CI/CD pipeline. The Docker image facilitates rapid software development, supporting consistency and reliability throughout the continuous integration and continuous delivery process.
Up to Date: The MarkLogic Server Docker image is fully supported by MarkLogic Server, and automated builds equip you with the latest updates. Trust in a solution designed to keep your data secure while simplifying data integration so you can build applications quickly.
Incorporate the MarkLogic Server Docker image into your Kubernetes cluster setup, and witness a more seamless blend of speed, flexibility and enhanced security—all in one place.
Rancher Desktop
For this post, we will be using Rancher Desktop as our tool of choice for deployment. Rancher Desktop is an open-source application providing a local Kubernetes and container management environment. It is designed to simplify the development, testing and deployment of containerized applications. Key points about Rancher Desktop and the value it can bring to developers:
Local Kubernetes Cluster: Rancher Desktop allows developers to run a local Kubernetes cluster on their machine, making it easy to develop and test Kubernetes applications without needing a remote cluster.
Container Management: It provides tools for building, running and managing containers, integrating seamlessly with Docker and other container runtimes.
Cross-Platform: Rancher Desktop is available for macOS, Windows and Linux, maintaining a consistent development environment across different operating systems.
Simplified Setup: It simplifies the setup process for Kubernetes and container environments, reducing the complexity and time required to get started.
Integration with Development Tools: Rancher Desktop integrates well with popular development tools and IDEs.
Resource Management: It allows developers to manage resources such as CPU and memory allocation for their local Kubernetes cluster, optimizing performance based on their needs.
Overall, Rancher Desktop is valuable for developers as it provides a streamlined, consistent and efficient environment for developing and testing containerized applications locally.
Now, let’s get started!
Step 1: Install and Launch Rancher Desktop
Head to the Rancher Desktop website to download the installer for your platform and follow the installation steps. Following installation, launch Rancher Desktop with dockerd selected.
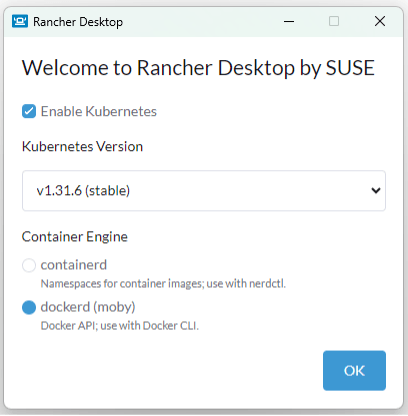
Image 1: Launch Rancher Desktop and select dockerd
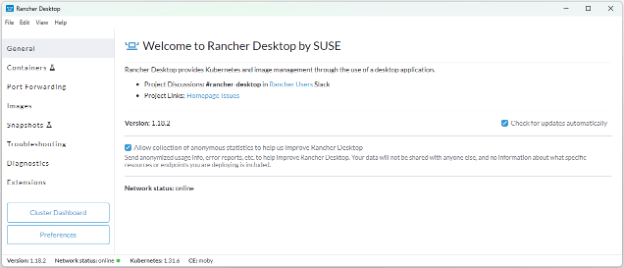
Image 2: Rancher Desktop welcome screen
If you are on macOS, then you will need to enable native macOS virtualization and Rosetta support. Follow the instructions on this Emulation page to modify preferences and enable that.
It is also recommended to set the memory allocation to 8 GB.
Reference the screenshot below for how the settings should look once changed.
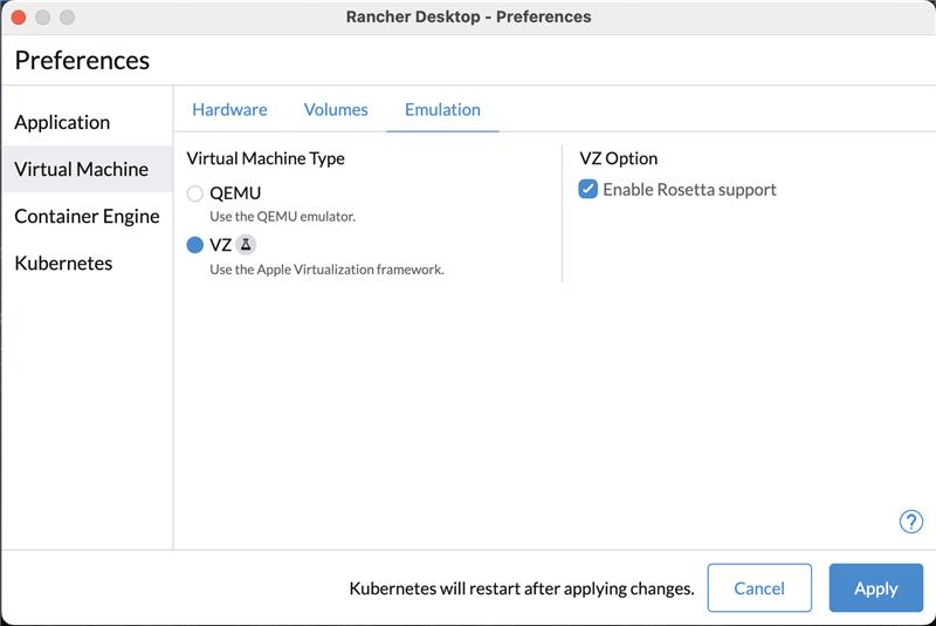
Image 3: Enable the Apple Virtualization framework along with Rosetta support
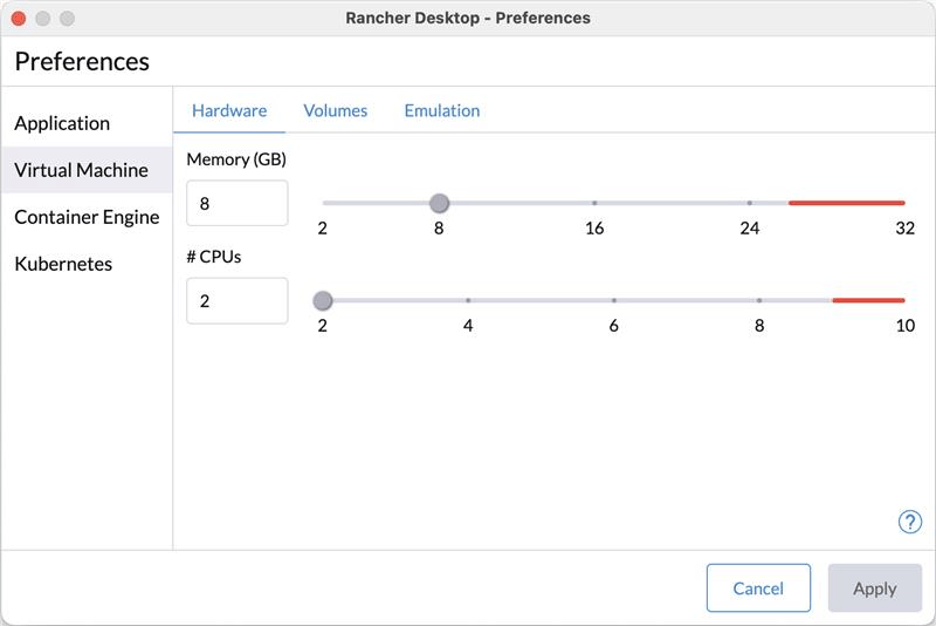
Image 4: Select 8 GB of memory and 2 CPUs as your recommended virtual machine settings for optimal MarkLogic Server performance
Step 2: Pull Docker Image
Now that we have Rancher Desktop installed, we need to get the MarkLogic Server Docker Image to deploy. More information about the image is available on the Docker MarkLogic Community page.
Select the Images tab on the left and then select the Add Image button.
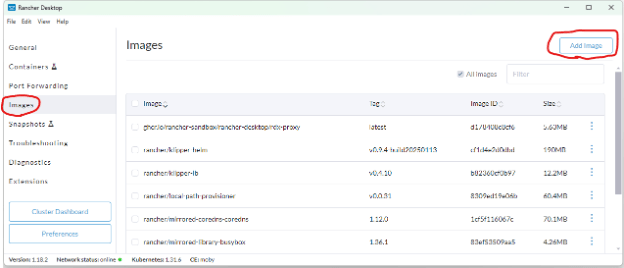
Image 5: To add a new Docker image, navigate to the images tab and then click the button in the top right corner
The Progress MarkLogic Server Docker image is available on the Docker Hub.
Note that there are various versions of the images that can be pulled to suit your specific needs. For this tutorial, we will be using the latest image.
For the image name, enter progressofficial/marklogic-db, then select pull. This defaults to the latest since no other tag was specified.
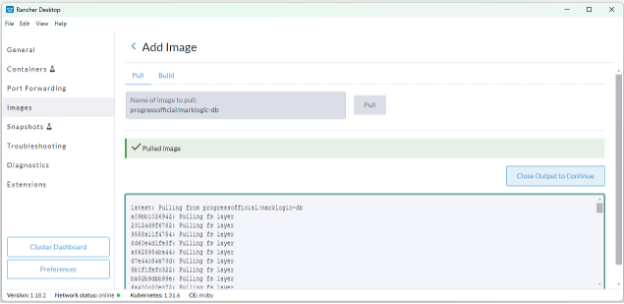
Image 6: View after successfully pulling the MarkLogic Server Docker image
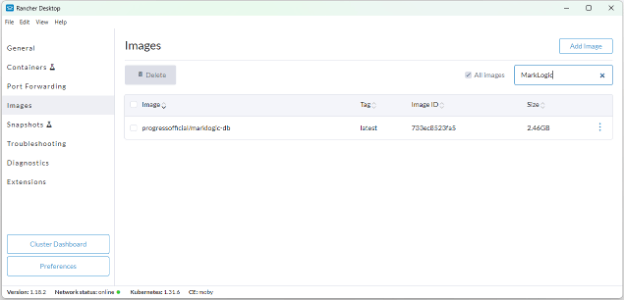
Image 7: Search for the MarkLogic image using the textbox in the top right corner.
Step 3: Deploy Image
The image has been pulled, now open the terminal for your platform. Verify the Rancher Desktop installation added docker to your path:
which docker
If you get back a path with Rancher Desktop, then the installation was successful.
Refer to the Official MarkLogic Server Docker Image repository for detailed instructions on how to deploy.
For this example, we will use a basic deployment where we specify the username, password and set init to true. We will give this deployment a name so that we can modify the container with Docker commands if needed.
Note that if running on Windows, you will need to remove the single quotes around username and password.
Open the terminal respective to your platform and execute the following command:
docker run -d -it -p 8000:8000 -p 8001:8001 -p 8002:8002 -e MARKLOGIC_INIT=true -e MARKLOGIC_ADMIN_USERNAME=‘admin’ -e MARKLOGIC_ADMIN_PASSWORD=‘Adm1n’ --name marklogic progressofficial/marklogic-db
Now the container is deployed. After a few minutes, MarkLogic Server should be fully initialized. While you wait, you can access the container logs with the following command:
docker logs -f marklogic
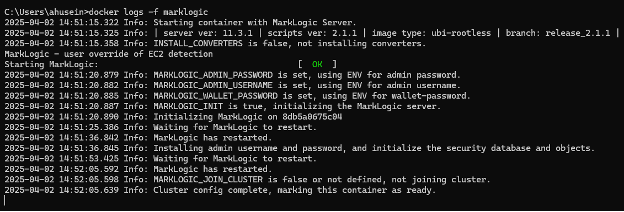
Image 8: Docker logs -f marklogic command line output on a successful deployment
Once you see the final “Cluster config complete, marking this container as ready” message, then you are ready to go! You can now view your deployment at http://localhost:8001. When prompted to enter your username and password, use the values specified when deploying the Docker container.

Image 9: MarkLogic Server Admin UI on Docker Image
Following the initial deployment, your container will now be visible within the Rancher Desktop GUI. Within this view, you will have the ability to stop and start the container:
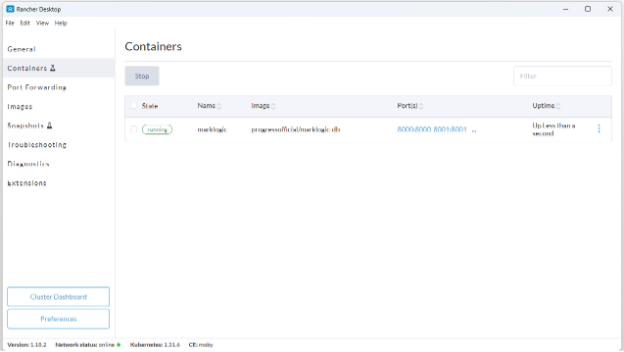
Image 10: Your MarkLogic container within the Rancher Desktop GUI
In conclusion, running MarkLogic Server in Docker containers offers a seamless and efficient alternative to the traditional native installer experience, and moving forward, will be the recommended way to deploy on macOS. By leveraging containerization, you can simplify your development workflow, promote consistency across environments and easily manage dependencies. Whether you choose Rancher Desktop, Docker Desktop or another container management tool, you’ll find that containerizing MarkLogic Server significantly enhances your development process. Embrace this modern approach and enjoy the benefits of a streamlined, containerized development environment.

