Display products custom fields in the Shopping cart

The following blog post describes the steps you need to take in order to display information about the custom product fields in the shopping cart.
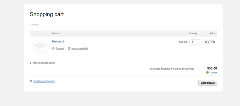
By design, the Shopping cart widget template displays information about the purchased products including the product's title, the product's price, the quantity, subtotal price as shown in the screenshot below:
It is possible that you may want to add some additional columns to the grid to display the values of custom product fields. If you try to achieve this by just modifying the Shopping cart template and add an additional column for the custom field for example by using the following markup for the RadGrid column:
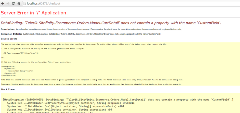
<telerik:GridTemplateColumn HeaderText="Custom field" UniqueName="CustomField" ItemStyle-CssClass="sfItmOptionsCol" HeaderStyle-CssClass="sfItmOptionsCol"> <ItemTemplate> <%# Eval("CustomFieldName")%> </ItemTemplate></telerik:GridTemplateColumn>Sitefinity will throw the following exception:
It is expected that Sitefinity throws this exception since we bind the RadGrid to the CartDetail object which by design does not contain the custom product fields.
In order to add a custom field to the shopping cart grid you need to create and map an external template for the shopping cart widget. Then in the code behind of your custom template you will be able to get the values of the custom field for the purchased products and bind these values to the custom column.
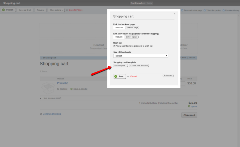
The first step will be to get the default template of the Shopping cart. In order to do this, please open the Shopping cart widget in edit mode and then click on the Edit template … button under the Shopping cart template label as shown in the screenshot.
Please copy the markup of the default template.
The next step will be to create a user control (an .ascx file) in your project and paste the markup of the default template you have just copied. After that you can add a new column in the RadGrid which will display the custom field values. For example you can place the new column between the ‘ProductDescription’ and 'Options' columns. Here is a sample markup of the column for the custom field which you can use as a sample:
<telerik:GridTemplateColumn HeaderText="Custom field" UniqueName="CustomField" ItemStyle-CssClass="sfItmOptionsCol" HeaderStyle-CssClass="sfItmOptionsCol"> <ItemTemplate> <div> <asp:Literal ID="CustomFieldId" runat="server" /> </div> </ItemTemplate></telerik:GridTemplateColumn>Please note that you can change the value of the UniqueName attribute of the GridTemplateColumn tag and the ID of the Literal and set them as desired.
What is left is to subscribe to the RadGrid's ItemDataBound event in the code behind of the custom template. Then on item data bound you can get the product id from the CartDetail so that you can get the product by its id. After you get the product you will be able to get the value of the custom field by the field name and to add the custom field to the column. You can use the sample code below as an example:
using System;using System.Collections.Generic;using System.Linq;using System.Web;using System.Web.UI;using System.Web.UI.WebControls;using Telerik.Sitefinity.Ecommerce.Catalog.Model;using Telerik.Sitefinity.Ecommerce.Orders.Model;using Telerik.Sitefinity.Modules.Ecommerce.Catalog;using Telerik.Web.UI;using Telerik.Sitefinity.Model;namespace SitefinityWebApp{ public partial class ShoppingCartCustomTemplate : System.Web.UI.UserControl { protected void Page_Load(object sender, EventArgs e) { this.shoppingCartGrid.ItemDataBound += new Telerik.Web.UI.GridItemEventHandler(shoppingCartGrid_ItemDataBound); } void shoppingCartGrid_ItemDataBound(object sender, GridItemEventArgs e) { if (e.Item is GridDataItem) { GridDataItem item = (GridDataItem)e.Item; CartDetail cartDetail = (CartDetail)item.DataItem; Guid productId = cartDetail.ProductId; CatalogManager catalogMgr = CatalogManager.GetManager(); Product product = catalogMgr.GetProduct(productId); if (product != null) { Literal lit = (Literal)item["CustomField"].FindControl("CustomFieldId"); lit.Text = product.GetValue("CustomFieldName").ToString(); } } } }}
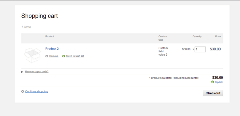
I have also prepared a short video for your convenience demonstrating the steps and the results after implementing this following the above sample. You can download the video from the following link.
I hope you will find the blog post helpful.


