Connect to any REST API from Splunk Enterprise
Introduction
Splunk is an operational intelligence and data processing platform that offers a great log analysis. It’s a powerful engine that lets you monitor, search, investigate, visualize and report on what’s happening with your IT infrastructure in real time.
REST APIs are the way to go when it comes to data access in the enterprise environments. But it’s not easy to bring data from REST APIs into Splunk in order to combine it with machine data in Splunk to drive deeper levels of analysis and operational intelligence. With Progress DataDirect Autonomous REST Connector, we can easily connect to any REST API and query our data using SQL. It normalizes REST data and makes them available as relational tables. With Splunk’s DB Connect and Progress Autonomous REST Connector we can bring in data to Splunk from any REST API.
In this tutorial, we will walk through how to get data into Splunk from a REST API using DataDirect Autonomous REST Connector. We will connect to Alpha Vantage REST API, which provides real-time stock information. Let’s get started.
Before You Start
Make sure you have following installed and configured properly before beginning the tutorial.
- Have Splunk Enterprise installed and running.
- Install the Splunk DB Connect app in Splunk Enterprise.
Download and Install Autonomous REST connector
- Download and install Autonomous REST JDBC connector from our website.
- Install the connector by running the setup executable file on your machine.
- After you have finished installation, you should find the Autonomous REST Connector at the below default path, unless you have chosen to install it at a different location.
C:\Program Files\Progress\DataDirect\JDBC_60\lib\autorest.jar
Setting up Autonomous REST Connector in Splunk
- Go to the Autonomous REST Connector install location and locate autorest.jar in the lib folder.
C:\Program Files\Progress\DataDirect\JDBC_60\lib\autorest. jar
- Copy autorest.jar to the below location in the Splunk install directory.
C:\Program Files\Splunk\etc\apps\splunk_app_db_connect\drivers
- Create a file called db_connection_types.conf in the below directory.
C:\Program Files\Splunk\etc\apps\splunk_app_db_connect\local
- Open the db_connection_types.conf file and paste the below configuration:
[datadirect_autorest]displayName = Progress DataDirect Autonomous REST ConnectorserviceClass = com.splunk.dbx2.DefaultDBX2JDBCjdbcDriverClass = com.ddtek.jdbc.autorest.AutoRESTDriversupportedVersions = 1.0jdbcUrlFormat = jdbc:datadirect:autorest:sample=http://api.example.com/data;
- Restart Splunk Enterprise to make sure the changes are reflected. You should now see Progress DataDirect Autonomous REST Connector listed on the drivers page along with the status saying that the driver has been installed as shown below.

Get your Alpha Vantage API Key
- You can get your API Key for Alpha Vantage from here to access the stocks data.
Create Connection in Splunk
- Go to the App Splunk DB Connect -> Configuration Tab -> Databases -> Identities and create a new identity.
- For anything other than Basic or Password Grant OAuth authentication, fill the username as anonymous, set the password field as empty and save the configuration.
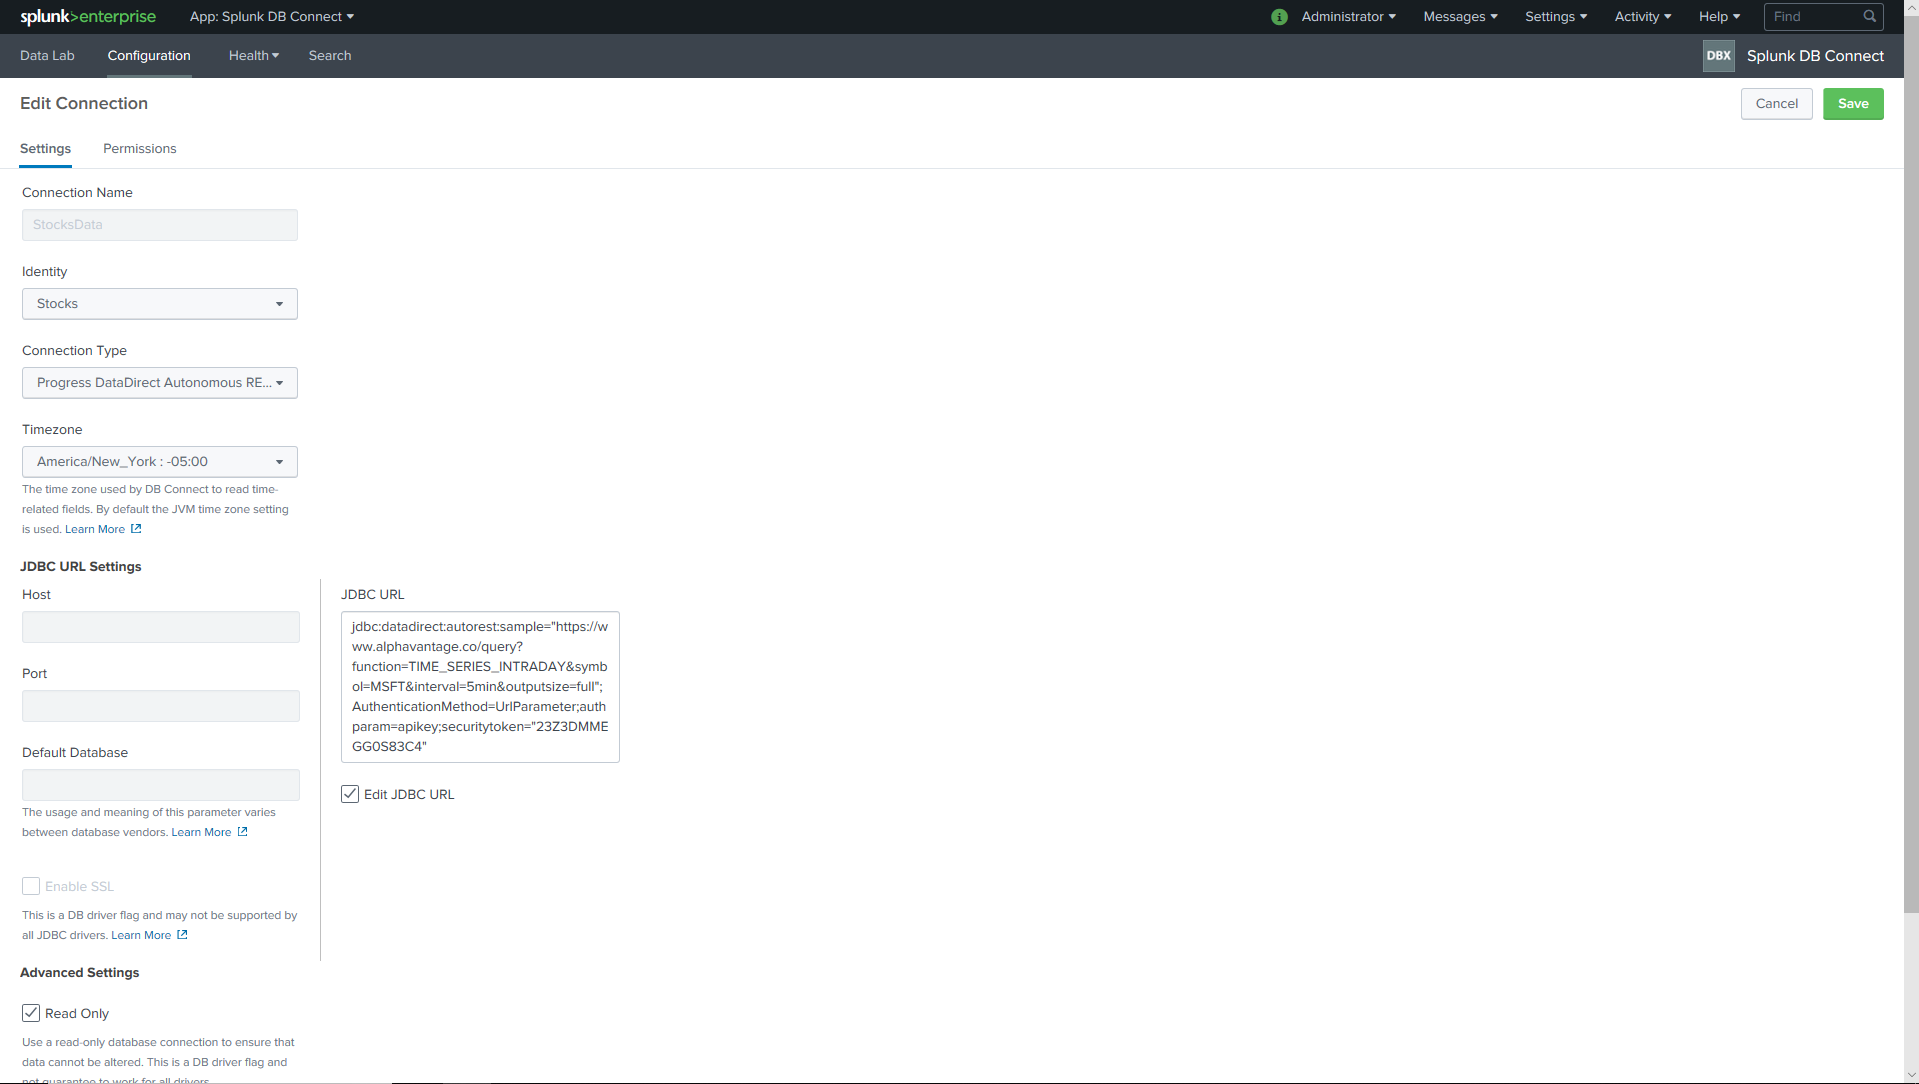
- Now go to Configuration -> Connections and create a new connection. Fill it out as below:
- Connection Name: Any Name
- Identity: Choose the Identity you just created
- Connection Type: Choose Progress DataDirect Autonomous REST Connector
- Time Zone: Time Zone as per your requirements
- Check Edit JDBC URL and now you should see JDBC URL field enabled
- Below is a sample JDBC URL for connection to the AlphaVantage
jdbc:datadirect:autorest:sample="https://www.alphavantage.co/query?function=TIME_SERIES_INTRADAY&symbol=MSFT&interval=5min&outputsize=full";AuthenticationMethod=UrlParameter;authparam=apikey;securitytoken="Your API Key" - Include your API Key for the Security Token connection parameter. Click on Save.
- After you save the configuration, Splunk validates the connection and, if the configuration is correct, the connection will be created.
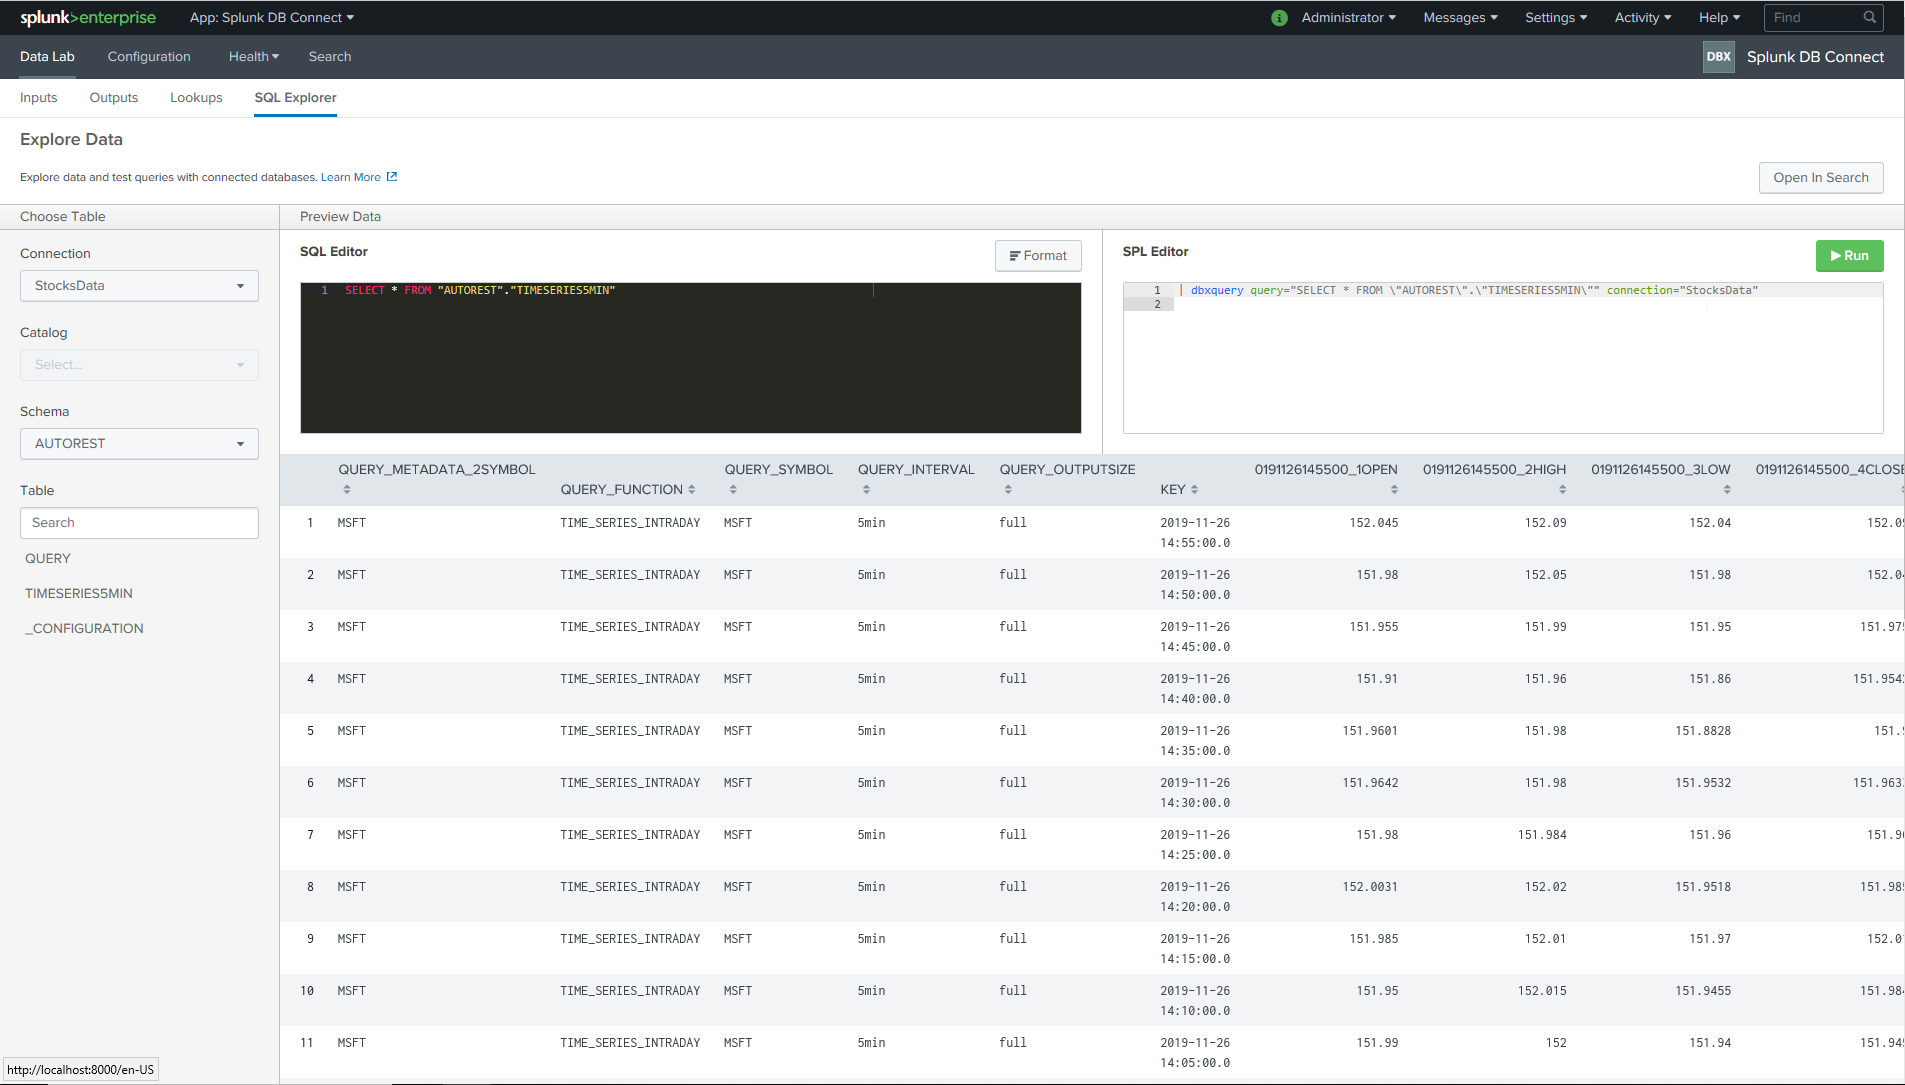
- Now got to DataLab -> SQLExplorer to start querying your data to test the connection and you should see the results like below.
You can use Progress DataDirect Autonomous REST Connector to connect to any REST API in your enterprise applications and make the data available in Splunk. Feel free to download Progress Autonomous REST Connector and try it out in your environment. If you have any questions please contact us and we will be happy to help you.


