Streaming your data from OpenEdge to Kafka
Background
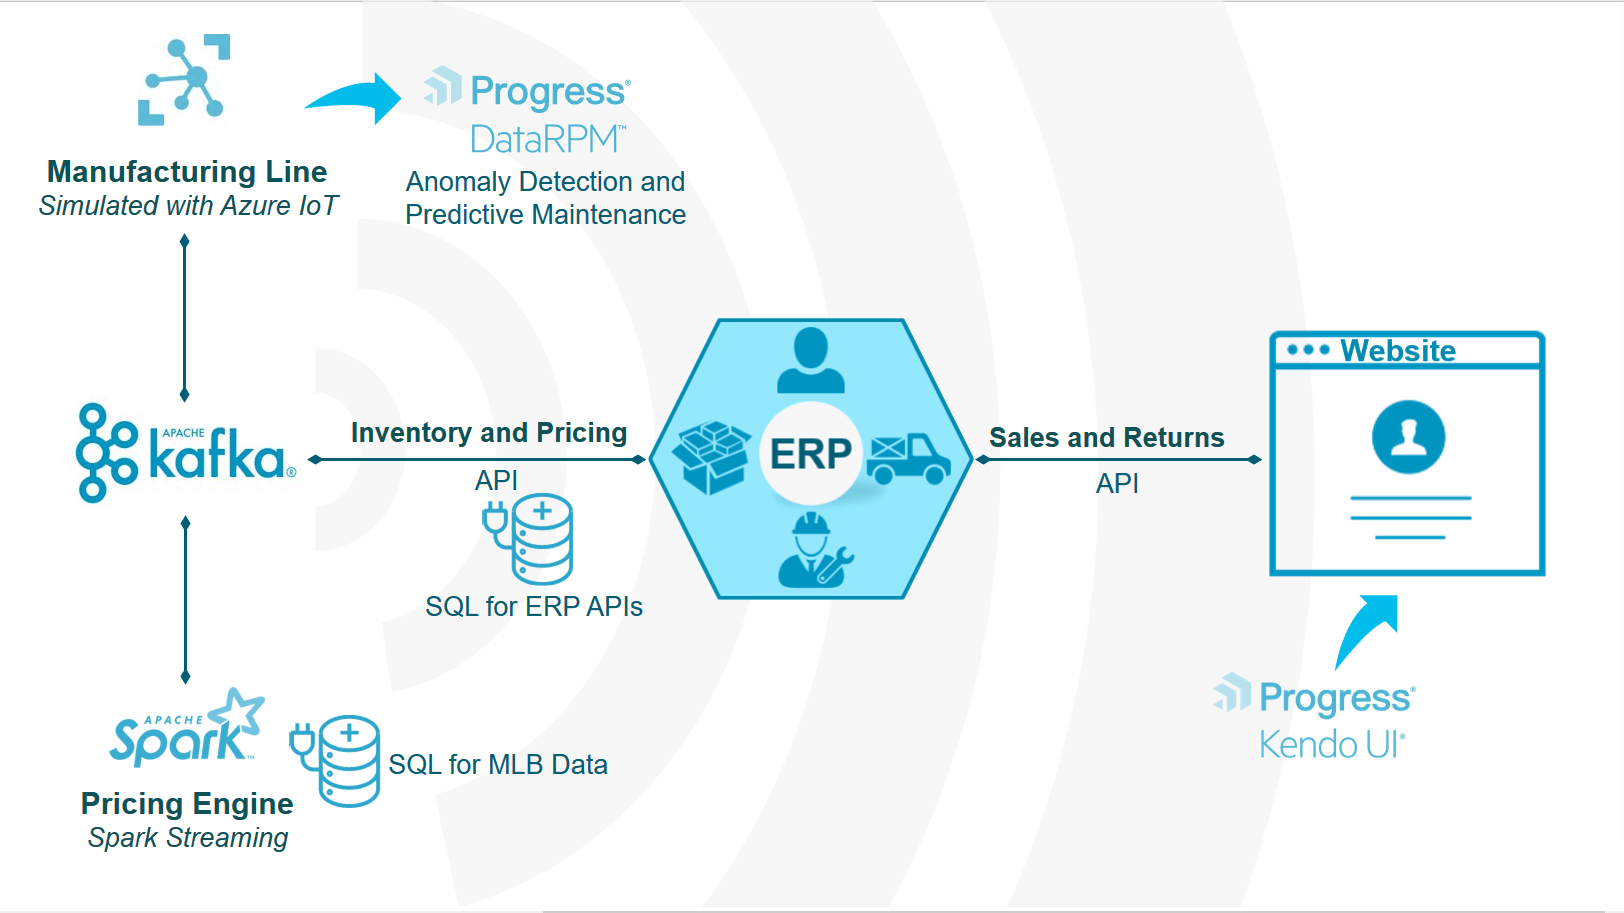
At Progress NEXT 2019, Yogesh in his keynote spoke about how at Progress we are accelerating Digital Innovation and during that presentation we showed off a cool little demo around event driven architecture where a baseball company updates its inventory and pricing on Sitefinity based on production rate data from IOT devices and demand for the baseball products. We heard some good things about the demo and there were requests for sharing on how we built it and I want to do this in series of articles on how I built the demo.

One of the main parts of the above demo is to stream your changes in OpenEdge to Kafka and this can be done very easily using CDC. In this article, I will walk you through on how you can create this integration between Progress OpenEdge and Apache Kafka. Let’s get started.
For the demo, we have used the Sports2000 database which ships with OpenEdge. We will be using the same database in this
Enable CDC on your database
- To enable CDC, we need to add a data area and an index area to the database. To do that, create a new file and add the below structure description.
## add_cdc.st#d"CDC_Track_Data":20,64;512 . f 102400d"CDC_Track_Data":20,64;512 . f 102400d"CDC_Track_Data":20,64;512 .#d"CDC_Track_Idx":21,1;64 . f 10240d"CDC_Track_Idx":21,1;64 . f 10240d"CDC_Track_Idx":21,1;64 .# - Save the file as add_cdc.st and close it.
- Open proenv and run the below command to add the new areas to your database.
prostrct addonline <databasename> cdc_sports2019.st - Now enable CDC by running the below command using proutil
proutil <databasename> -C enablecdc area "CDC_Track_Data" indexarea "CDC_Track_Idx" - If CDC has been enabled successfully, you should see the below message on your terminal.
CDC feature has been successfully enabled. (18039)
Create new CDC policy
- Go to Database Administrative Console, choose the database you have just enabled the CDC for and go to “Create Change Data Capture policy”. This option will only be enabled if you have enabled CDC on the database.
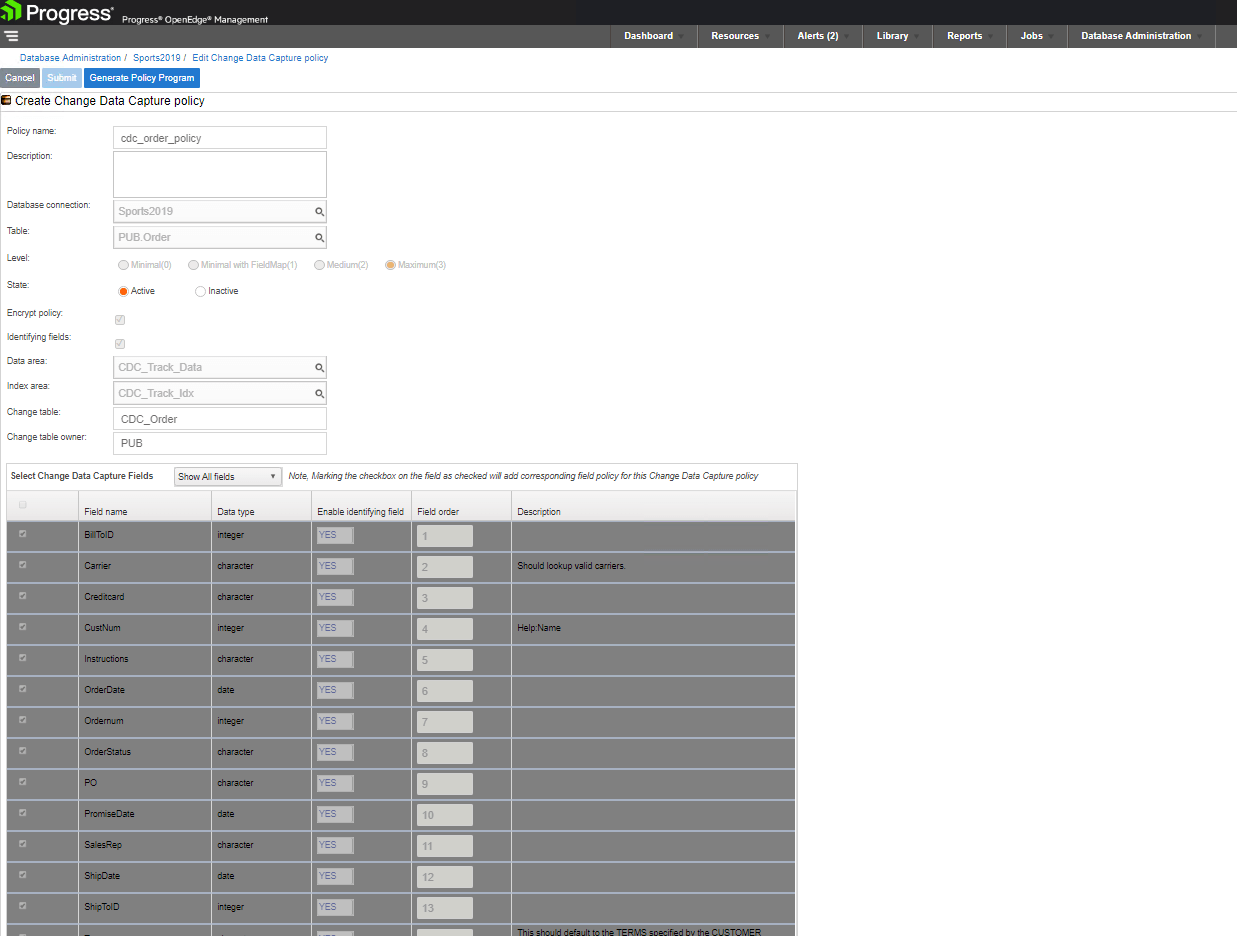
- In the next screen, choose your table from the database, choose the Data Area and Index Area you have added in the previous section, and choose all the fields you want to be present in the CDC table. We chose the table Order and selected all the fields in that table as shown below.

- Change the state to active and click on Submit to enable this policy.
- Now you should find a new CDC table along with your regular table in your metadata. As we have enabled CDC on the table Order, we see the CDC_Order table in the metadata.
Create View on CDC table
- When you want to stream your data changes in OpenEdge to Kafka, you can do that using the JDBC driver and by polling the CDC table that you have just created. But in our testing, we found that characters “_” or “-” cause issues when Kafka JDBC Connector tries to fetch data from OpenEdge.
- This might cause issues with CDC tables as some of the metadata columns like _Tran-id, _Time-Stamp, _Change-Sequence., has those characters.
- As a workaround we will create a view around the CDC table and use that view to query the changes in table.
- We created a view around CDC_Order table and renamed the columns as below
CREATE VIEW PUB.CDCOrderView ASSELECT "_Tran-id" AS CDCTransactionID, "_Time-Stamp" AS CDCTimeStamp, "_Change-Sequence" AS CDCChangeSequence, "_Continuation-Position" AS CDCContinuationPosition, "_ArrayIndex" AS CDCArrayIndex, "_Fragment" AS CDCFragment, "_Operation" AS CDCOperation, "BillToID", "Carrier", "Creditcard", "CustNum", "Instructions", "OrderDate", "Ordernum", "OrderStatus", PO, "PromiseDate", "SalesRep", "ShipDate", "ShipToID", "Terms", "WarehouseNum"FROM PUB."CDC_Order";Configuring Kafka
- Download Kafka from the Confluent website and extract the downloaded Kafka package
- Add /confluent-x.x.x/bin to your PATH and start Kafka by running the below command
confluent start
- Copy OpenEdge JDBC driver (openedge.jar) to /home/confluent-5.2.2/share/java/kafka-connect-jdbc/
- Now, we just need to configure the connection to OpenEdge and specify the query Kafka has to use to poll for changes. To do that, open a new file and paste the following configuration.
name=cdcorderconnector.class=io.confluent.connect.jdbc.JdbcSourceConnectorconnection.url=jdbc:datadirect:openedge://hostname:port;databaseName=sports2019;User=<user>;Password=<password>query=SELECT*FROM CDCORDERVIEWmode=incrementingincrementing.column.name=CDCTRANSACTIONIDtopic.prefix=cdcordernumeric.mapping=best_fit - Change the connection.url to suit your connection configuration. Save the file as cdcorder.properties at the path /home/confluent-5.2.2/etc/kafka-connect-jdbc
Run the JDBC connector
- With all the configurations done, it is now time to load the connector configuration and run it. To do that run the below command
confluent load cdcorder -d cdcorder.properties - If your configuration doesn’t have any errors, you will see the configuration printed on your terminal.
- Check Kafka topics to see if the topic cdcorder has been created by running the below command. This may take a minute to see the topic created after you have loaded the configuration.
kafka-topics --list --zookeeper localhost:2181 - Once you see the topic cdcorder in the above list, this means that streaming has begun. So for any change in the order table, it will be written in to Kafka topic cdcorder. To see the data in the topic ‘cdcorder’, run the below command.
kafka-avro-console-consumer --bootstrap-server localhost:9092 --topic cdcorder --from-beginning --property schema.registry.url=http://localhost:8081
With your databases changes now being streamed in Kafka topics, you can use a Kafka Consumer that reads these events and you can program to act on those events by sending emails or notifications to user or run real-time analytics or use the CDC metadata in those events to replicate the data to a different system.