Connect to Oracle Eloqua, MongoDB, Postgres and others from Denodo VDP
Introduction
Denodo Platform is a data virtualization platform that offers a wide range of features—including data manipulation, joins, imports, exports, stored procedures, and more. With this one stop shop for your data virtualization needs, you don’t want to have to scramble across different vendors to find connectivity to all your data sources. This is where Progress DataDirect comes in with our enterprise grade, high performant ODBC and JDBC drivers, offering connectivity to all the data sources you need.
In this tutorial, we will walk you through on how you can connect to Oracle Eloqua (now, Oracle Marketing Cloud) from Denodo VDP. You can use similar steps with any of our JDBC drivers.
Install Progress DataDirect Eloqua JDBC driver
- Download DataDirect Eloqua JDBC driver.
- Extract the downloaded package PROGRESS_DATADIRECT_JDBC_ELOQUA_WIN.zip and run the setup.exe
- Follow through the installer instructions and complete the setup.
Configure Eloqua JDBC driver in Denodo VDP
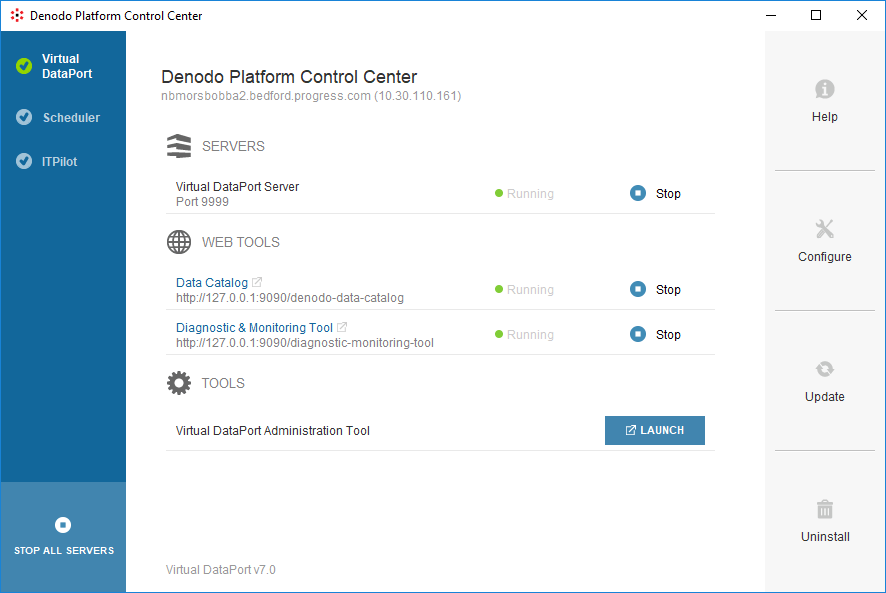
- Open Denodo Platform Control Center and Launch the Virtual DataPort Administration Tool.
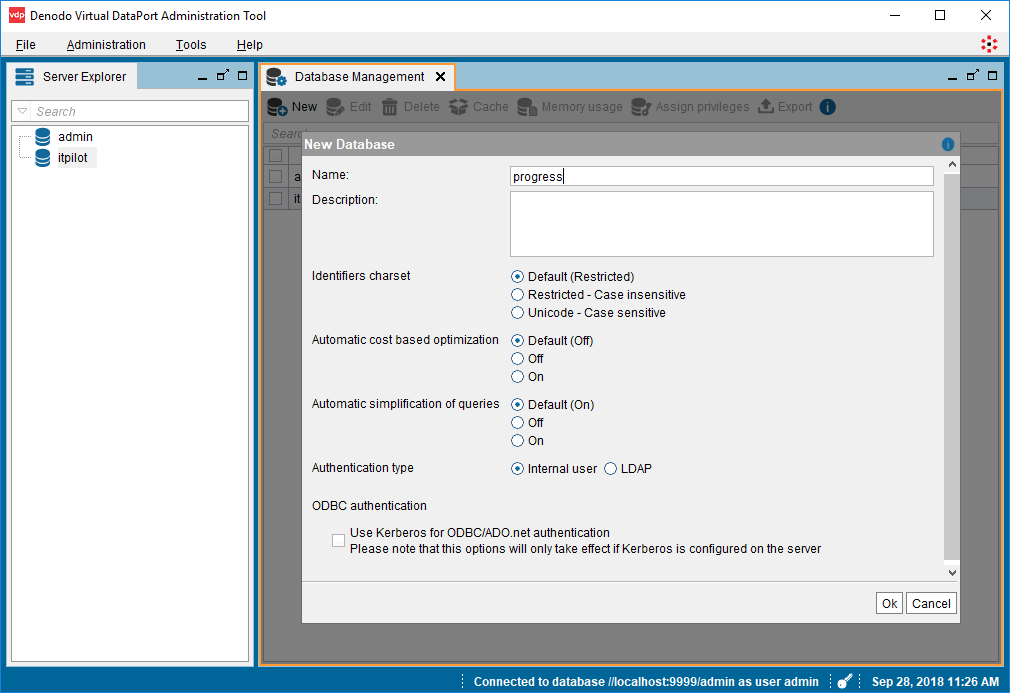
- In Denodo VDP Tool, go to Administration menu and open Database Management. Click on New to create new database and name it as you like.
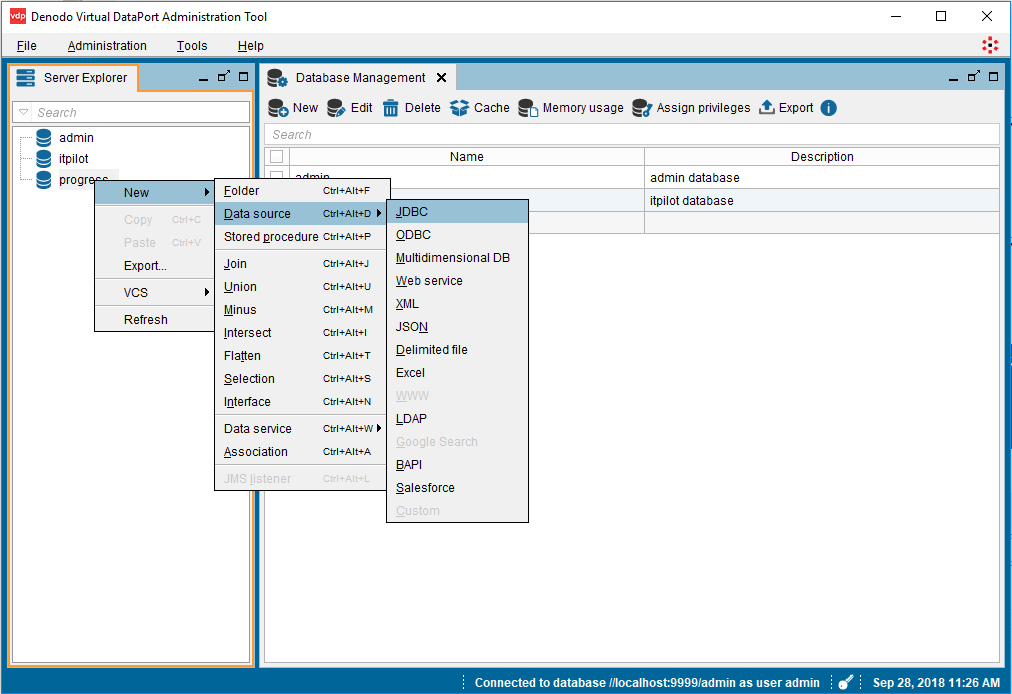
- Right click on the newly created database, choose New -> DataSource and choose JDBC data source.
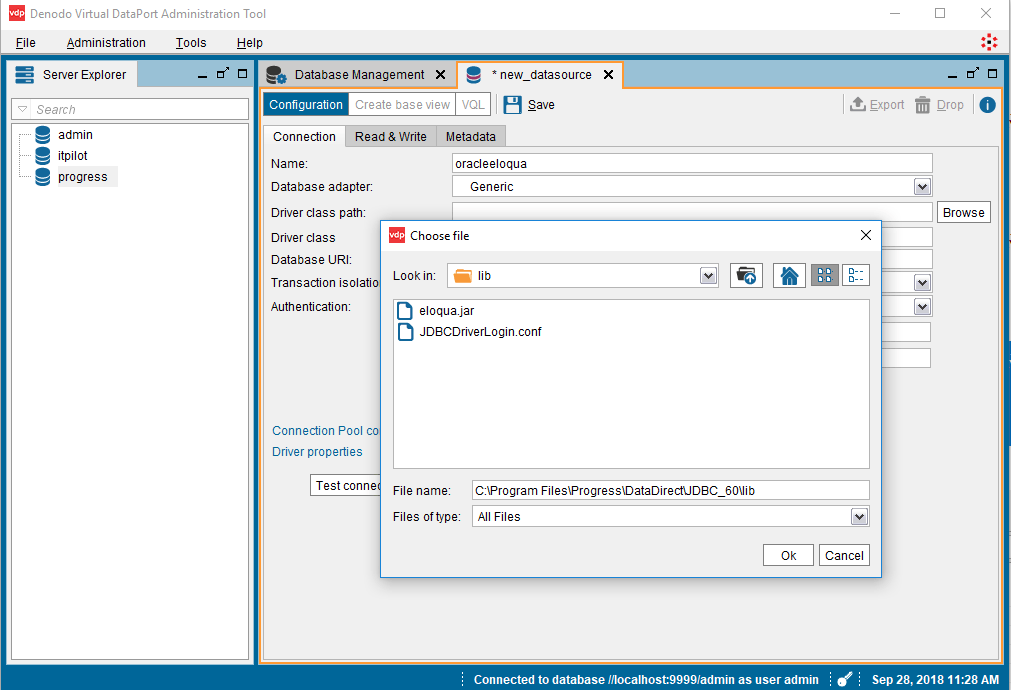
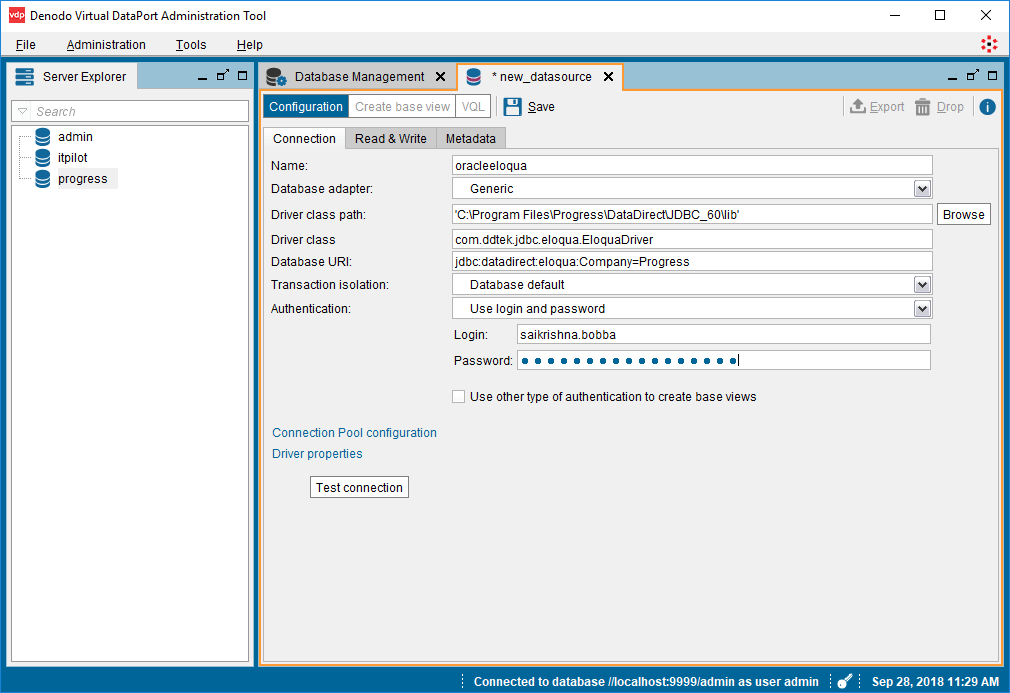
- On the new datasource form, fill out any name you like. For the driver class path, navigate to C:\Program Files\Progress\DataDirect\JDBC_60\lib and choose the eloqua.jar
- Fill out connection configuration for your Eloqua instance as shown below.
Driver class: com.ddtek.jdbc.eloqua.EloquaDriver
Database URI: jdbc:datadirect:eloqua:Company=company_id;
Login: Your username
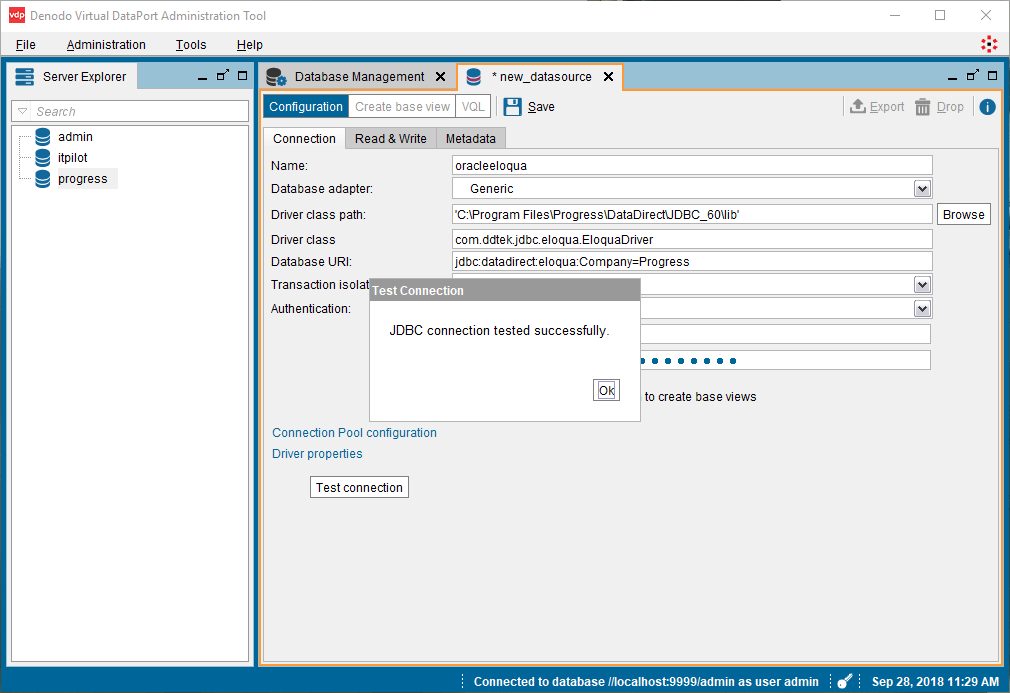
- Now click on Test Connection, to verify all your configuration. If all is well, you should see the below message from Denodo VDP.
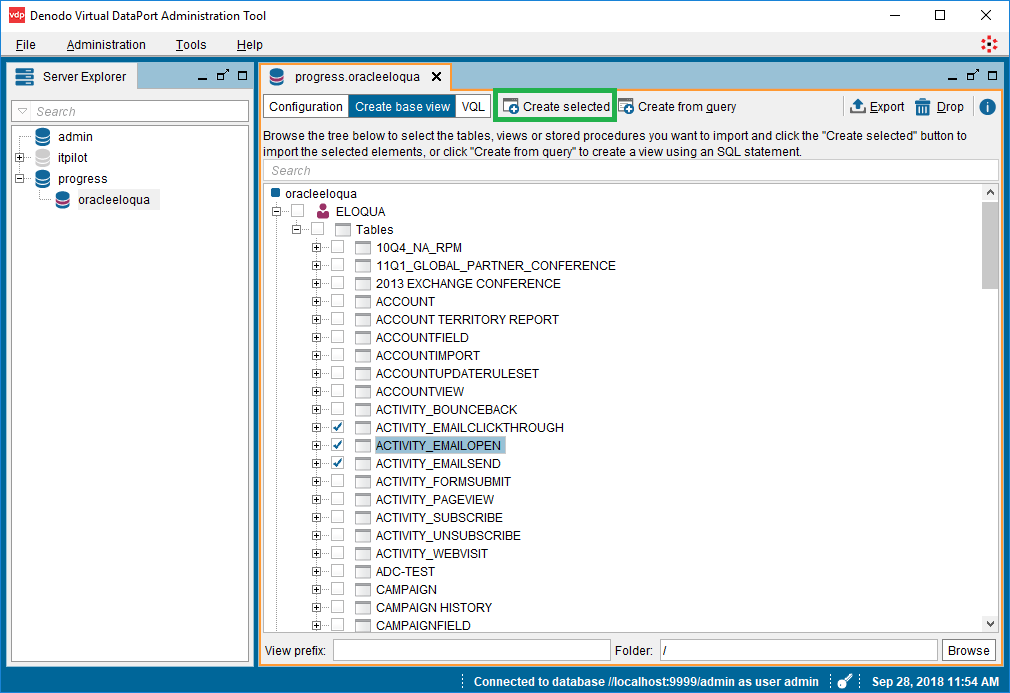
- Now go to Create base view tab, and open the node Eloqua-> Tables and choose all the tables you want to import and click on Create Selected
- Wait for the Denodo VDP to complete creating the base views and once it is done, you should see the following message.
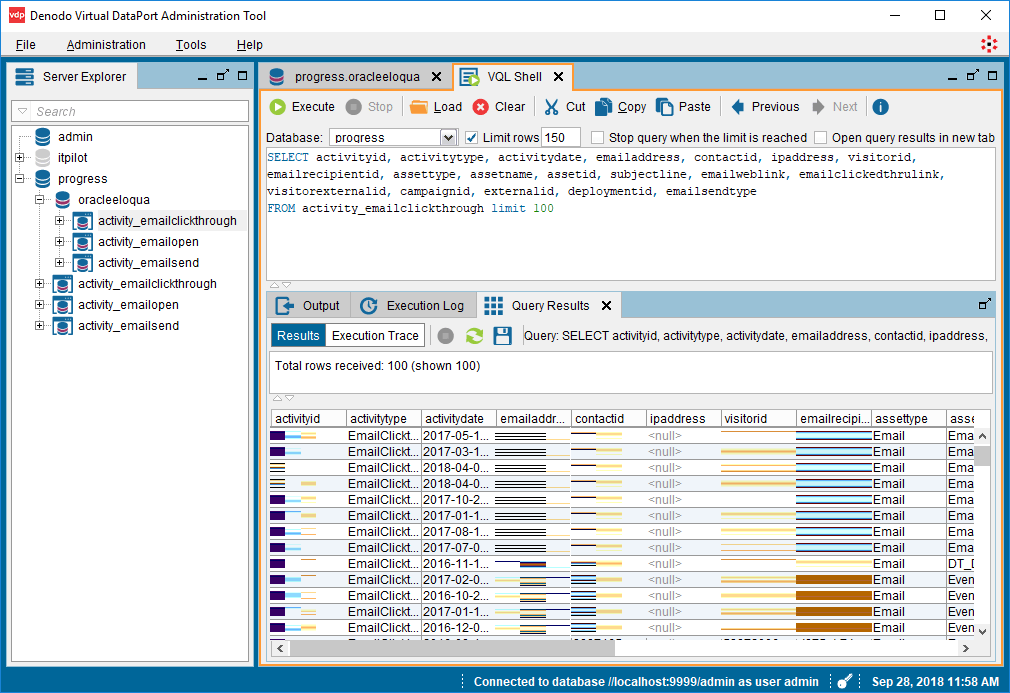
- You can now open VQL shell and start querying the data.
You are now ready to virtualize your Eloqua data using Denodo VDP tool. Along with Progress DataDirect JDBC drivers, you can also use Progress DataDirect ODBC drivers with Denodo VDP to create virtualization for your data sources. Feel free to download the drivers and if you have any questions or issues, don’t hesitate to contact us.
