A Complete Guide for Google BigQuery Authentication
Introduction
In this tutorial, we will walk through how to connect to Google BigQuery from our favorite SQL/BI/ETL tools using different authentications supported by Progress DataDirect Google BigQuery JDBC Connector. There are two types of Authentication covered in this document:
- Service Account based
- OAuth 2.0
Let’s look at how we can authenticate ourselves using these two authentication schemes when using Progress DataDirect Google BigQuery JDBC Connector.
Service Account based Authentication
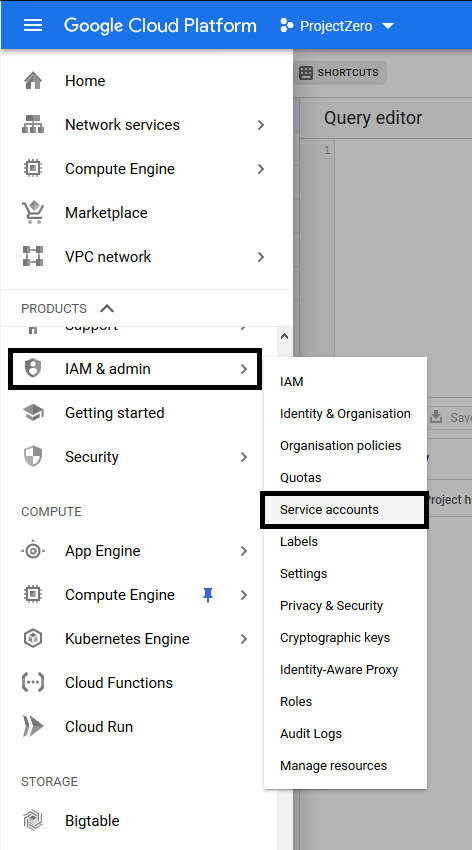
- Login to your Google Cloud Console. Open the Burger Menu on the side and Go to IAM -> Service Accounts as shown below.
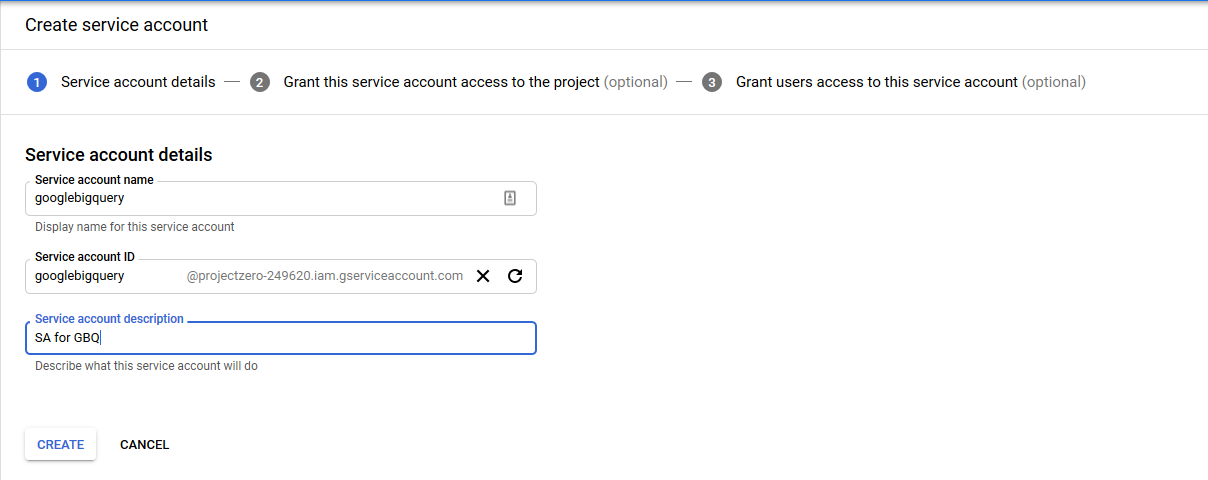
- In the Service Accounts page, Click on the Create Service Account button on the top. You should now see a form to create a service account. Fill in any Service Account Name, Service Account ID, Service Account Description. Below is an example –
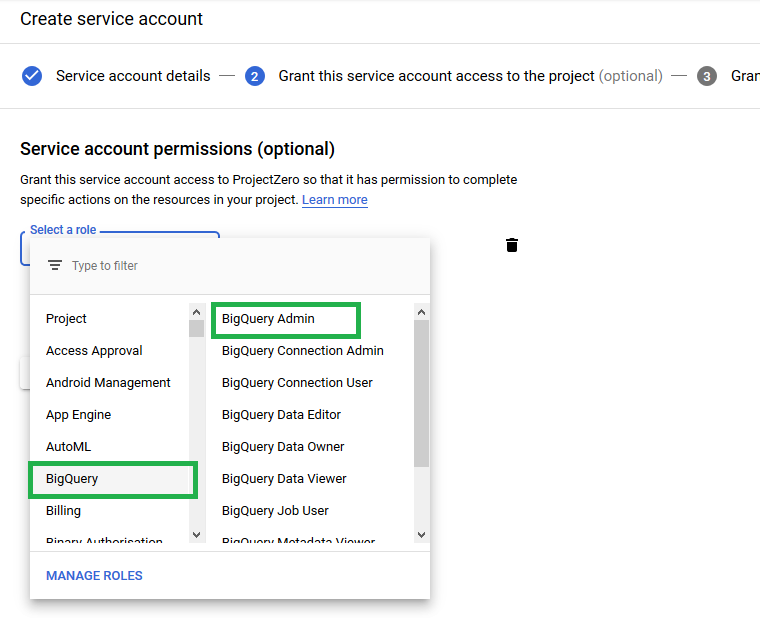
- Click on Create. Now you should see an option to assign Service Account permissions. Under that you should find a drop down. Choose BigQuery-> BigQuery Admin.
- Click on Continue. On the next screen, you should now see an option to Create Key. Click on Create Key. You should now see a menu on right asking you to choose between json file .p12 key file. Choose any key format and click Create.
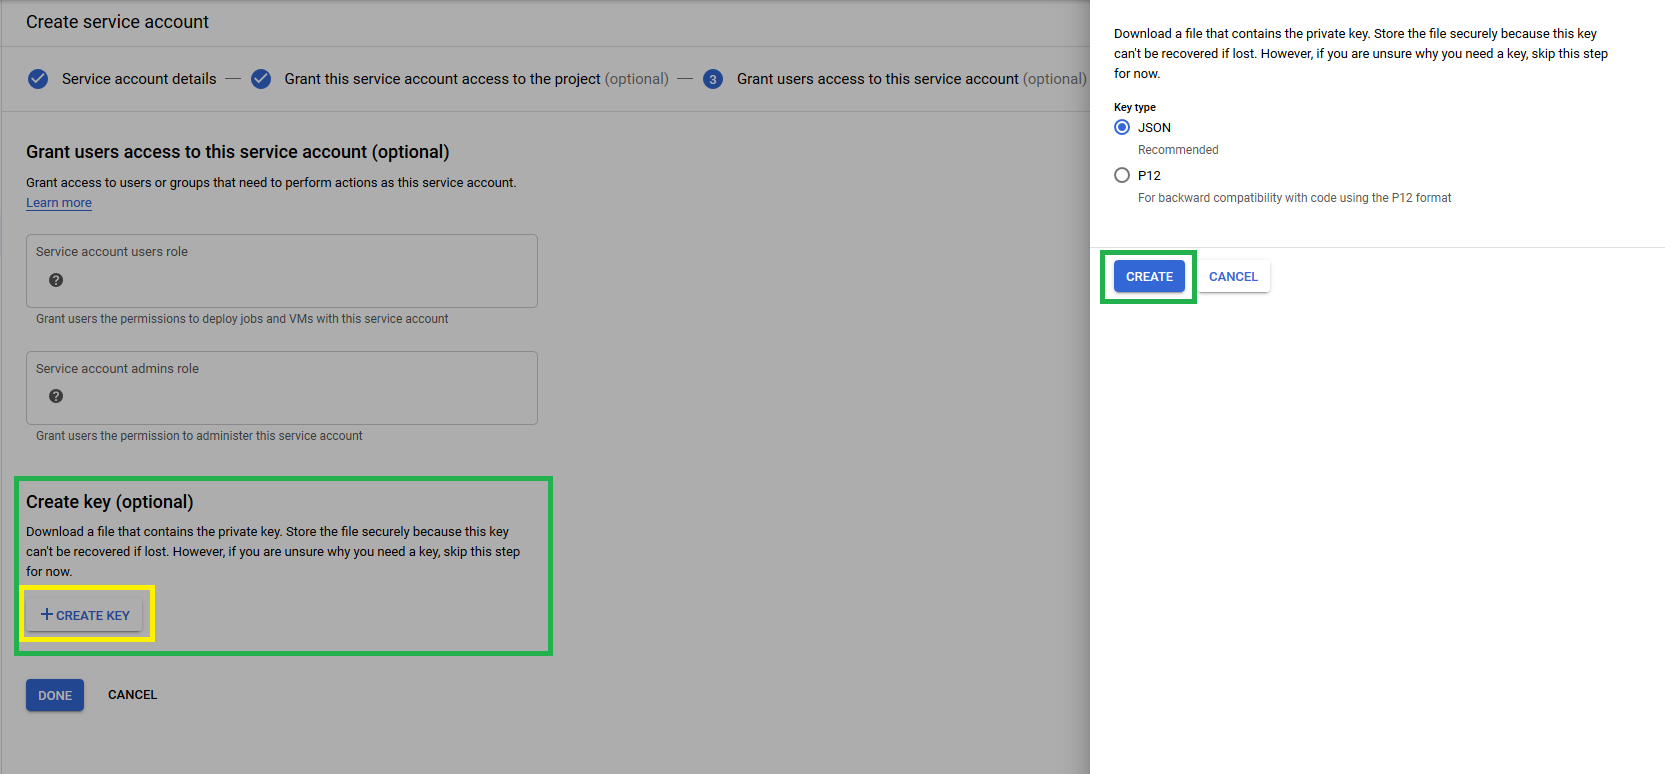
- This will start a download of a .json or .p12 file based on your choice. Save the file.
- To connect to Google BigQuery using Progress DataDirect BigQuery JDBC Connector, you can use the below URL –
jdbc:datadirect:googlebigquery:AuthenticationMethod=serviceaccount;Project=your-project-id;Dataset=your-dataset;ServiceAccountEmail=abc@projectid.iam.gserviceaccount.com;ServiceAccountPrivateKey=/path/to/json-key-filewhere
Project - Your Project ID, this can be found in your Google Console
DataSet - The Dataset name you want to connect to
ServiceAccountEmail – Service Account ID you created above. You should find it in IAM->Service Accounts as shown below
ServiceAccountPrivateKey – Path to JSON or .p12 file you saved earlier. - Here is an example URL for your reference:
jdbc:datadirect:googlebigquery:AuthenticationMethod=serviceaccount;Project=projectzero-249620;Dataset=datadirect;ServiceAccountEmail=googlebigquery@projectzero-249620.iam.gserviceaccount.com;ServiceAccountPrivateKey=C:\Users\sbobba\Downloads\projectzero-249620-215fa9911145.json
- Use your favorite tool of choice with the above URL and you should be able to easily query all the data in your Google BigQuery datasets.
OAuth2.0 Authentication
- OAuth2.0 is another authentication we can use to access our Google BigQuery data from Progress DataDirect Google BigQuery Connector.
- We need two pieces of information to access Google BigQuery data using the Progress DataDirect Google BigQuery JDBC Connector – Access Token and Refresh Token.
- To get the Access Token and Refresh token, we need to:
- Create an OAuth ClientID to get ClientID and Client Secret.
- Send an Authorization request to Google to get the Authorization Code.
- Exchange the Authorization Code to get the Access Token and Refresh Token by sending a Token request to Google.
-
Register OAuth ClientID
- To Register a new OAuth ClientID, go to Google Developer Console and login.
- Go to the tab OAuth Consent Screen, and fill in the details for your OAuth Client:
- Application Name: Your Application Name
- Support Email: Your Email/ Support Email
- Scopes for Google APIs:
Add Scope -> BigQuery API ../auth/bigquery - Authorized Domains: Any public facing website
- Application HomePage: Any public facing website
- Application Privacy Policy Link: Your Privacy policy
- Below is an example of the consent screen for your reference –

- Click on Save.
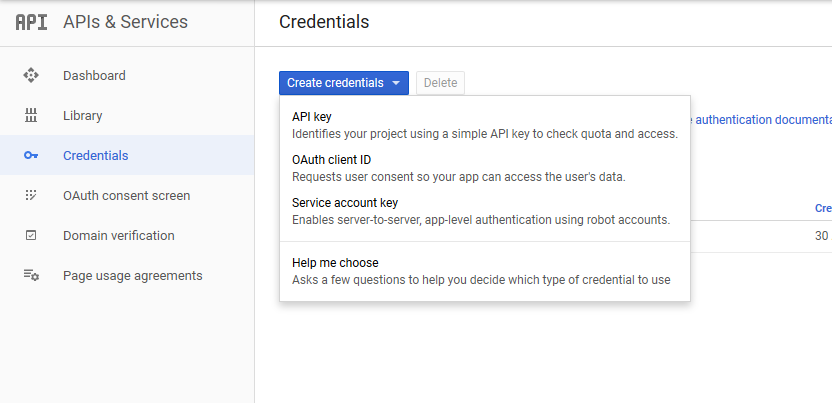
- Go to Credentials tab, click on Create Credentials, choose OAuth Client ID.
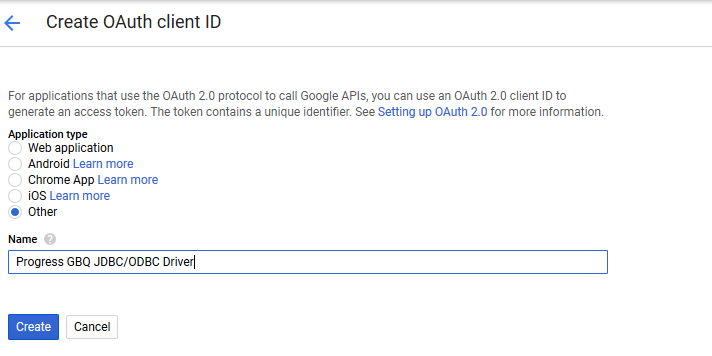
- Now we should see a screen like below asking for our application type. Choose Other, provide a name and click Create.
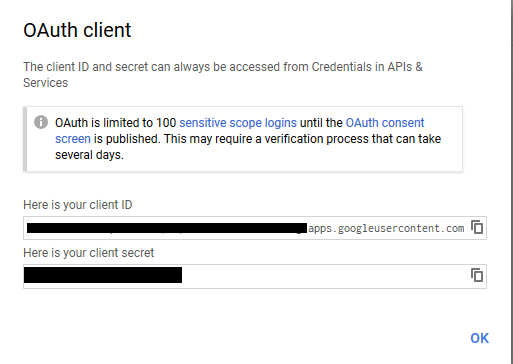
- We should now see a new popup with our ClientID and Client Secret. Save them, we will need them later.
-
Get Authorization Code
- With ClientID and Client Secret in hand, we are ready to make an authorization request to Google to get the Authorization code.
- To do this, copy this URL to your notepad and replace clientid with the Client ID we got in the above step.
https://accounts.google.com/o/oauth2/v2/auth?client_id=<;Your-client-Id> &redirect_uri=urn:ietf:wg:oauth:2.0:oob&state=GBQAUthTest&access_type=offline&scope=https://www.googleapis.com/auth/bigquery&response_type=code
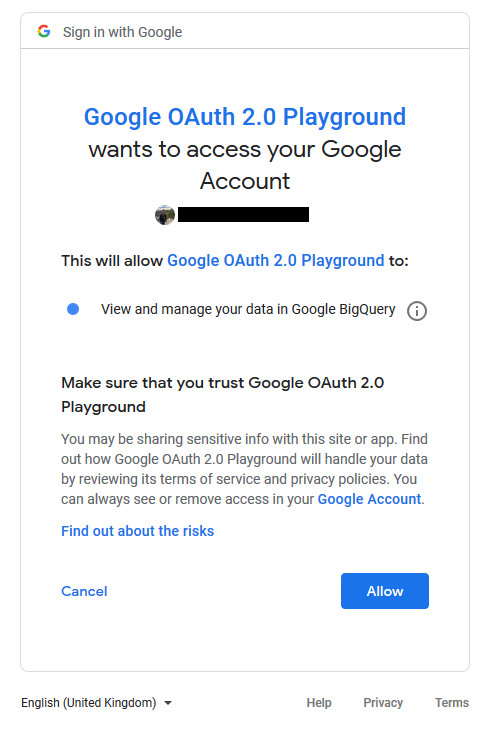
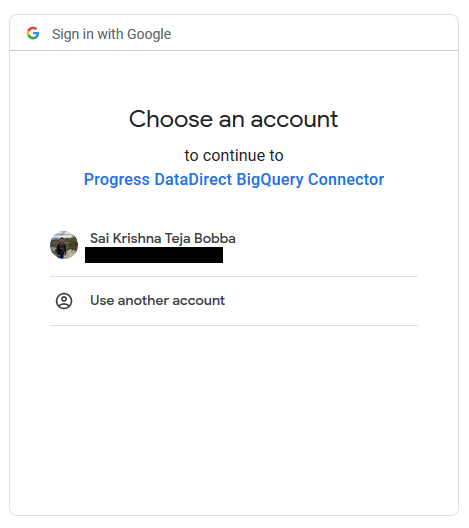
- After you have replaced the ClientID in your URL, copy it and paste the URL into your browser. You should now see this page. Select your account.
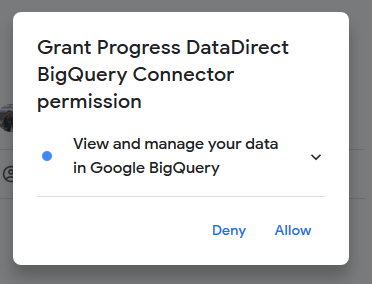
- As soon as you choose your account, you will see a pop up asking if you want to grant access. Click on Allow.
- We should now see a warning if our app isn’t verified. Click on Advanced and you should see another option Go to <your application name>. Click on it.
- Now we should see another window asking for confirmation if we want to allow our OAuth Client access to our BigQuery data. Click on Allow.
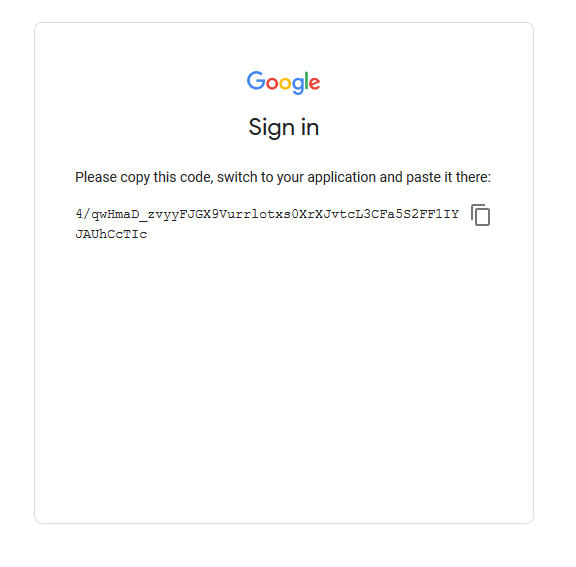
- We should now see a page with an authorization code in it as shown below. Copy the code and save it.
-
Get Access and Refresh Tokens
- With the Authorization Code in our hands, it’s time to get the Access and Refresh Tokens. This is the last step before we can access data in Google BigQuery using Progress DataDirect BigQuery JDBC connector.
- Open Postman and send a POST request to Google OAuth Token endpoint to exchange your ClientID, Client Secret and Authorization Code for Access Token and Refresh Token.
POST https://www.googleapis.com/oauth2/v4/token HTTP/1.1Content-Type: application/x-www-form-urlencodedcode=Your Authorization_code_from_step_17&client_id=your_client_id&client_secret=your_client_secret&redirect_uri=urn:ietf:wg:oauth:2.0:oob&grant_type=authorization_code - This will return Access Token and Refresh Token as shown below. Save them.
{"access_token":"your-access-token","expires_in": 3600,"refresh_token":"your-refresh-token","scope":"https://www.googleapis.com/auth/bigquery","token_type":"Bearer"}
- Accessing Data using Progress DataDirect BigQuery JDBC Connector
- To connect to Google BigQuery using Progress Google BigQuery JDBC Connector, we can use the below URL –
jdbc:datadirect:googlebigquery:Project=projectzero-249620;Dataset=datadirect;AccessToken=your-access-token;RefreshToken=your-refresh_token;ClientID=your-clientid.apps.googleusercontent.com;ClientSecret=your-client-secret
- We should be able to connect to Google BigQuery and are ready to query all our BigQuery data from our favorite SQL /BI/ETL tools.
We hope this tutorial helped to get started with the Progress DataDirect Google BigQuery JDBC Connector and explained how to work with different authentications. Please feel free to contact us with any questions and we will be happy to help.
