Creating an Ecommerce Store Locator Widget

The content you're reading is getting on in years.
This post is on the older side and its content may be out of date.
Be sure to visit our blogs homepage for our latest news, updates and information.
Do you want to help your customers find your brick and mortar stores quickly by adding a Store Locator feature to your website? I will explain how to create a basic Store Locator Widget from start to finish. This is a rather lengthy process to explain, covering a lot of territory, but once you are done you will know a little more about creating a custom Sitefinity widget, using Module Builder, how Sitefinity dynamic data works, and integrating third party API’s such as Google maps into your website.
The Store Locator widget will display a list of physical stores on your website based upon a customer entered zip code. The list can be further narrowed by selecting a range of distance. When the user clicks on a store’s name in the list, a Google map will automatically update to show the location of the store on the map, identifying the exact location with a map marker.
In this example I will discuss how to perform the following tasks.
- Use Sitefinity’s integrated Module Builder to create a new custom Store Locator module.
- Enter data for each of our physical stores in the Sitefinity Content section.
- Create a new custom widget to display the store location data on the front end.
- Integrate Google Maps to display the stores location.
- Use Google’s Geocoding API to convert our store’s locations into latitude and longitude coordinates for use with Google Maps.
- Use Sitefinity’s DynamicContent class and explain how to use this class in code to access values of dynamically created content.
You can access all of the code for this project at GitHub:
https://github.com/esitefinity/EcommerceStoreLocator
An important note about the C# code:
This project uses the System.Device.Location namespace which is new to .Net Framework 4.0. This assembly provides a convenient class for storing geographic coordinates as well as a built in method to calculate the distance between two points specified by latitudes and longitudes. Please refer to the comments near the top of the C# code for an explanation of how to remove the dependency on this assembly.
Also note that this code uses the Google maps API to display a Google map for the store. In order to use the maps API you must use your Google account (or create a new account) and then request a unique access key which you will include in the Javascript script for the Google Map. The key is free and is returned to you immediately so there is no cost and almost no delay to begin using the mapping feature. Just remember, the map on this example will NOT work until you supply your own key!
Let’s get started!
Our first step to create our Store Locator is to create a new Sitefinity module using Sitefinity’s Module Builder tool.
Creating the Module Using Module Builder
From the Sitefinity Administration backend, click Administration -> Module Builder
Click on the Create a module link
Enter “Store Locator” in the Name field. The description field is optional so we will leave that blank.
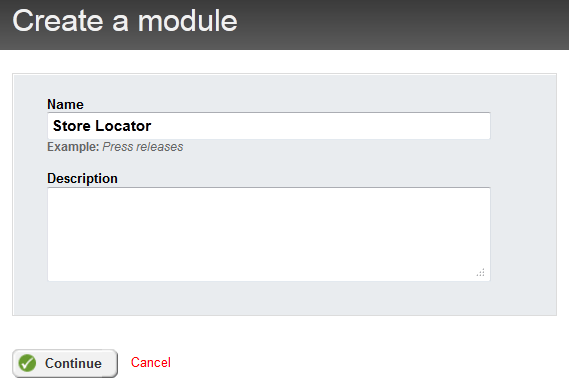
Click on the Continue button.
Define a content type of Store Locator
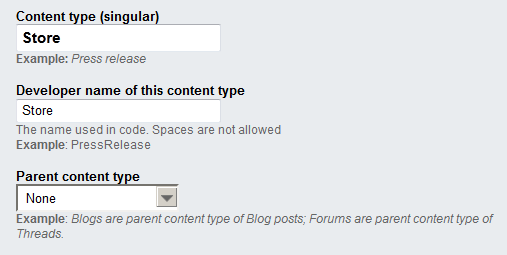
You are now on the “Define a content type…” screen. On this page we will define the type of data that will be used for the Store Locator widget.
For the Content type (singular) field enter the name of a single object that will be used in the store locator module. In our case each element of data is a physical “store” so enter “Store” in the field.
The Developer name of this content type is generally the same as the Content Type name we entered above but without spaces and some punctuation. This name follows the formatting conventions of what you would name an object in C# code. In our example, entering “Store” is perfect.
Our “Store” content is a complete object and does not relate to any other object (in a parent child relationship) so we can leave the Parent content type dropdown set to “None”.
Field of this item
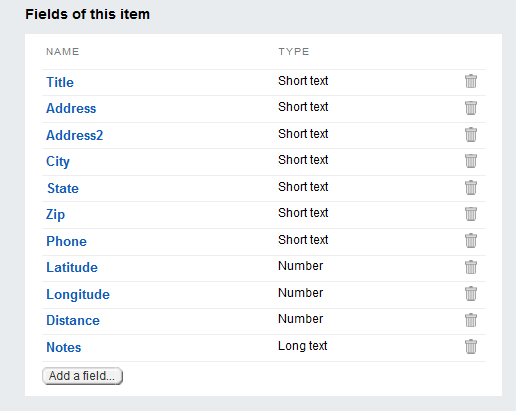
In the middle section we now need to create a “field” to hold each piece of data that we want to save in a single “store” object. For each “store” create a field for each of the following:
| Name | Type | Description |
| Title | Short text | This field is created by default. It holds the displayed name of the store |
| Address | Short text | The primary street address of the store |
| Address2 | Short text | The secondary street address (optional) |
| City | Short text | The store’s city |
| State | Short text | The store’s state |
| Zip | Short text | The store’s zip code (5 digit U.S.zip code) |
| Phone | Short text | The store’s phone number |
| Latitude | Number - 5 decimal places | The latitude of the store’s physical location |
| Longitude | Number - 5 decimal places | The longitude of the store’s physical location |
| Distance | Number - 2 decimal places | A place holder to hold the calculated distance to the store |
| Notes | Long text – Rich text editor | An option field to hold additional information about the store location |
Your fields section should look like this:
Which field is the identifier of the content?
For our content, leave this dropdown set to “Title”.
Advanced
Leave the Advanced section unchanged.
Click on the Finish button to save the module.
Activating the Store Locator Module
Now that you have created a Store Locator module it must be activated. Upon completing the content type definition section above you will now on the Store Locator screen:
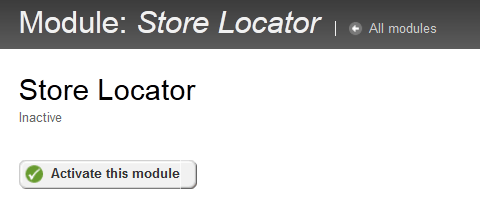
Click on the Activate this module button.
Our new Store Locator module is now complete.
Entering Store Data into Sitefinity
We now need to enter data for each of our physical stores.
From the main menu select Content.
You will now see the content menu has a new content type of Store Locator.
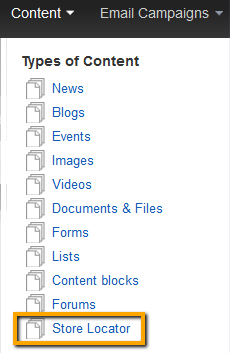
Click on Store Locator to begin entering data for each of our physical stores.
To start we are going to enter data for just one store:
| Title | San Diego (Aero Drive) #140 |
| Notes | Sun: 9:00 AM - 8:00 PM |
| Address | 3396 Murphy Canyon Rd |
| City | San Diego |
| State | CA |
| Zip | 92123 |
| Phone | (858) 555-0300 |
| Latitude | 32.80681 |
| Longitude | -117.11573 |
Note: You can choose to set the Latitude and Longitude fields to “0” (zero). If you set them to zero, the widget will use the store’s zip code to calculate the distance to the store from the customer’s starting zip code. This will mean that the distance is a lot less accurate because you are not pinpointing the store to a specific coordinate but rather the larger area covered by the zip code. Also, on the Google map, the store’s location will be shown as a marker in the middle of the zip code area, not at the exact store address (currently the widget uses only the set latitude and longitudes OR the Zip code to determine the map marker’s location). It is fairly easy to get an exact latitude and longitude for an address directly from Google maps. In your browser go to http://maps.google.com and enter in the store address. On the map, right click on the red marker, and select “What’s here” from the pop-up menu. The Google address bar in the browser will change to display the exact latitude and longitude coordinates of the location which you can enter in the fields above.
Click on the Publish button to save and publish your store’s data.
Creating our Custom Widget
We now have a new Sitefinity Store Locator module and we have entered data for our physical stores.
Next we want to display the store data on a Sitefinity page for the customer to view. In order to display the data we need a new Sitefinity widget.
In reality Sitefinity has already created a new widget automatically for us. However this widget is fairly basic, and although it can be modified and styled, it is actually a bit easier to create a new custom widget for our purposes - especially as our widget will require some interactivity from the user, dynamically changing the data displayed based on the customer’s selections.
Creating a new Sitefinity widget is really not much more difficult than creating a typical .Net user control.
First create a new folder on our web app project to contain our custom widget.
In Visual Studio’s Solution Explorer, right click on the SitefinityWebApp project and select “Add”, “New Folder”. Create a new folder named “Custom”.
Right click on the Custom folder and select “Add”, “New Item” and select Web User Control.
Create a new web user control named “StoreLocator.ascx”.
There are two steps for creating our widget - creating the front-end markup and the backend code behind.
Front-End Markup Code
Our front-end markup is the following:
<%@ Control Language="C#" AutoEventWireup="true" CodeBehind="StoreLocatorCustom.ascx.cs" Inherits="SitefinityWebApp.Custom.StoreLocatorCustom" %><script type="text/javascript" src="https://maps.googleapis.com/maps/api/js?key=GOOGLE_API_KEY&v=3.exp&sensor=false"></script><script type="text/javascript"> var defaultLat = <asp:Literal id="litDefaultLat" runat="server" />; var defaultLong = <asp:Literal id="litDefaultLong" runat="server" />; var map; function initialize() { showMap(defaultLat, defaultLong); } function showMap(lat, long) { var mapOptions = { zoom: 14, center: new google.maps.LatLng(lat, long), mapTypeId: google.maps.MapTypeId.ROADMAP }; var map = new google.maps.Map(document.getElementById("map_canvas"), mapOptions); var marker = new google.maps.Marker({ position: mapOptions.center, title: "" }); // To add the marker to the map, call setMap(); marker.setMap(map); } google.maps.event.addDomListener(window, 'load', initialize);</script><div class="storeLocator"> <span class="yourZip">Your Zip Code: <asp:TextBox ID="txtSourceZip" runat="server" Columns="6"></asp:TextBox></span> <span class="findStores"><asp:Button ID="btnFindStores" Text="Find Stores" runat="server" /></span> <span class="distance">Within: <asp:DropDownList id="ddlDistance" AutoPostBack="true" runat="server"> <asp:ListItem Text="All Stores" Value="0" /> <asp:ListItem Text="10 miles" Value="10" /> <asp:ListItem Text="50 miles" Value="50" /> <asp:ListItem Text="75 miles" Value="75" /> <asp:ListItem Text="100 miles" Value="100" /> </asp:DropDownList> </span> <div class="storeCount"> <asp:Label ID="lblStoreCount" runat="server"></asp:Label> stores </div> <table style="width:100%" class="list" cellspacing="0" cellpadding="0"> <tr> <td class="column1" valign="top"> <telerik:RadListView runat="server" ID="listStores"> <ItemTemplate> <div style="padding: 10px 10px 10px 10px;"> <b><a href='javascript:showMap(<%# Eval("Latitude")%> ,<%# Eval("Longitude")%>)'><%# Eval("Title")%></a></b> <br /> <%# Eval("Address")%> <br /> <%# Eval("City")%>, <%# Eval("State")%> <%# Eval("Zip")%> <br /> <%# Eval("Phone")%> <br /> <span style='display:<%# Eval("Distance").ToString() == "0.00" ? "none" : "block"%>'>Distance: <%# Eval("Distance")%> miles</span> </div> </ItemTemplate> </telerik:RadListView> </td> <td valign="top"> <div id="map_canvas" style="width:100%; height:400px;"></div> </td> </tr> </table></div>Here are some points of interest about the mark-up above:
- The script tag for the Google maps API requires a key which you will get free from Google:
<script type="text/javascript" src="https://maps.googleapis.com/maps/api/js?key=GOOGLE_API_KEY&v=3.exp&sensor=false"></script><script type="text/javascript">Once you have your key, replace the yellow highlighted text above with your actual key.
- The embedded <%# Eval(“field_name”) %> tags are how you tell the page to display our field data we entered for our stores. This is how you tell the page where to display the store’s Address, City, State, etc.
- The embedded style script is missing from the above example. The styles are available from the download of the source code for this project.
C# Code Behind
You can look at the C# code behind from the downloaded project associated with this blog. The code is highly commented so it should be somewhat self explanatory.
For those of you familiar with coding for Sitefinity the biggest point to notice is that we are accessing our store’s data using the DynamicModuleManager class.
Every Sitefinity module has an associated manager class that you can use to access/store data for the module’s content: Blogs have a BlogsManager class, News has a NewsManager class, and so on.
But our new Store Locator module is not a built in module. It has been created and loaded dynamically at run time so there is no StoreLocatorManager class to handle our store’s data.
This is where the DynamicModuleManager class comes into play.
To retrieve our store data we first create an instance of the DynamicModuleManager class:
var dynamicModuleManager = DynamicModuleManager.GetManager();We next need to know the C# Type of the store data. This Type is created at runtime so you must use the TypeResolutionService to access the dynamic type.
Type storeType = TypeResolutionService.ResolveType( "Telerik.Sitefinity.DynamicTypes.Model.StoreLocator.Store");As is shown in the code comments, you can find the type name in the backend at:
Advanced -> Settings -> Toolboxes -> Toolboxes -> PageControls -> Sections -> ContentToolboxSection -> Tools
Look for your dynamic module which should be named:
Telerik.Sitefinity.DynamicTypes.Model.StoreLocator.Store
This is the name of the type that you need to resolve to determine the C# Type of your dynamic data.
With the manager class and data type we can now create an IQueryable<DynamicContent> object for our store’s data with the following statement:
var stores = dynamicModuleManager .GetDataItems(storeType) .Where(s => s.Status == Telerik.Sitefinity.GenericContent.Model.ContentLifecycleStatus.Live);In our code we will do a little filtering and ordering of data before we bind it to our list control:
IOrderedEnumerable<DynamicContent> sortedStores = stores.ToList() .Where(x => Convert.ToInt32(TypeDescriptor.GetProperties(x)["Distance"].GetValue(x)) <= withinDistance) .OrderBy(y => TypeDescriptor.GetProperties(y)["Distance"].GetValue(y));And then we can bind our filtered and sorted list to our front end RadListView control:
listStores.DataSource = sortedStores;listStores.DataBind();To access (and modify) the value of a dynamically created type requires a little programming muscle.
Each of our objects that is bound to the RadListBox is actually a DynamicContent type.
If you look at the CalculateStoreDistances method in the code behind you will see we pass in the IQueryable list of DynamicContent objects in a parameter called “stores”:
void CalculateStoreDistances(IQueryable<DynamicContent> stores)We loop through each “store” object in the “stores” list to calculate its distance from the customer’s starting zip code.
Each “store” object is of type DynamicContent. It is from this DynamicContent object where we need to get the physical store’s address, state, zip, etc.
But again, since this is a dynamically created C# Type we cannot simply get the address of the store using the following statement:
string address = store.Address;
Address is not a directly accessible property because the store object was not created during compilation. We can however get the value of the Address property using the .Net TypeDescriptor class!
var properties = TypeDescriptor.GetProperties(store);PropertyDescriptor addressProperty = properties["Address"];string address = addressProperty.GetValue(store).ToString();After we calculate the distance to the store, we temporarily save the calculated distance back into our dynamic store object so it is available to our RadListbox when we bind the data. You can also save a value back into the dynamic type object:
PropertyDescriptor distanceProperty = properties["Distance"];distanceProperty.SetValue(store, (decimal)Math.Round(distanceMiles, 2));That is the highlights of the code behind.
Google Geocoding API
You will see we determine the latitude and longitude of a zip code by posting data to Google’s Geocoding API. With this API we post a zip code to Google who returns an XML file containing data about the zip code including its latitude and longitude.
You can create your own GetCoordinate method to retrieve a zip code’s coordinates to access the data without relying on the Google API. For instance, there are many third-party services that will provide you periodic updates of data containing all of the US Zip codes and their geographic coordinates. You can write custom code to upload this data to a custom database table and then change the GetCoordinate method to lookup the coordinates for a zip code with a database access instead of a web post.
Register the Widget in the Sitefinity Toolbox
Now that we have a new widget to display our stores, we need to register this template so it will appear on the Sitefinity page creation toolbox.
From the Sitefinity backend click Administration -> Settings
Click Advanced link
The Settings page appears.
In the left pane, click Toolboxes -> Toolboxes
Click on PageControls -> Sections -> Ecommerce -> Tools
Click on the Create New button.
In the Tools pane enter the following:
| Control CLR Type or Virtual Path | ~/Custom/StoreLocator.ascx |
| Name | StoreLocator |
| Title | Store Locator |
Note: The naming convention for the Name field is the same as for naming a typical C# object. In general keep the name unique but short, starting with a letter (not a number), and with no spaces.
The Title field is actually displayed to the user in the Sitefinity backend as the name of the widget so you are free to use spaces and other punctuation for this field.
Create a New Sitefinity Page
With our module, data, and widget all complete, the last step is to create a new Sitefinity page and drag our widget onto it.
In the Sitefinity backend, select Pages -> Create a Page
Create a new page called “Locations”. For this example we are not worried about styles, formatting, etc., so just create a page with default settings, with a built in template such as “1 Column, Header, Footer”.
In the page designer, in the right-hand widget toolbox, locate and expand the “Ecommerce” section. You will now see our new widget in the list of available Ecommerce widgets.
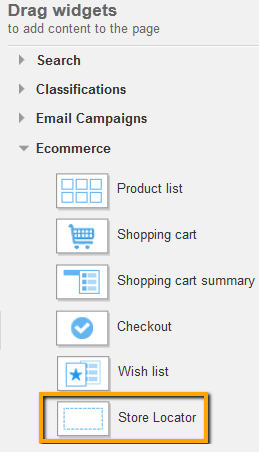
Note: We have reduced the list of widgets in the picture above to conserve space.
Drag the Store Locator widget onto the page, and click on the Publish button.
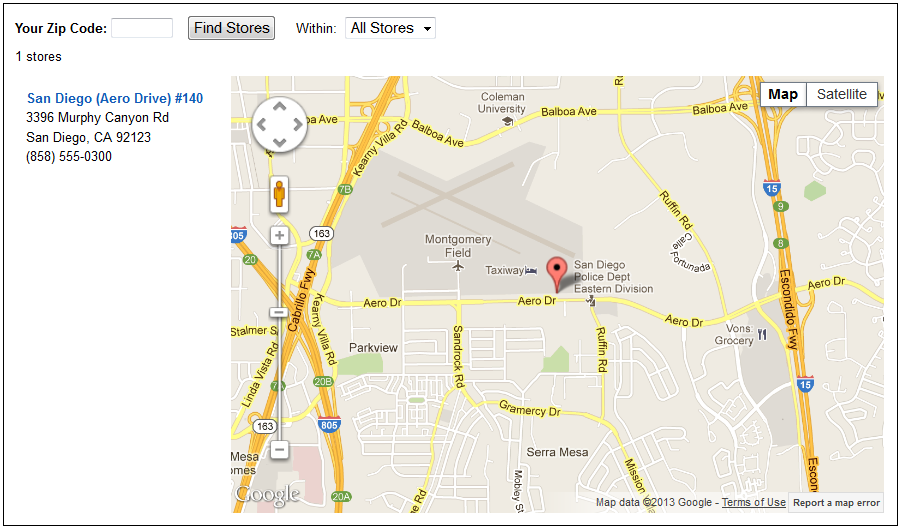
Now view our new page, and you we will see the new store locator in action:
Using the Store Locator Widget
When the widget first appears it will display a list of all stores you have entered. The first store on the list will be the default location shown on the Google map as there is no starting zip code from which to determine distances.
When the customer enters a zip code into the textbox and clicks on the “Find Stores” button the distances to each store will be calculated. The list will be re-displayed with closest store at the top, the farthest store on the bottom. The distance to each store will be displayed at the bottom of each store’s entry.
The “Within” dropdown allows the customer to reduce the list of stores to the ones within a given distance. If “All Stores” is chosen, then all stores are displayed regardless of their distance from the starting zip code.
Possible Enhancements
Although this store locator’s functionality should cover the needs of a lot of users there are some enhancements that could be done to make it even more polished.
- The store list shows all stores. There is no paging or limit to the number of stores displayed so if you have a lot of stores the list (and thus the page) will be very long. Adding paging or a limit to the total number of stores will make this better.
- You can pass more information about a store’s location to Google maps using their API. You could then have Google pop up a box when the customer clicks on the store’s marker to display more information about the store.
- Currently there is no tool-tip text set on the Google map’s marker. You could pass the store’s name to Google maps so when the customer mouse’s over a marker they know which store they are hovering over. This would be most helpful if you have a lot of stores in the same area of a map.
- Country can be added to the store addresses to facilitate world-wide store location.

