Deploy the database to Azure SQL
PREREQUISITES: You must use Microsoft SQL Server Management Studio 18.0 (or later)
Before you publish your project to Azure App Service, you must first upload your project's database to Azure SQL Database. Azure SQL Database is a database as a service solution providing intelligent, scalable, cloud database service and a broadest SQL Server engine compatibility. To get your Sitefinity website database running in Azure SQL Database perform the following steps:
Create a SQL server
To have your Sitefinity website database deployed to the cloud, you must first have a SQL server that will host your database. If you already have a SQL server in your Azure account, you can skip this step. If you don’t have one or want to create a new SQL server, follow the steps below:
- Navigate to the Azure Portal
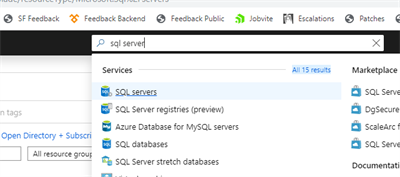
- Using the search box located in the top center of the page, search for SQL Server
- From the search results pick SQL Servers
- Click on the Add button
- Fill in the following information:
- Server name – the name of your new SQL Server
- Server admin login – your server admin user name
- Password
- Subscription – select an existing Microsoft Azure subscription to designate this server to
- Resource group – select an existing resource group or create a new one. For more information on resource groups refer to the Microsoft documentation on Resource groups.
- Location – pick a location most suitable for your website traffic to get the best performance.
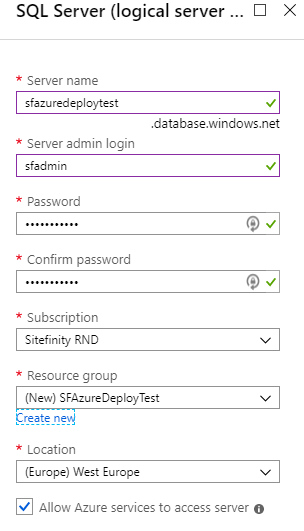
NOTE: Keep a record of these details as you will need it later in the process to connect to your server.
-
Click Create
- Once your SQL server has been created it will appear in the list of SQL servers for your subscription. If the server does not automatically show up, use the Refresh button to check if it’s not complete.
Deploy your database
Once your SQL Server has been created, you can now proceed with deploying your website database to Azure SQL Database. The process is facilitated in your local installation of SQL Server Management Studio (SSMS). You must connect to your SQL server in Microsoft Azure and deploy your local database there. Follow these steps:
- On the machine where your website database is restored, open your SQL Server Management Studio
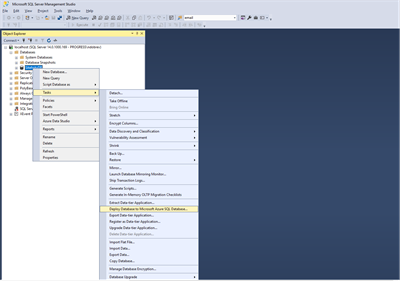
- Locate your database, right click on it, and select Tasks » Deploy Database to Microsoft Azure SQL Database
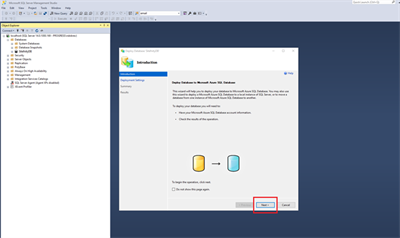
- On the next screen, click Next
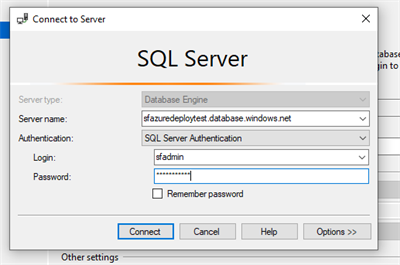
- The next screen asks you to fill in your Azure SQL server connection details.
- If you followed the steps in the previous paragraph to create a SQL server use the details, you supplied there.
- If you already had an SQL server in your Azure subscription, fill in its details.
When finished, click Connect.
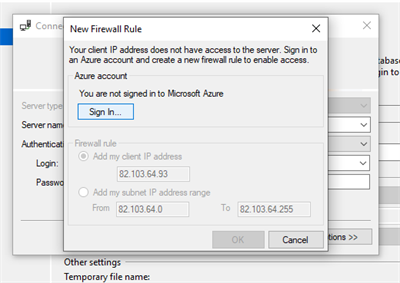
- If you haven’t already added a firewall rule in your Azure account that enables communication from your local dev machine’s IP or range of IPs, the next screen enables you to configure one without leaving the SSMS interface. The wizard prompts you to sign in with your Azure account and add a firewall rule for your IP address.
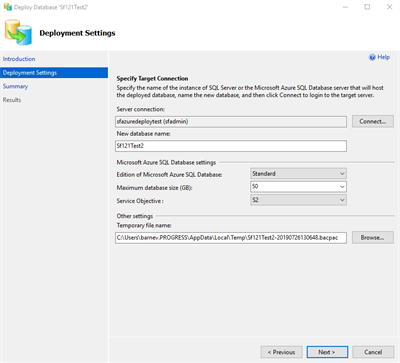
- The next screen facilitates configuring the parameters of your Azure SQL Database. These parameters determine the maximum allowed size of the database and its performance. The officially recommended minimum requirements for your Sitefinity database to operate efficiently are the following:
- Edition – Standard
- Maximum database size – 50 GB
- Service objective – S2
NOTE: The above settings are the officially recommended minimum for a Sitefinity database. For more information about configuring and pricing options see Azure SQL Database pricing.
-
Click Next.
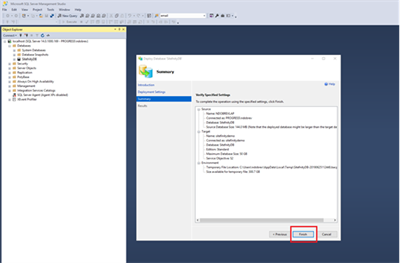
- On the next screen you are presented with a summary of the configured options. Review it carefully and click Finish to start the deployment process.
- Once deployment is complete, click Close on the next screen.
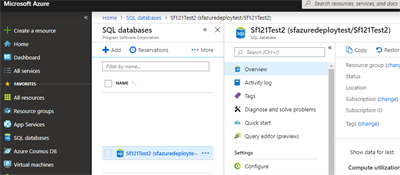
RESULT: Your database has been successfully deployed to Azure SQL Database. You can verify this by going to the Azure portal and clicking on (or searching for) SQL Databases:
NOTE: The instructions provided above are based on using SQL Server Management Studio (SSMS) for deploying your database to Azure SQL. If you encounter any problems while deploying your database, you can try an alternative approach using the Microsoft SQL Data Migration Assistant.