Default workflow
Workflow is tightly integrated into the Sitefinity CMS publishing process. Although you cannot see it in the user interface, even if you don’t define a workflow, Sitefinity CMS uses a default definition. This definition moves an item between several default states: draft, published, scheduled and unpublished. These default states are applied for items in all built-in content modules, unless you have defined another type of workflow. Although very similar, the default workflow should not be confused with content lifecycle.
Compare content lifecycle and default workflow
Unlike the lifecycle, with workflow an item can be in only one state. When switching the workflow state, this actually changes the item, rather than creating a new row in the database. There are no new rows in the database, only new values in the existing rows for each item. Here is the meaning of default workflow states:
| Draft |
The default state of an item. Not visible in the frontend. |
| Published |
An item, which has gone through the whole workflow process and is visible in the frontend. |
| Scheduled |
An item, which has gone through the whole workflow process, but is not yet visible in the frontend (it will be published on a future date). |
| Unpublished |
An item has been published once already, but has then been unpublished. |
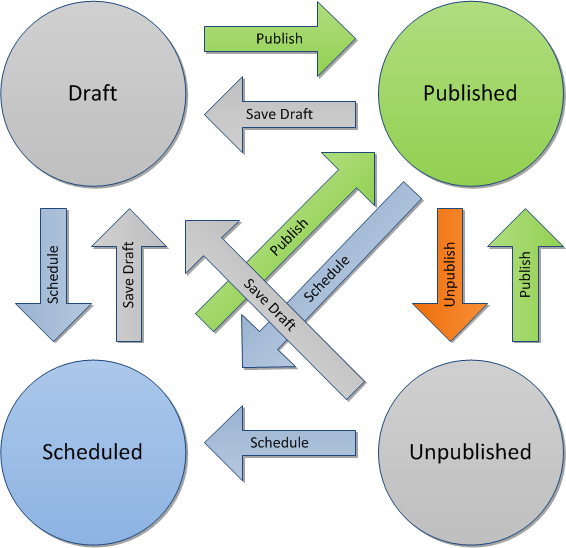
The diagram above shows how an item can move between the different states of the default workflow. Circles represent states, arrows represent actions that can be performed with content items. Those actions can be performed both from the Sitefinity CMS user interface, as well as the API.
A rule you can follow when dealing with lifecycle and workflow is that the workflow state of an item is always applied to the Master version in the lifecycle. This means that workflow does not have any meaning for Temp and Live versions.
- Temp versions are temporary, so their workflow state is always the one of the version they were copied from.
- Live versions always have a workflow state of Published.
- All workflow states are applied to the master version of an item.
Sample workflow operations
To see how each action affects an item, you can observe the state of the database and the user interface of Sitefinity CMS, similar to how you did with the content lifecycle.
- Create a news item
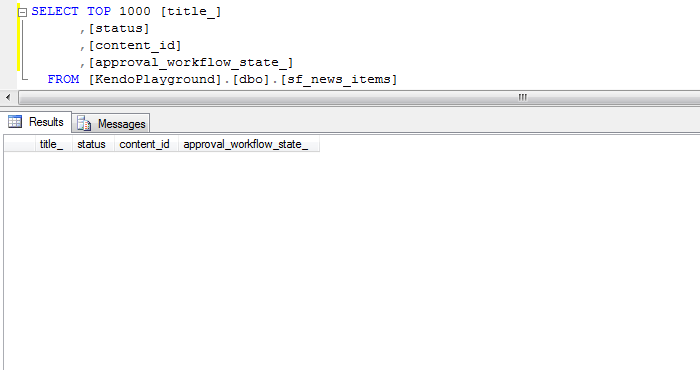
As with the lifecycle, just clicking the Create button does not persist anything into the database. The item is still only in memory and the table is empty.

To do the same using the API, you do not need to call the workflow at all. Create an item the way you normally would.
- Save the item as draft
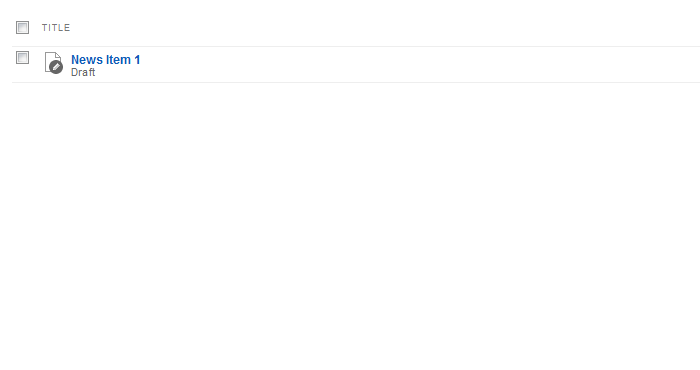
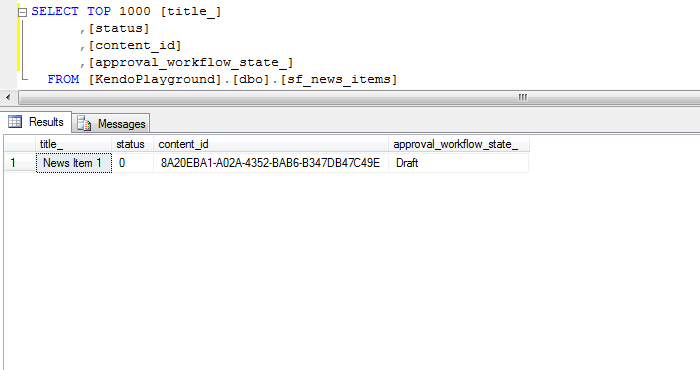
Once you save the item as draft, a Master version is persisted in the database. Its workflow state is Draft, as can be seen in the last column.
Saving a draft of an item through the API is also done without specific workflow calls. Since this is the default workflow state of an item, it is automatically set.
- Publish the news item
Publishing the item creates a Live version in the lifecycle, and sets the workflow state of both Live and Master versions to Published.

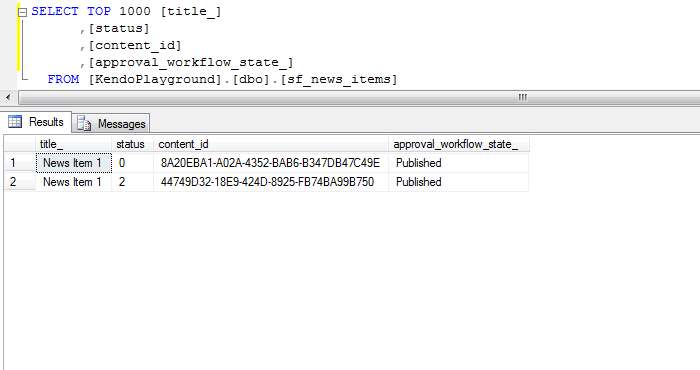
When publishing the item through code, it is not enough to call the Publish method for the lifecycle - that would only create a live lifecycle version. To instruct the workflow that it should also change the state of the item to Published, you need to call WorkflowManager.MessageWorkflow().
- Edit the item again
If you edit the item for a second time, while it is being edited, there is also a Temp version in the database. The workflow state of all lifecycle versions is Published. Only the Live version (before the changes you have made) is visible on the frontend.

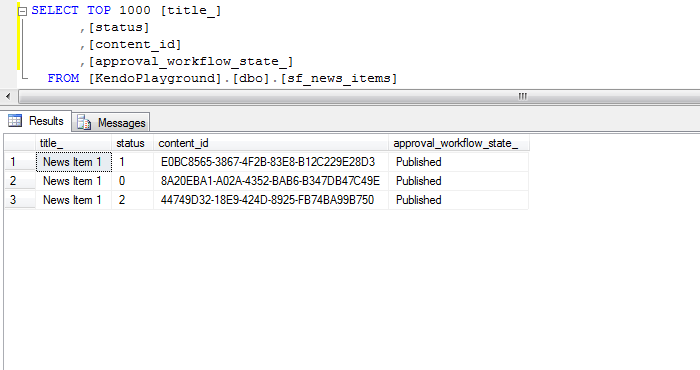
Checking out the item and making the changes is a matter of calling the lifecycle methods. The difference comes when you actually want to persist the changes. Except the call to CheckIn(), you also need to go through the workflow once more. If you do not, the item's state will be Newer than published, but our changes won't be live yet. So, you message the workflow telling it to publish the item.
- Schedule the news item
Once you are happy with our changes, you decide to schedule the item to be published on a date in the future. This removes the Temp version from the database and sets the workflow state of the Master version to Scheduled. The Live version still has a workflow state of Published and is visible in the frontend.

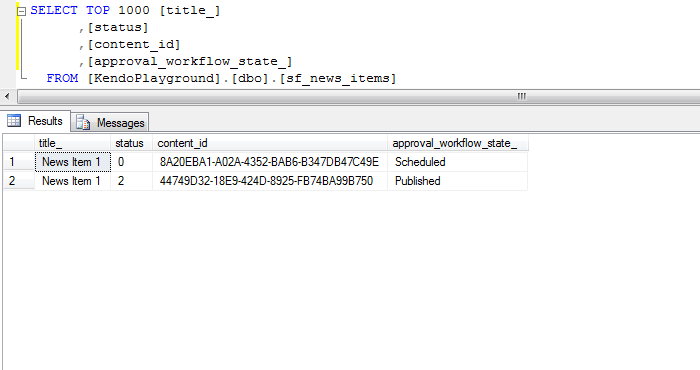
Scheduling an item through the API is done the same way as publishing - calling the workflow. The difference here is that you use Schedule for the parameter specifying the operation name.
- Publish the news item again
Publishing the scheduled item changes the workflow state of the Master version to Published and makes the item immediately visible in the frontend


The code for publishing the item is the same as in Step 3.
This completes the sequence of steps through which you have moved a news item. Remember that while content lifecycle keeps several versions of an item, the default workflow operates on the master version by changing its status property. Knowing the difference between the two is important, and will become more evident when working with non-default workflow. You will discuss advanced workflow scenarios in the next topics of this section.
Following is a code sample that demonstrates the above operations: