Configure an AWS Load Balancer Tutorial for Progress Hybrid Data Pipeline
Introduction
Accessing on-premises data from the cloud often brings with it many security and availability headaches, but with DataDirect Hybrid Data Pipeline it is now possible to securely access data behind any firewall while still leveraging the benefits of advanced cloud load balancing.
In this tutorial, you’ll learn how to quickly configure Amazon’s Application Load Balancer (ALB) to achieve both the scalability and reliability of a clustered Hybrid Data Pipeline installation by leveraging our support of the WebSockets protocol.
Download and Install a Hybrid Data Pipeline Cluster
This document assumes you are already familiar with installing a Hybrid Data Pipeline cluster on 2 or more EC2 instances which meet the minimum requirements – including use of an external configuration database and shared storage. It also assumes familiarity with configuring VPCs, Security Groups and basic administration within the AWS environment.
General Information about installing a single node in AWS can be found here, while details on a cluster installation can be found in our Installation Guide.
Note that there are a few changes with the DataDirect Hybrid Data Pipeline installation specific to supporting cloud load balancers:
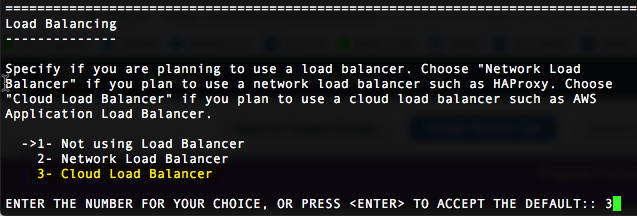
- There is a new option for Load Balancers. Be sure to choose option 3 if using a WebSockets based load balancer such as the Amazon ALB
- Make sure to load your PEM file (SSL cert) on the HDP server as well as on the AWS Application Load Balancer. This ensure correct the redistributable files are created to support installation of the On-Premises Connector and hybrid ODBC/JDBC drivers.
- Ensure your “Load Balancing Host Name” matches the hostname in your SSL cert.
Configuring an Application Load Balancer (ALB) in AWS
For the purpose of this document, it is assumed you are installing a 2 node cluster which only has SSH (port 22) access from the outside world and that both nodes are in the same VPC/subnet.
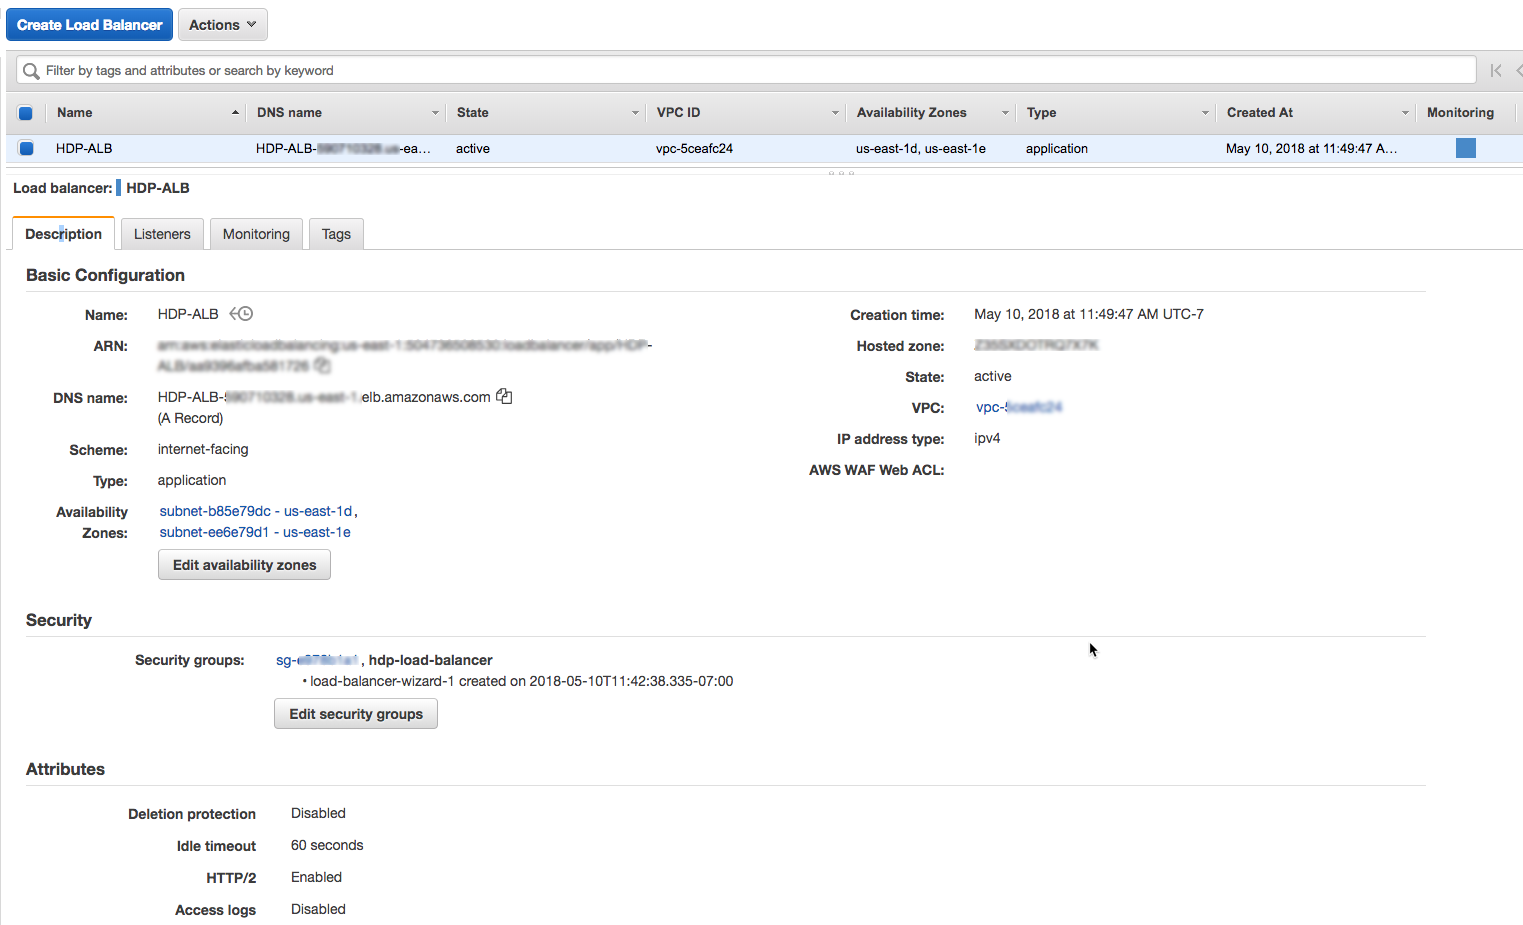
- Create a new Application Load Balancer
- Provide a name
- Scheme is internet-facing
- IP address type is ipv4
- Choose availability zone(s) of your preference
- Configure 4 Target Groups
- Under Load Balancing, click on Target Group
- You will be creating 2 target groups containing all nodes and 1 group specifically for each node. For a 2 node cluster, there will be 4 target groups.
- New Target Group (#1)
- Name: hdp-nodes-http
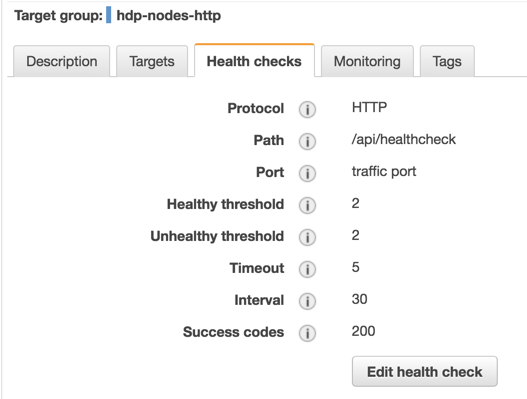
- Health Checks
- Protocol: HTTP
- Path: /api/healthcheck
- Advanced settings
- Port: traffic port
- Healthy threshold: 2
- Unhealthy threshold: 2
- Timeout: 5 seconds
- Interval: 30 seconds
- Success Codes: 200
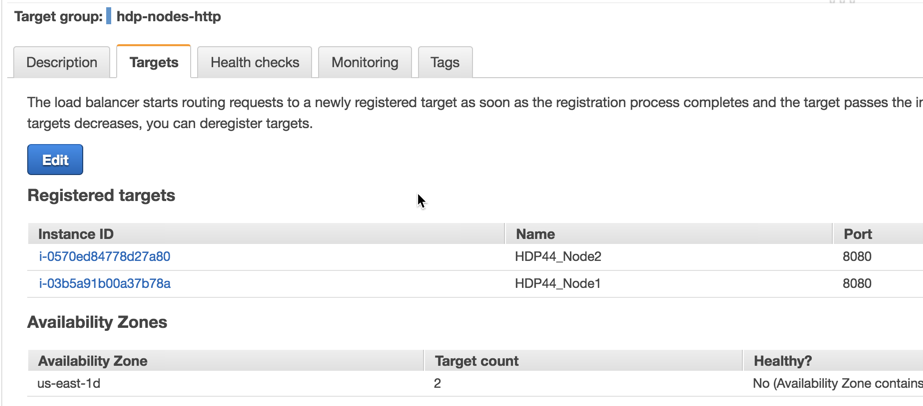
- Register Targets
- Select Targets tab and click Edit
- Select both HDP nodes and click Add to Registered
- Create New Target Group (#2)
- Name: hdp-notification-pool
- Protocol: HTTP
- Port: 11280
- Target Type: Instance
- Health Checks
- Protocol: HTTP
- Path: /
- Advanced settings
- Port: traffic port
- Stickiness: Disabled
- Register Targets:
- Select all HDP nodes and click Add to Registered
- Create New Target Group (#3)
- Name: hdp-opa-node1
- Protocol: HTTP
- Port: 40501
- Target Type: Instance
- Health Checks
- Protocol: HTTP
- Path: /
- Advanced settings
- Port: traffic port
- Stickiness: Disabled
- Register Targets:
- Register ONLY HDP node #1
- Create New Target Group (#4)
- Name: hdp-opa-node2
- Protocol: HTTP
- Port: 40501
- Target Type: Instance
- Health Checks
- Protocol: HTTP
- Path: /
- Advanced settings
- Port: traffic port
- Stickiness: Disabled
- Register Targets:
- Register ONLY HDP node 2
- Add Listener to ALB
- Go to Load Balancer and select the Listeners tab
- Click Add Listener
- Select HTTPS for port 443
- Under Default Actions, set Forward to hdp-nodes-http target group created above.
- Select security policy (default – ELBSecurityPolicy-2016-08)
- Select the correct SSL certificate for your domain
- Create/attach a security group to the Application Load Balancer:
- Allow inbound TCP on 443 for 0.0.0.0/0
- Create Forwarding Rules
- Click view/edit rules under the Rules column for the HTTPS listener

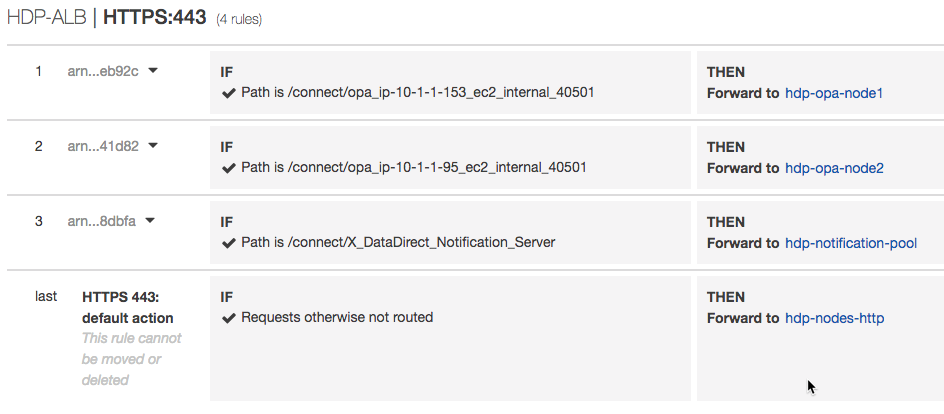
- Add these 3 rules in this order (for a total of 4 rules):
- Path: /connect/ /connect/opa_ip-10-1-1-153_ec2_internal_40501
- Replace ip-10-1-1-153 with the appropriate info for your HDP node #1. This is the internal DNS name.
- Forward to hdp-opa-node1
- Path: /connect/ /connect/opa_ ip-10-1-1-95_ec2_internal_40501
- Replace ip-10-1-1-95 with the appropriate info for your HDP node #2. This is the internal DNS name.
- Forward to hdp-opa-node2
- Path: /connect/X_DataDirect_Notification_Server
- Forward to hdp-notification-pool
- The final rule should already exist
- HTTPS 443 – All other requests forward to hdp-nodes-http
- HTTPS 443 – All other requests forward to hdp-nodes-http
- Path: /connect/ /connect/opa_ip-10-1-1-153_ec2_internal_40501
- Add these 3 rules in this order (for a total of 4 rules):
- Click view/edit rules under the Rules column for the HTTPS listener
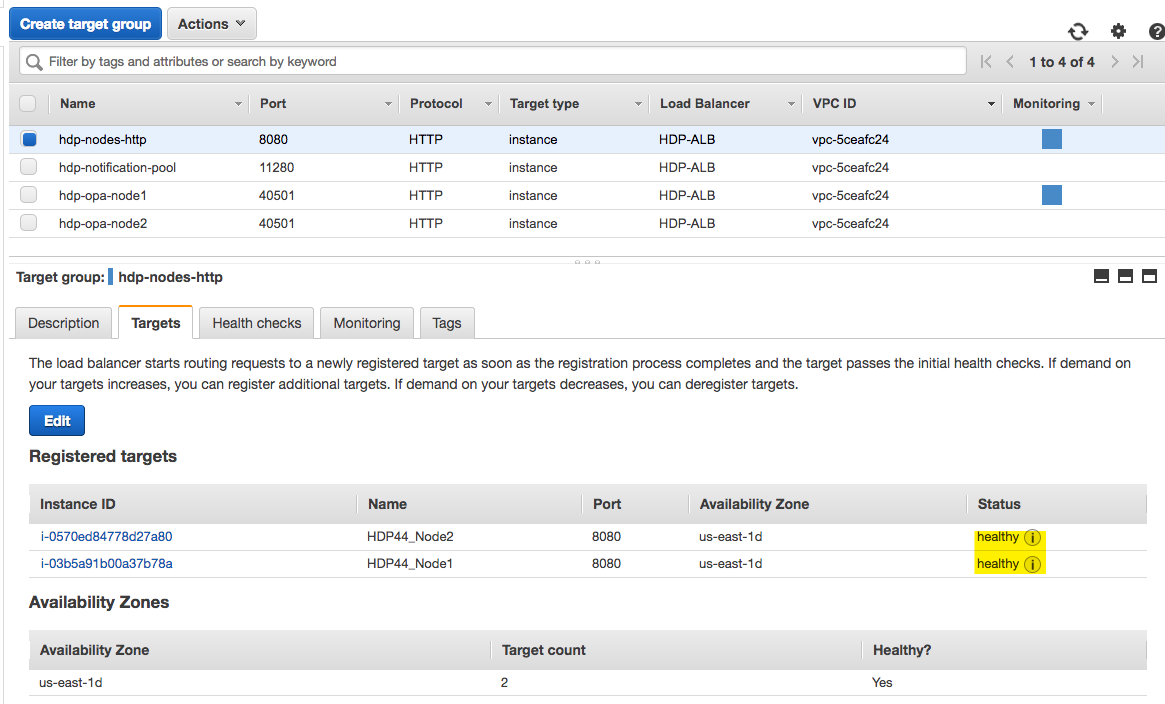
- Verify Targets
- Once the ALB has been configured with the listener and target group rules, the targets should show as healthy for each target group if the instances are online and HDP is running.
- Configure DNS
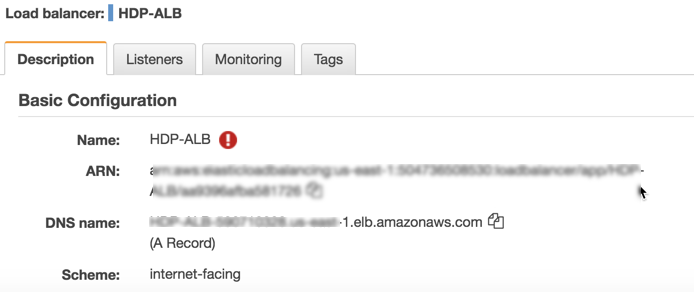
- Add a CNAME to your DNS to point your hostname to the ALB’s public DNS hostname. It is shown under the Basic Configuration of the Load Balancer as “DNS Name.”
- Add a CNAME to your DNS to point your hostname to the ALB’s public DNS hostname. It is shown under the Basic Configuration of the Load Balancer as “DNS Name.”
- Under Load Balancing, click on Target Group
We hope this tutorial assisted in creating a cloud-based solution to OData enable both your on-premises and cloud data sources using Progress Hybrid Data Pipeline and Amazon’s Application Load Balancer. Now you can have security, scalability and reliability all together in a single data access solution which lets you bring sources such as Oracle, Postgres, MySQL, DB2 and SQL Server out from behind the firewall. If you have any question, please feel free to contact us.