In enterprise development, there are things that are difficult and then there are things that are really difficult. This is typically because of the complexity of scale and the proliferation of different systems across large companies. In my own experience, making systems talk to each other can be enough to make any developer want to pull their hair out.
The good news is that Progress Kinvey offers multiple tools that can make the job of an enterprise developer much easier—particularly when it comes to integrating complex systems. For instance, in my prior post, I showed how Kinvey lets you easily “mobilize” your existing enterprise RDBMS data. In this post, I want to demonstrate how Kinvey can also simplify connecting an existing enterprise authentication system with your mobile or web app using a feature called Mobile Identity Connect.
I also discussed Mobile Identity Connect in a prior post on Understanding Users in Kinvey.
Which Enterprise Authentication?
Our example will walk through connecting to Azure Active Directory. I chose this in large part because it offers readers an easy way to recreate the steps and the app if they choose to do so themselves. Obviously, it’s important to emphasize that the steps may differ depending on what type of authentication system your company uses.
Currently, you can connect Kinvey to an authentication service via any of the following methods:
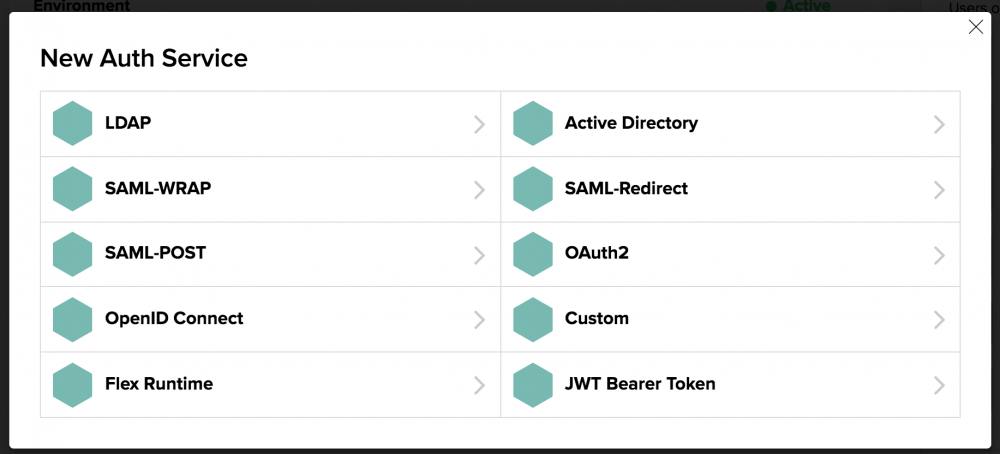
If you don’t see your option on that list, keep in mind that the Flex Runtime option functions as a custom option that can potentially handle any scenarios not covered by the other options.
In our example, I’ll walk through connecting Azure AD via OpenID Connect.
Setting Up Azure Active Directory
Getting Azure AD set up is probably the hardest part of the whole process. That’s not to say that it is hard—just that there are a number of steps to get everything properly configured. Let’s walk through it.
- From within the Azure portal, click on Azure Active Directory or click on +New and search for Azure Active Directory.
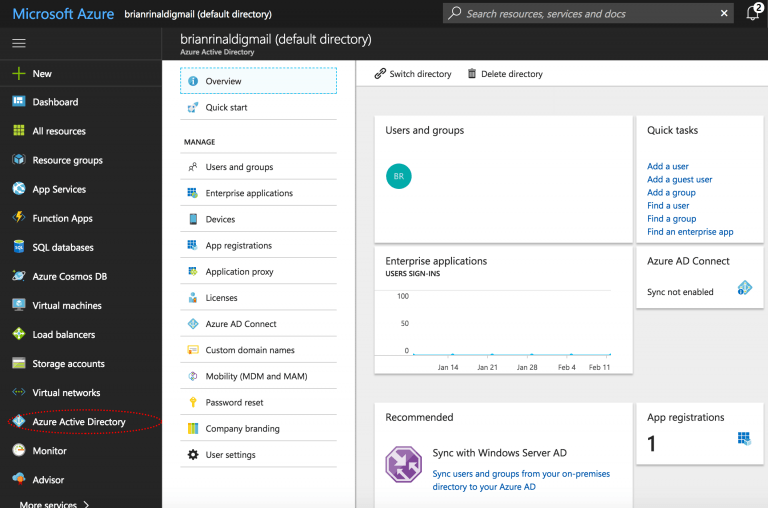
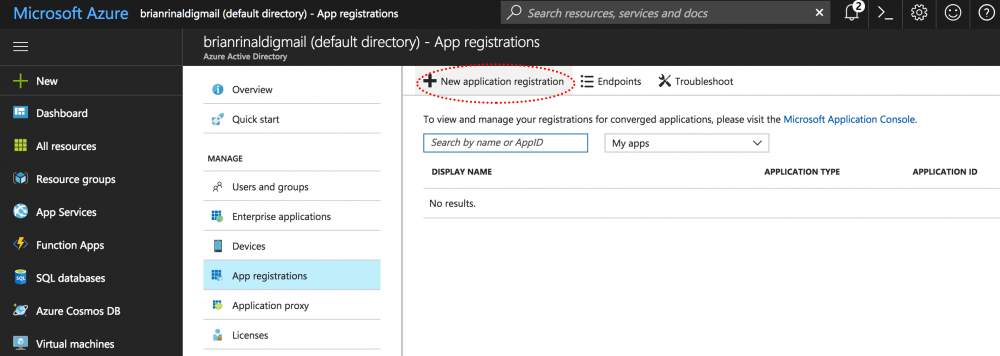
- Choose the “App Registrations” option and “New Application Registration.”
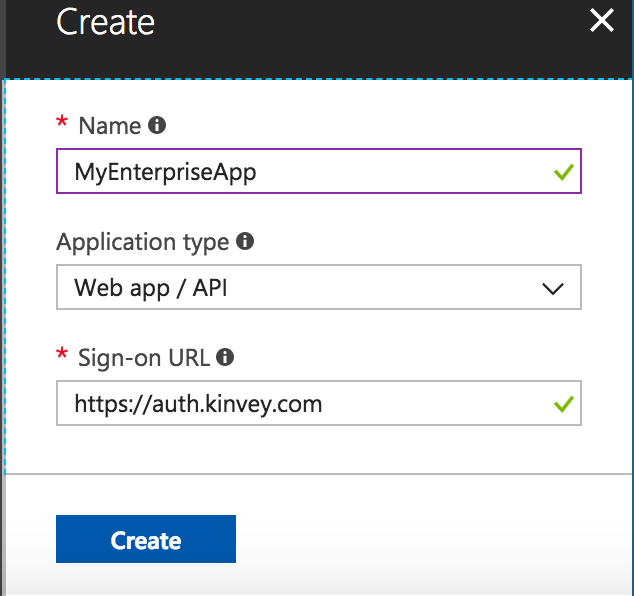
- Enter a name for the application (I entered “kinvey”), choose “Web app / API” and, for the Sign-on URL, enter
https://auth.kinvey.com.
- Once it is created, choose “Reply URLs”.
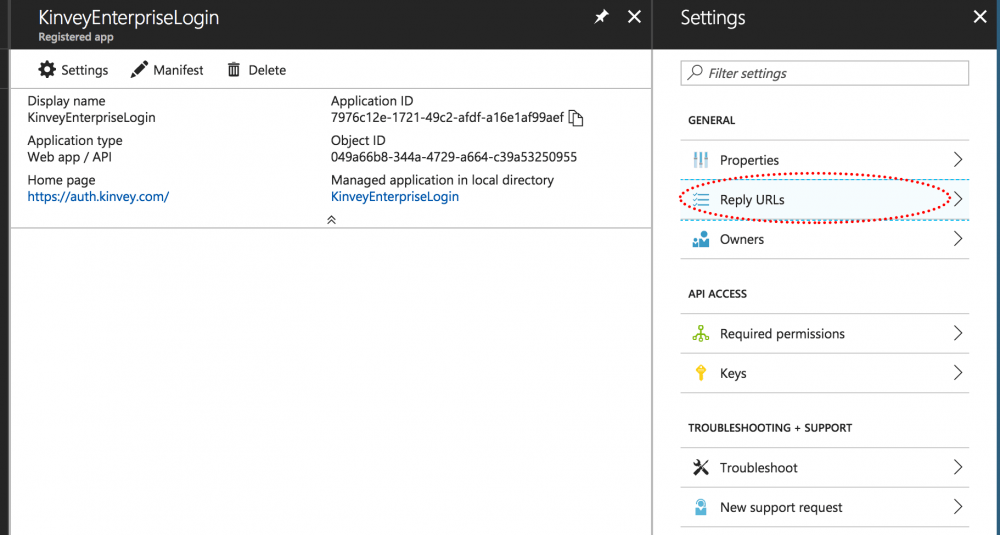
- Enter
https://auth.kinvey.com/oidc/redirect(see docs)

- Back in the application settings, choose “Required Permissions” and then “Windows Azure Active Directory.”
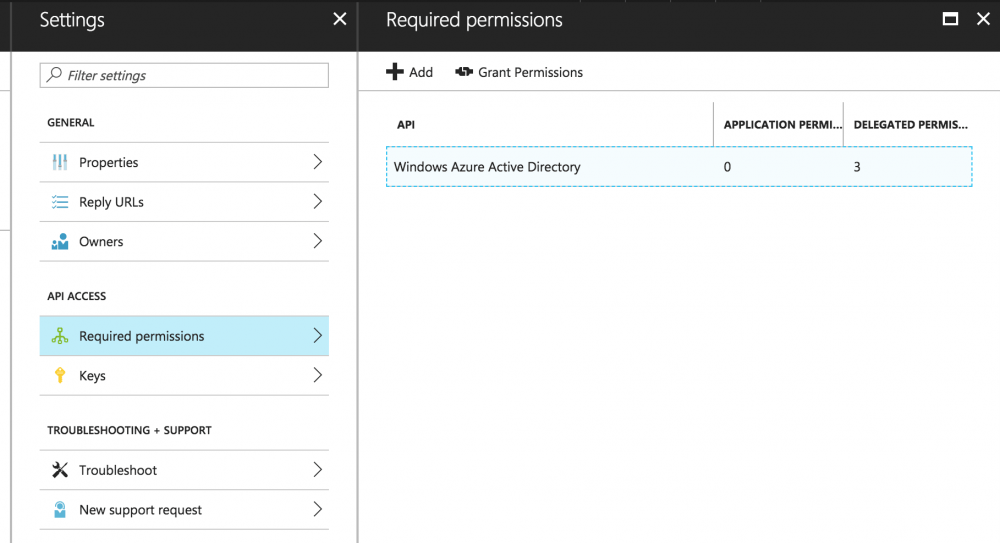
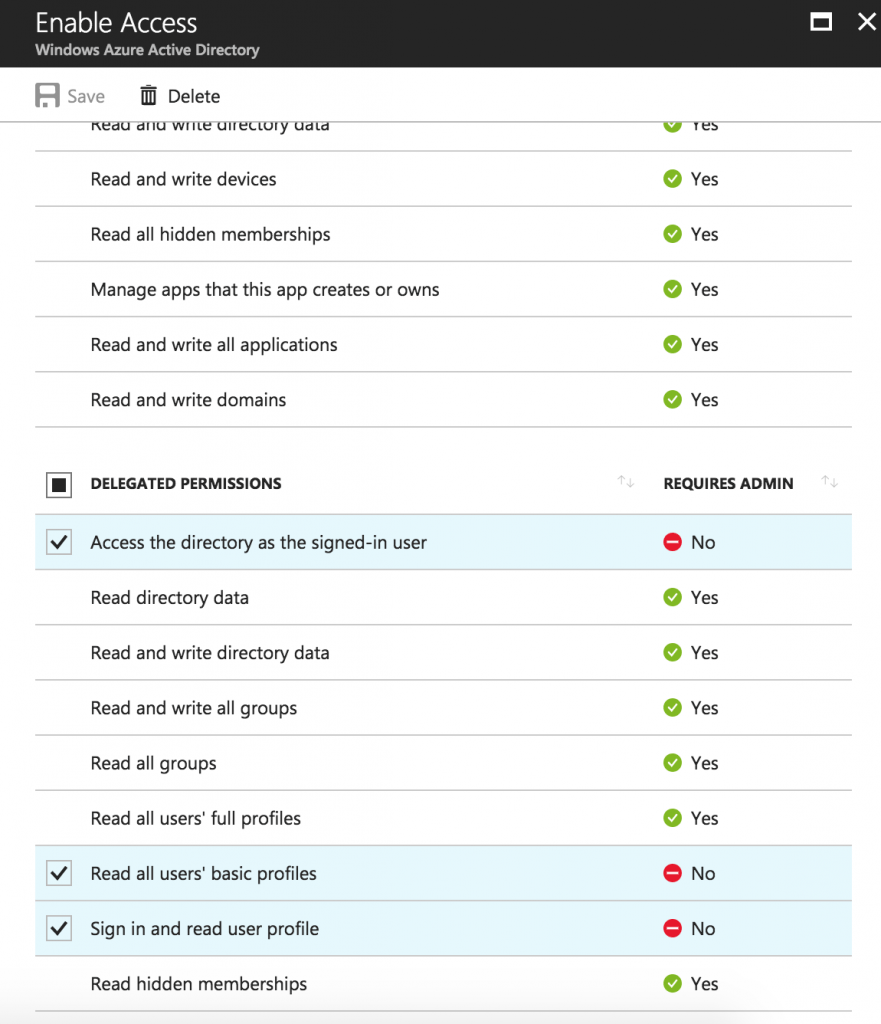
- Enable the following:
- Access the directory as the signed-in user
- Read all users’ basic profiles
- Sign in and read user profile
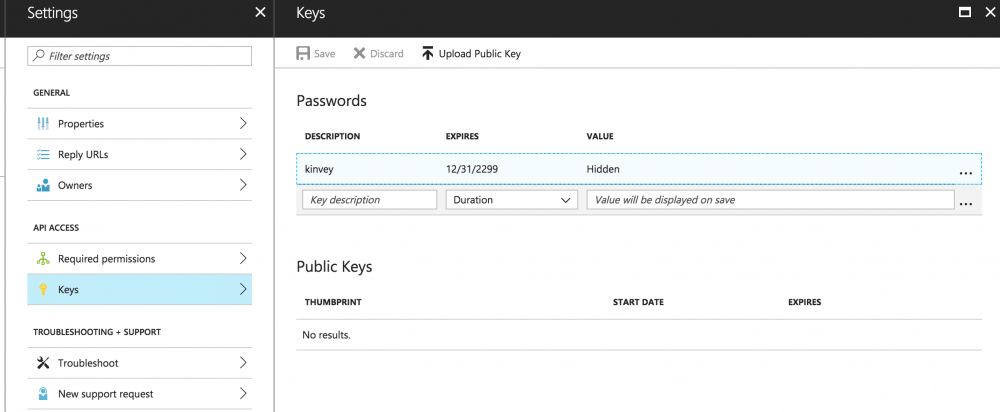
- Back in the application settings again, choose “Keys” and create a new option under “Passwords”. Set the description (I used “kinvey”) and expiration (I chose “never”). Click “Save”. Make sure to copy the value before leaving.
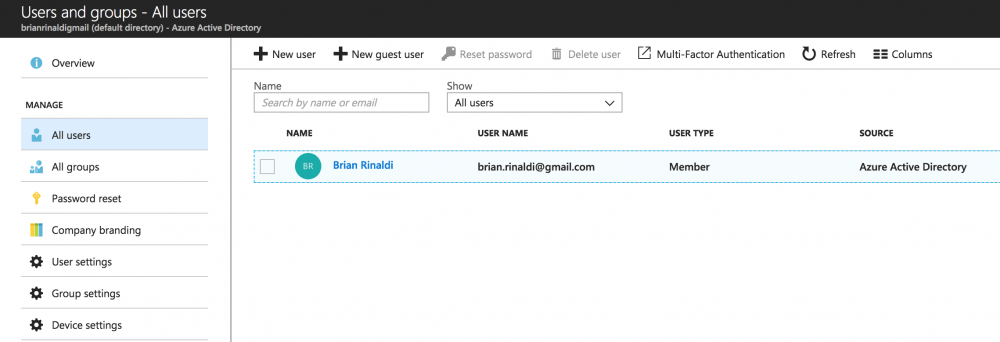
While it is not exactly a configuration setting, your Azure Active Directory will need a user in order to be able to test the log in process. Go to your Active Directory, click “Users and Groups,” then “All Users,” and finally “New User.” As you can see in the image below, I went ahead and added myself.
Whew! We’re done with the Azure configurations… on to Kinvey. But, don’t worry, the next steps are easier.
Special thanks to my colleague Ronald Heiney for his help figuring out these steps.
Setting Up Mobile Identity Connect
From within the Kinvey web console, you’ll want to choose the Mobile Identity Connect option from the left-hand navigation. Next click the “Add Auth Service” button. From there you will see all of the options discussed earlier in this article.

Choose the “OpenID Connect” option. Let’s look at my auth service settings and then discuss each field and how to get it from Azure.

Let’s discuss everything that you’ll need to enter that isn’t a default value. First, let’s get the easy ones out of the way.
- Name: This can be anything you like.
- Redirect URI’s: This is the URL of your app login where the authorization will be sent back from the service. Since this example shows an example app running locally, I simply entered the URL for my local site (
http://localhost:8080).
The good news is that the next batch of properties can all be found in a single location on Azure. The bad news is that (in my experience) finding that location is a bit convoluted. Let me walk through it.
The documentation shows that the Open ID Connect metadata document can be found at:
https://login.microsoftonline.com/{tenant}/.well-known/openid-configurationThe tricky part seems to be figuring out your tenant to populate the URL. There is a full page of documentation showing how to get the tenant, but I managed to find mine using the following steps:
- In the Azure portal, choose “Azure Active Directory” then “App Registrations” and then “Endpoints”.
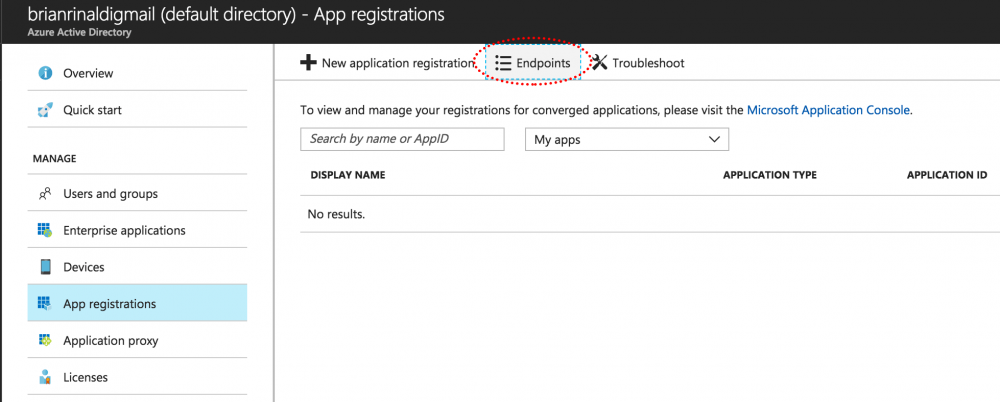
- Each of the endpoints listed includes the tenant, in most cases immediately following the
https://login.microsoftonline.com/portion of the URL.
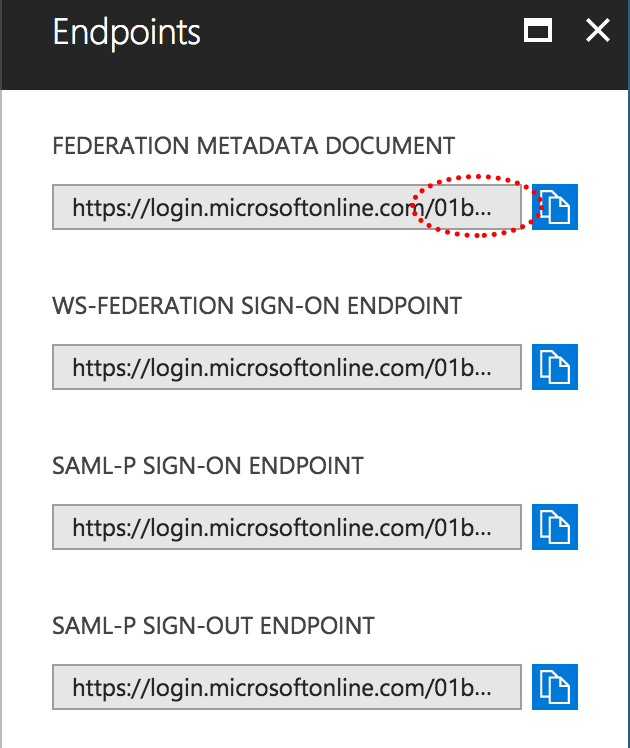
- Plug that value into the
{tenant}portion of the URI above.
Now that we have the metadata, we can pull the following values:
- Provider URI: This is the
token_endpointfrom the metadata. - Grant Endpoint: This is the
authorization_endpointfrom the metadata. - Issuer Identifier: This is the
issuervalue from the metadata.
Ok, we’re almost done. There are just a few more fields to complete.
- Client ID: This is the Application ID from within the Azure Active Directory “App Registrations.”

- Client Secret: This is the secret that we copied when we created the application key in Azure earlier.

- Scope: Specify the
profile emailscopes (separated by a space).
Finally, save the service.
Testing the Service
Before we jump into code, it would be worthwhile to test our service. That way we can be sure that, if we encounter any issues, they are in our code and not in our configuration.
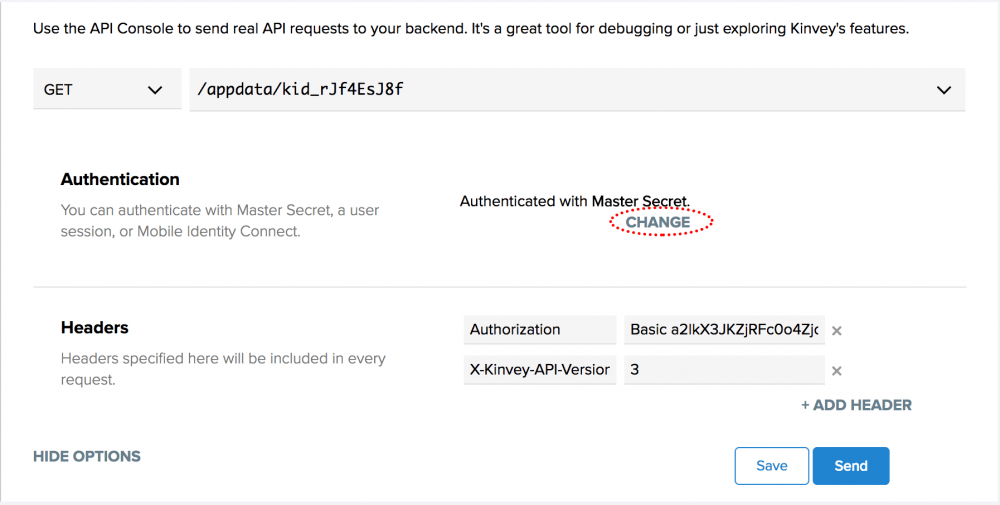
From within the Kinvey browser console, click on the “API Console” option and then click on the “Show Options” link.
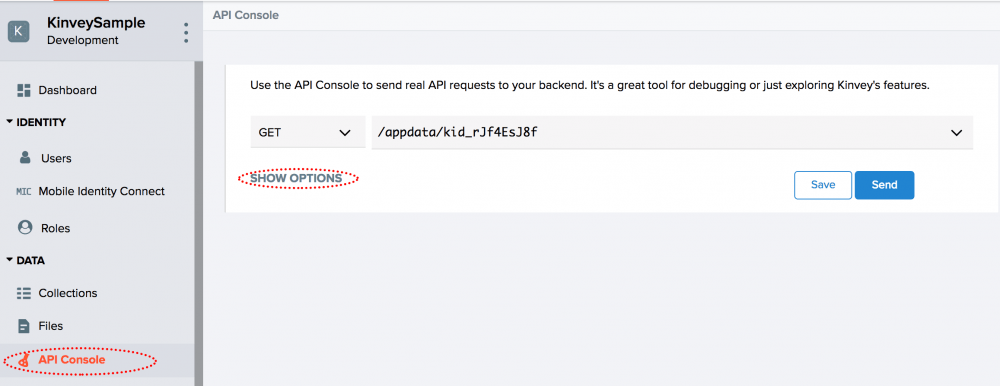
Next, click the link to change the authorization type.
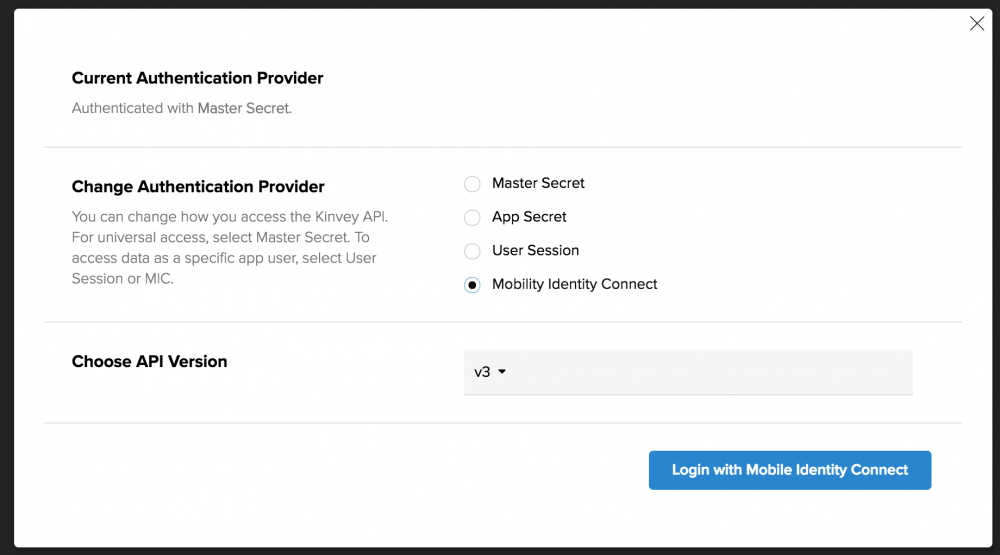
Change the authentication provider to “Mobile Identity Connect” and click the “Login with Mobile Identity Connect” button.
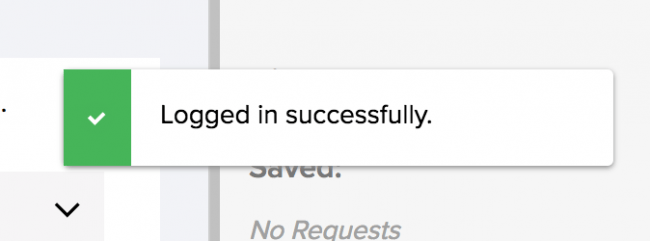
This should pop open a new window allowing you to authenticate via Azure AD and, assuming everything was set up properly, the modal windows will close and you’ll get a “Logged in successfully” message.
Ok—we’re finally ready to write some code!
Building the App
For the purposes of example, I’ve built a very simple login screen that utilizes the Mobile Identity Connect authentication service we just set up to log into the app. It is a much simplified version of the app built for my prior tutorial on authentication.
First, of course, you’ll need to import the Kinvey SDK. Next, we create a very simple form with a login button (there’s no need for the username and password since, as you’ll see, the authentication happens via Microsoft similar to how it might via an OAuth provider).
<div id="wrapper" class="wrapper">
    <div class="container">
        <h1>Welcome</h1>
        <div id="error" class="error"></div>
        <form class="form" id="signup">
            <button type="button" id="login-button" class="loginbutton">Login</button>
        </form>
    </div>
</div>
Note that the CSS for this example is essentially the same from my prior login sample with some unnecessary styles removed. To save space, I am not repeating the full CSS here.
The JavaScript is pretty simple as well. Let’s take a look and then I’ll walk through it.
var client = Kinvey.init({
    appKey: 'kid_rJf4EsJ8f',
    appSecret: 'cf8e49769b83466db5b34f6ce1a83b77'
});

// for the sake of simplicity in a sample app, I am always logging the current active user out when the page is loaded
var promise = Kinvey.User.logout();

// login using the Kinvey authentication
document.getElementById('login-button').addEventListener('click', function(event) {
    var user = new Kinvey.User();
    var promise = user.loginWithMIC(window.location.href);
    promise.then(function onSuccess(user) {
        loginSuccess();
        console.log(user);
    }).catch(function onError(error) {
        document.getElementById('error').innerHTML = error.message;
    });
});

function loginSuccess() {
    document.getElementById('signup').classList.add('fadeout');
    document.getElementById('wrapper').classList.add('form-success');
}
Of course, first I initialize the Kinvey SDK using my appKey and appSecret. Also, since this is a simple app that literally only logs someone in, I “reset” it right off the bat by ensuring that any existing user is already logged out.
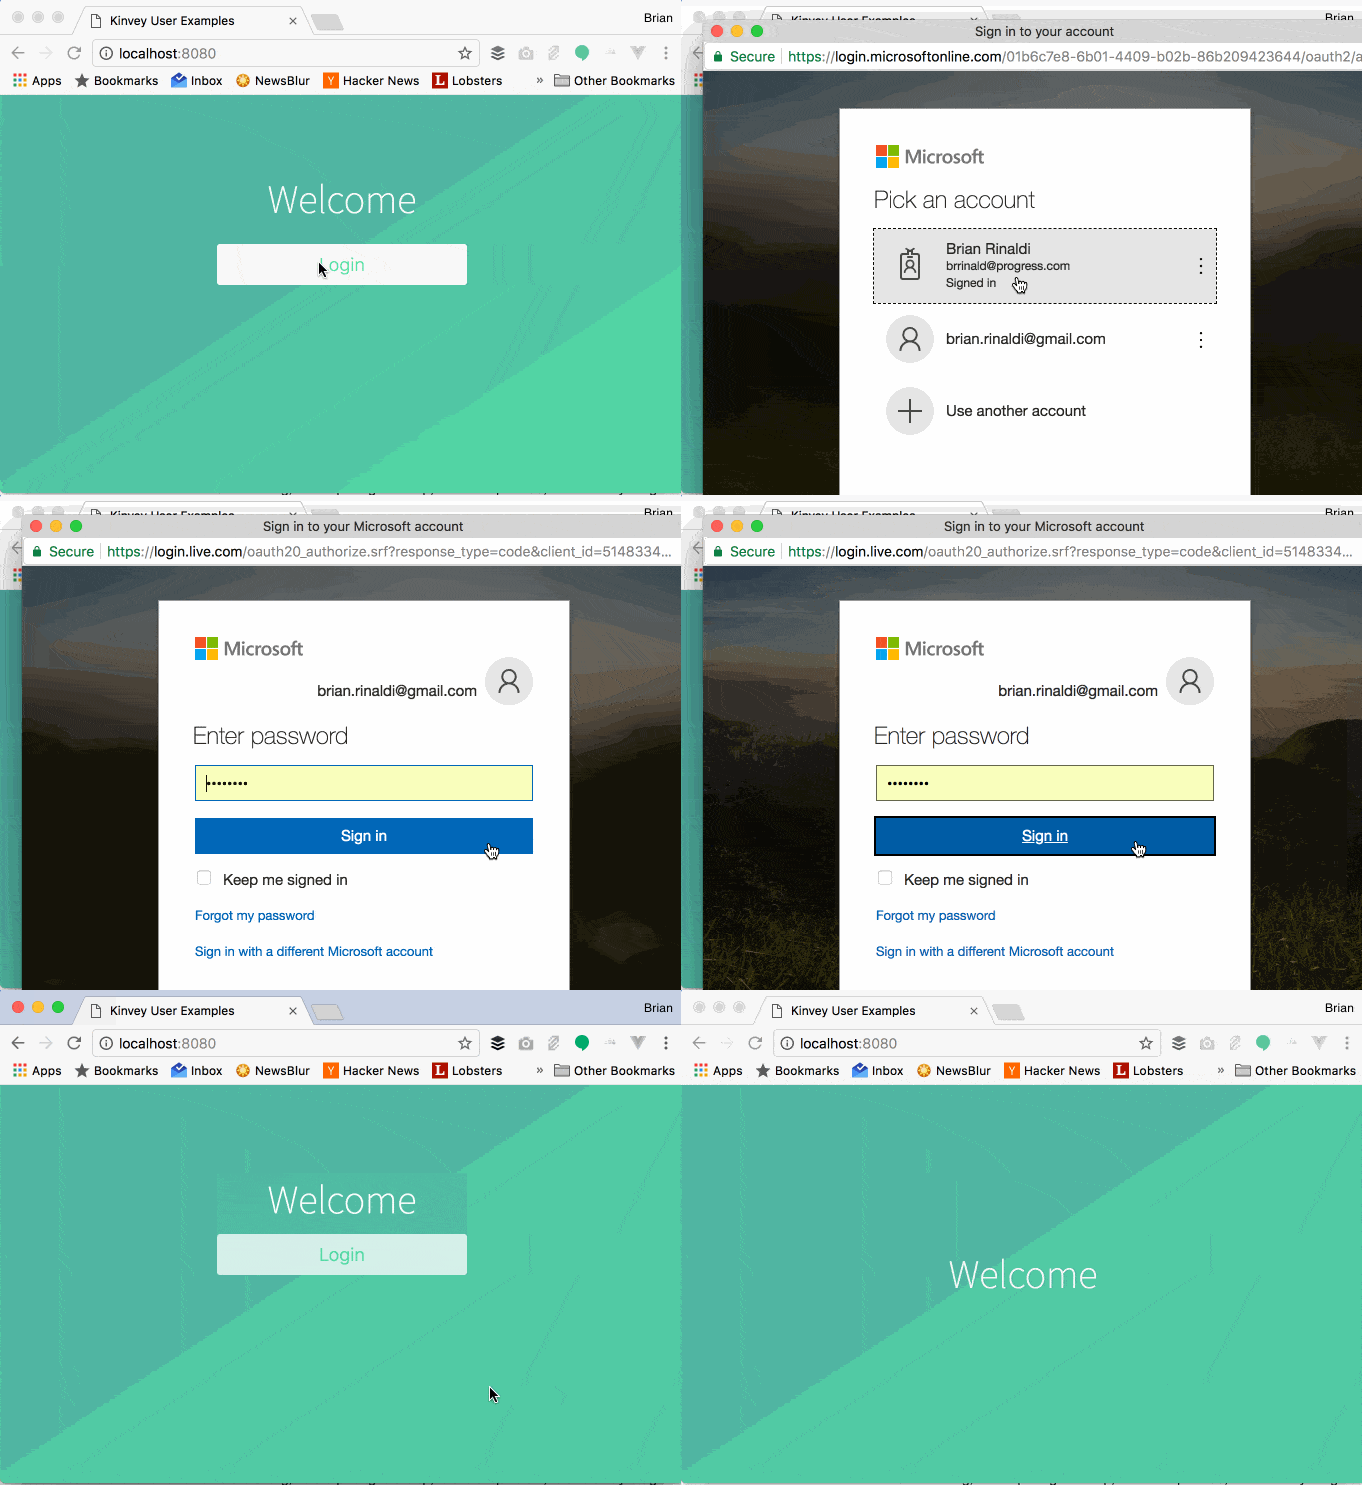
The actual login code is just a couple lines, we create a new user and then call the loginWithMIC() method, passing in our callback (i.e. the current URL in this case). If the login is a success, we show an animation, otherwise we display any errors returned directly on the page.
Let’s see how this works in action (since you can’t obviously log in yourself to my AD, I will demonstrate with an animation).
Next Steps
While this is a simple example and the specific steps listed here are specific to Azure Active Directory, the same principals would apply to any of the supported authentication options. Even if your enterprise authentication is an internal Active Directory system, for instance, you can still use Mobile Identity Connect to allow company employees to easily authenticate in your web and mobile apps. Yes, there may be some necessary firewall rules to allow Kinvey access, but, much like the configurations steps in the above example, once those are out of the way, you can easily have a unified login experience across all your enterprise apps.
If you’d like to learn more about how to add these features to your enterprise mobile app using NativeScript, check out this free online course.

Brian Rinaldi
Brian has been a developer for over 20 years. Currently he works on developer content at Progress. He is a frequent speaker and author, serving as co-editor of the Mobile Dev Weekly newsletter and book author for O’Reilly. You can follow Brian via @remotesynth on Twitter.
Comments
Topics
- Application Development
- Mobility
- Digital Experience
- Company and Community
- Data Platform
- Secure File Transfer
- Infrastructure Management
Sitefinity Training and Certification Now Available.
Let our experts teach you how to use Sitefinity's best-in-class features to deliver compelling digital experiences.
Learn MoreMore From Progress
Latest Stories
in Your Inbox
Subscribe to get all the news, info and tutorials you need to build better business apps and sites
Progress collects the Personal Information set out in our Privacy Policy and the Supplemental Privacy notice for residents of California and other US States and uses it for the purposes stated in that policy.
You can also ask us not to share your Personal Information to third parties here: Do Not Sell or Share My Info
We see that you have already chosen to receive marketing materials from us. If you wish to change this at any time you may do so by clicking here.
Thank you for your continued interest in Progress. Based on either your previous activity on our websites or our ongoing relationship, we will keep you updated on our products, solutions, services, company news and events. If you decide that you want to be removed from our mailing lists at any time, you can change your contact preferences by clicking here.


